Eclipse 180G2 MP3 Video Player LCD screen Replacement

Introdução
Ir para o passo 1The LCD display is protected by a plastic screen which can become cracked or smudged. However, since it is held in place by tension, removing it for cleaning or replacement is simply a matter of separating the external casing from the electronic components.
O que você precisa


-
-
Remove the two screws on the bottom of the device with a Phillips head screwdriver.
-
Use a spudger to remove the plastic plate from the bottom of the player.
-
-
-
Hold the device firmly between two fingers. Be sure you aren't holding down the top of the device; the circuit board will slide out of the shell through that end.
-
Use the spudger to push the USB port on the bottom of the device inward.
-
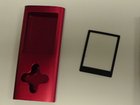
The plastic LCD cover and the key pad will now be free; they were held in place by the tension between the case and the internal circuit board.
-
-
-
Freed from the internal space of the device, the LCD screen as well as the buttons will simply fall out of the face of the device. They can now easily be replaced.
-


To reassemble your device, follow these instructions in reverse order.
To reassemble your device, follow these instructions in reverse order.
Cancelar: não concluí este guia.
Uma outra pessoa concluiu este guia.
Gear Up For Future Repairs
Shop all


Equipe

USF Tampa, Team 1-4, Tanski Winter 2015 Membro de USF Tampa, Team 1-4, Tanski Winter 2015
USFT-TANSKI-W15S1G4
4 Membros
Autoria de 5 guias