
Dell Latitude E6420 Backplate Replacement
Introdução
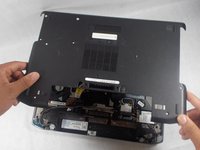
Ir para o passo 1The backplate can crack and expose the hardware it protects. This guide will show the user how to replace the backplate.
O que você precisa


-
-
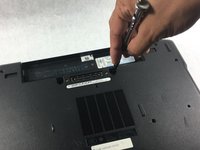
Push the tabs on the left and right of the battery out towards the edge of the case.
-
-
-
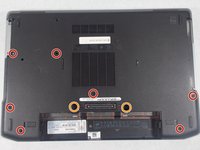
Using the screwdriver, remove seven 4mm Phillips #1 screws from the bottom of the laptop.
-
Using the screwdriver, remove two 9mm Phillips #00 screws from the bottom of the laptop.
-


To reassemble your device, follow these instructions in reverse order.
To reassemble your device, follow these instructions in reverse order.
Cancelar: não concluí este guia.
4 outras pessoas executaram este guia.
Equipe

UMass Dartmouth, Team S2-G3, Simcock Spring 2018 Membro de UMass Dartmouth, Team S2-G3, Simcock Spring 2018
UMASSD-SIMCOCK-S18S2G3
3 Membros
Autoria de 7 guias