Ir para o conteúdo principal
Dell Inspiron M5010 Hard Drive Replacement

Dell Inspiron M5010 Hard Drive Replacement

Sydney Moseley

Sydney Moseley e 4 outros colaboradores

Última atualização em July 19, 2018

10 - 20 minutos
Moderado
Ferramentas incorretas

O que você precisa

Ferramentas

  1. Dell Inspiron M5010 Hard Drive Replacement, Battery: passo 1, imagem 1 %32 Dell Inspiron M5010 Hard Drive Replacement, Battery: passo 1, imagem 2 %32
    • Make sure laptop is powered off before removing the battery.

    • Slide both arrow tabs towards the outer edge of the computer to release the battery.

    • Battery is not shown.

  2. Dell Inspiron M5010 Hard Drive Replacement, Remove keyboard retaining screw: passo 2, imagem 1 %32
    • Remove Keyboard retaining screw from bottom of laptop.

  3. Dell Inspiron M5010 Hard Drive Replacement: passo 3, imagem 1 %32 Dell Inspiron M5010 Hard Drive Replacement: passo 3, imagem 2 %32 Dell Inspiron M5010 Hard Drive Replacement: passo 3, imagem 3 %32
    • Insert the 6 inch metal ruler, or another flat object into the holes in the top left of the keyboard, the top middle of the keyboard, and the top right of the keyboard to release the keyboard from the computer.

    • There are a number of screws on the bottom that required to be removed prior to the keyboard being able to be lifted up.

  4. Dell Inspiron M5010 Hard Drive Replacement: passo 4, imagem 1 %32
    • Lift the keyboard up slightly and push forward in order to release bottom tabs.

  5. Dell Inspiron M5010 Hard Drive Replacement: passo 5, imagem 1 %32
    • Pull the black tab up and then pull left on keyboard plug to release keyboard.

  6. Dell Inspiron M5010 Hard Drive Replacement, Palm Rest: passo 6, imagem 1 %32
    • Flip the laptop, so the bottom of the laptop is facing up.

    • Remove the seven 6.0mm Phillip #000 screws indicated using the Phillips #000 screwdriver.

  7. Dell Inspiron M5010 Hard Drive Replacement: passo 7, imagem 1 %32 Dell Inspiron M5010 Hard Drive Replacement: passo 7, imagem 2 %32
    • Flip the laptop back over, so that the top of the laptop is facing up.

    • Open the laptop.

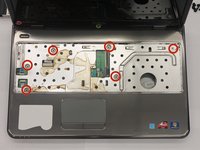
    • Remove all of the indicated 6.0 mm screws with the Phillips #000 screwdriver.

  8. Dell Inspiron M5010 Hard Drive Replacement: passo 8, imagem 1 %32
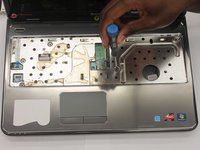
    • Unplug the palm rest cables by lifting the black tab up and then pulling on the blue tabs.

  9. Dell Inspiron M5010 Hard Drive Replacement: passo 9, imagem 1 %32 Dell Inspiron M5010 Hard Drive Replacement: passo 9, imagem 2 %32 Dell Inspiron M5010 Hard Drive Replacement: passo 9, imagem 3 %32
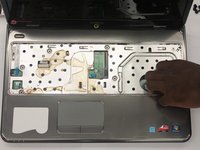
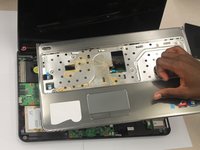
    • Carefully unsnap and remove the palm rest.

    • Place your fingers inside the large circle in the lower right corner to get a good grip.

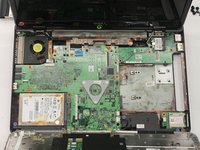
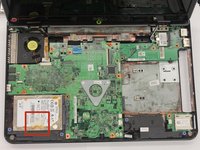
  10. Dell Inspiron M5010 Hard Drive Replacement, Hard Drive: passo 10, imagem 1 %32
    • Remove the 4 mm Hard Drive screws with the Phillips #000 screwdriver.

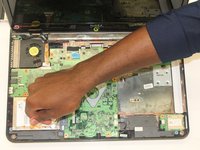
  11. Dell Inspiron M5010 Hard Drive Replacement: passo 11, imagem 1 %32 Dell Inspiron M5010 Hard Drive Replacement: passo 11, imagem 2 %32
    • Flip laptop over.

    • Open lap top.

    • Pull the clear tab attached to the hard drive and gently lift up the hard drive.

Conclusão

To reassemble your device, follow these instructions in reverse order.

12 outras pessoas executaram este guia.

Sydney Moseley

Membro desde: 10/13/14

452 Reputação

Autoria de 1 guia

Equipe

Clemson, Team 1-5, Benson Fall 2014 Membro de Clemson, Team 1-5, Benson Fall 2014

CLEM-BENSON-F14S1G5

4 Membros

Autoria de 11 guias

Um comentário

Thank you it was very helpful.

John Peel - Responder

Comentar

Exibir estatísticas:

Últimas 24 horas: 0

Últimos 7 dias: 2

Últimos 30 dias: 11

Ao todo: 9,548