
Compaq Mini 110 Hard Drive Replacement
O que você precisa


-
-
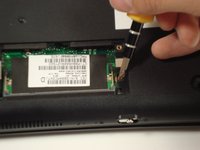
Use a Philips #0 screwdriver to unscrew the two screws covering the memory compartment on the bottom of the laptop and remove the cover.
-
-
-
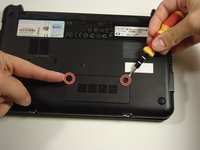
Unscrew the screw for the bottom case located in the RAM compartment.
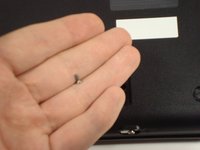
Falta um passo, pois nos modelos COMPAQ MINI 110, existe um parafuso que segura o teclado, que se encontra bem escondido dentro da cavidade que encaixa a bateria.
-
-
-
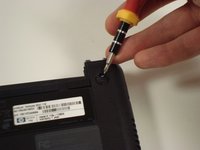
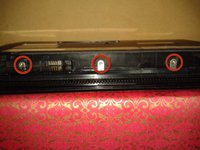
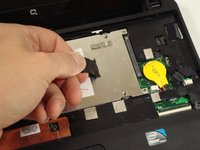
Remove the three screws in the silver tabs at the back of the keyboard.
-
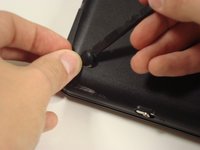
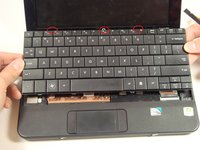
Lift the keyboard away from the laptop.
3 screws in red circles are actually on metal tabs in the battery compartment, 1 deeper than the other 2. There is a keyboard symbol for each of the 3 screws.
Step 8B: Lift out keyboard by pushing upwards on the 2 accessible metal tabs. This is the most difficult step. Lack of Quality Control during assembly may prevent the kevboard from lifting out without breaking!!
-


To reassemble your device, follow these instructions in reverse order.
To reassemble your device, follow these instructions in reverse order.
Cancelar: não concluí este guia.
16 outras pessoas executaram este guia.
Equipe

Cal Poly, Team 22-2, Maness Fall 2010 Membro de Cal Poly, Team 22-2, Maness Fall 2010
CPSU-MANESS-F10S22G2
6 Membros
Autoria de 20 guias