Ir para o conteúdo principal
Canon EOS 60D Rear LCD Screen Replacement

Canon EOS 60D Rear LCD Screen Replacement

Alejandro Cabrera

Alejandro Cabrera e 2 outros colaboradores

Última atualização em February 1, 2020

Nenhuma estimativa
Moderado

Introdução

Ir para o passo 1

If you drop the camera and break the LCD screen, or if the screen just stops functioning, this guide will help you replace it.

Be sure to use a magnetic mat or small container for your screws, as they are very small and easy to misplace.

O que você precisa

Ferramentas

Exibir mais…

  1. Canon EOS 60D Rear LCD Screen Replacement, Rear LCD Screen Dissasembly: passo 1, imagem 1 %32
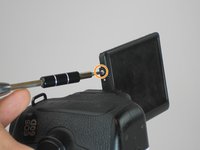
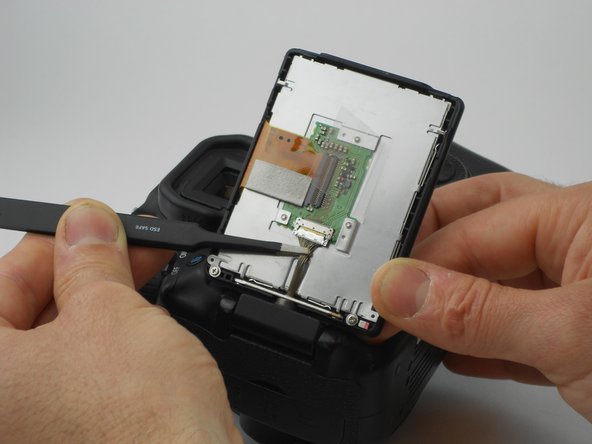
    • Take the LCD out of its place to expose the Phillips #PH00 screws.

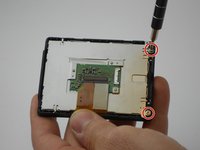
    • Remove the two 2.5 mm Phillips #PH00 black screws on both sides of the LCD screen.

    • Next remove the two 3 mm Phillips #PH00 black screws near both sides of the base where the screen swivels.

  2. Canon EOS 60D Rear LCD Screen Replacement: passo 2, imagem 1 %32
    • Using a plastic opening tool, carefully pry off the back cover of the LCD.

  3. Canon EOS 60D Rear LCD Screen Replacement: passo 3, imagem 1 %32 Canon EOS 60D Rear LCD Screen Replacement: passo 3, imagem 2 %32
    • Remove the 3 mm Phillips #PH00 silver screw on the side of the screen.

    • Turn the screen to remove the second 3 mm Phillips #PH00 silver screw.

  4. Canon EOS 60D Rear LCD Screen Replacement: passo 4, imagem 1 %32
    Ferramenta utilizada neste passo:
    Tweezers
    $4.99
    • Using the tweezers, carefully disconnect the rear connector by pulling it away from the screen.

  5. Canon EOS 60D Rear LCD Screen Replacement, Rear LCD Screen: passo 5, imagem 1 %32 Canon EOS 60D Rear LCD Screen Replacement, Rear LCD Screen: passo 5, imagem 2 %32
    • Remove the two 2.5 mm Phillips #PH00 silver screws using the PH00 screwdriver.

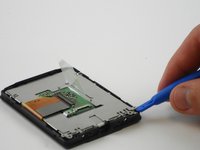
    • Using the plastic Spudger opening tool, carefully lift up on the medal tabs next to where the screws were located.

  6. Canon EOS 60D Rear LCD Screen Replacement: passo 6, imagem 1 %32
    • Finally, remove the LCD screen by grabbing the clear plastic tab and lifting it carefully.

Conclusão

To reassemble your device, follow these instructions in reverse order.

3 outras pessoas executaram este guia.

Equipe

USF Tampa, Team 16-6, Wollert Fall 2015 Membro de USF Tampa, Team 16-6, Wollert Fall 2015

USFT-WOLLERT-F15S16G6

3 Membros

Autoria de 14 guias

0Comentários do guia

Comentar

Visualizações:

Últimas 24 horas: 1

Últimos 7 dias: 9

Últimos 30 dias: 65

Ao todo: 8,254