
Bowers and Wilkins T7 Access Panel Replacement
Introdução
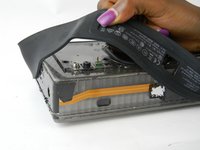
Vá para o passo 1Use this guide to learn how to take off or replace your access panel for the Bowers and Wilkins T7 speaker, enabling you to replace every other part.
O que você precisa


-
Ferramenta utilizada neste passo:Tweezers$4.99
-
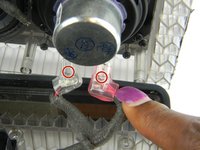
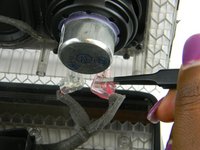
Gently squeeze the internal locking mechanism inside the red and white terminals with either your fingers or a pair of precision tweezers.
-
While squeezing the internal locking mechanism, pull back the terminal.
-
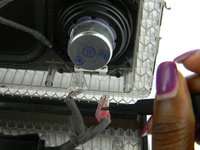
Repeat this process for the second speaker.
-


To reassemble your device, follow these instructions in reverse order.
To reassemble your device, follow these instructions in reverse order.
Cancelar: não concluí este guia.
2 outras pessoas executaram este guia.
Equipe

USF Tampa, Team S7-G1, Cagle Spring 2017 Membro de USF Tampa, Team S7-G1, Cagle Spring 2017
USFT-CAGLE-S17S7G1
Membros da 5
Autoria de 6 guias