Ir para o conteúdo principal
Asus MeMO Pad 7 ME170C Speaker Replacement

Asus MeMO Pad 7 ME170C Speaker Replacement

Tatiana Schneider

Tatiana Schneider e 7 outros colaboradores

Última atualização em December 29, 2022

7 minutos
Moderada
Ferramentas incorretas
Precisa de melhores imagens

The speaker is where sound comes out. When videos or music are played too loudly, it can cause the speaker to blow. This is a component of the Memo Pad that needs to be replaced when this problem occurs.

O que você precisa

Ferramentas

Exibir mais…

  1. Asus MeMO Pad 7 ME170C Speaker Replacement, Speaker: passo 1, imagem 1 %32 Asus MeMO Pad 7 ME170C Speaker Replacement, Speaker: passo 1, imagem 2 %32 Asus MeMO Pad 7 ME170C Speaker Replacement, Speaker: passo 1, imagem 3 %32
    • Before beginning to disassemble the device, power it off.

    • Make sure to be gentle with the device. Excessive force can result in a damaged screen.

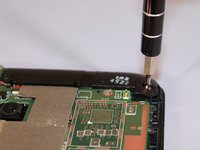
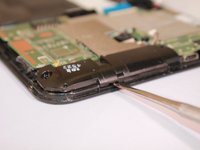
    • Using the Jimmy tool, gently wedge it into the seam of the device at the side.

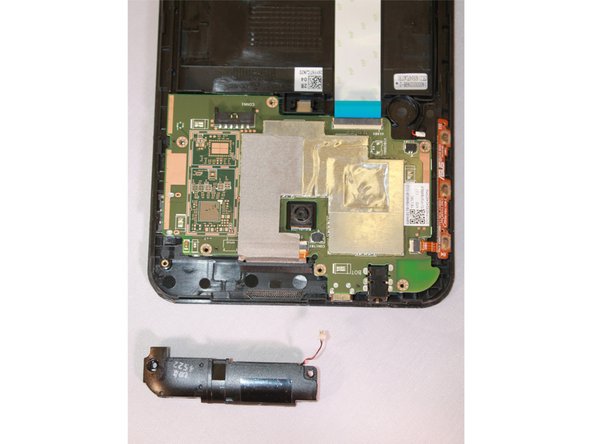
    • Pry the Jimmy tool gently all around the seam. Use up and down motions until the back panel is detached.

  2. Asus MeMO Pad 7 ME170C Speaker Replacement: passo 2, imagem 1 %32 Asus MeMO Pad 7 ME170C Speaker Replacement: passo 2, imagem 2 %32 Asus MeMO Pad 7 ME170C Speaker Replacement: passo 2, imagem 3 %32
    • From the top of the tablet, locate the white cable connector.

    • It is inserted in a black port on the motherboard.

    • Use the blue plastic opening tool to push the white cable connector out of the port.

    • Push the cable in a sideways motion towards the top of the device.

  3. Asus MeMO Pad 7 ME170C Speaker Replacement: passo 3, imagem 1 %32 Asus MeMO Pad 7 ME170C Speaker Replacement: passo 3, imagem 2 %32
    • Use the Phillips #000 screwdriver to remove the seven screws.

    • There should be two silver and five black screws for a total of seven screws.

  4. Asus MeMO Pad 7 ME170C Speaker Replacement: passo 4, imagem 1 %32 Asus MeMO Pad 7 ME170C Speaker Replacement: passo 4, imagem 2 %32
    • Use the slender, metal spudger tool to gently lift up the edge of the speaker to remove the device.

Conclusão

To reassemble your device, follow these instructions in reverse order.

Uma outra pessoa concluiu este guia.

0 comentários

Adicione um comentário

Exibir estatísticas:

Últimas 24 horas: 0

Últimos 7 dias: 4

Últimos 30 dias: 4

Duração total: 713