Ir para o conteúdo principal

AcuRite 02032 Wind Cup Assembly Replacement

O que você precisa

  1. AcuRite 02032 Wind Cup Assembly Replacement, Battery: passo 1, imagem 1 %32 AcuRite 02032 Wind Cup Assembly Replacement, Battery: passo 1, imagem 2 %32 AcuRite 02032 Wind Cup Assembly Replacement, Battery: passo 1, imagem 3 %32
    • Remove the battery compartment lid by lifting upward.

  2. AcuRite 02032 Wind Cup Assembly Replacement: passo 2, imagem 1 %32
    • Pull the ribbon to eject the 2 X AA alkaline batteries.

  3. AcuRite 02032 Wind Cup Assembly Replacement: passo 3, imagem 1 %32 AcuRite 02032 Wind Cup Assembly Replacement: passo 3, imagem 2 %32 AcuRite 02032 Wind Cup Assembly Replacement: passo 3, imagem 3 %32
    • Once the batteries are removed, it is safe to proceed.

  4. AcuRite 02032 Wind Cup Assembly Replacement, Base: passo 4, imagem 1 %32
    • Remove the four 0.8cm screws that attach the bottom panel to the device

    • An extended driver is needed to reach 3 of these screws. If you are using the 64 - bit driver kit you can extend the driver by inserting the driver PH1, (Phillips size 1) into the size 4 hexagonal adapter.

  5. AcuRite 02032 Wind Cup Assembly Replacement: passo 5, imagem 1 %32 AcuRite 02032 Wind Cup Assembly Replacement: passo 5, imagem 2 %32
    • Gently lift the top section of the weather center away from the base. With all the screws removed it should lift off easily.

  6. AcuRite 02032 Wind Cup Assembly Replacement, Wind Cup Assembly: passo 6, imagem 1 %32
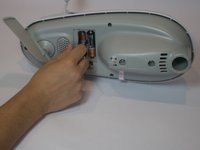
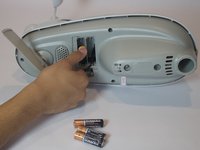
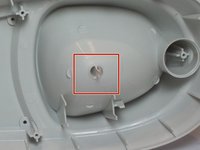
    • Remove the four 0.8cm screws inside the case located near the fan using the J1 screw bit.

  7. AcuRite 02032 Wind Cup Assembly Replacement: passo 7, imagem 1 %32 AcuRite 02032 Wind Cup Assembly Replacement: passo 7, imagem 2 %32
    • With all four screws removed, the wind cup assembly should lift straight up off the middle section.

    • Set down the bottom half of the weather center careful. There are two small pegs that will break with the slightest amount of pressure.

  8. AcuRite 02032 Wind Cup Assembly Replacement: passo 8, imagem 1 %32
    • Replace the old wind cup assembly with the new assembly that was purchased.

Conclusão

To reassemble your device, follow these instructions in reverse order.

Ben Kegel

Membro desde: 09/15/16

350 Reputação

Autoria de 3 guias

Equipe

CSU Fullerton, Team 1-4, Bruce Fall 2016 Membro de CSU Fullerton, Team 1-4, Bruce Fall 2016

CSUF-BRUCE-F16S1G4

Membros da 5

Autoria de 7 guias

3 comentários

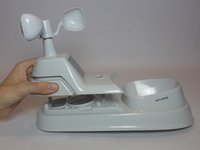
Do you have to replace the whole top, wind cups,top plate with solar panel, just for the wind cups?

Tom Halverson - Responder

For a broken wind cups do you have to replace the top section with the solar panel?

Tom Halverson - Responder

No. After you take it apart hold the shaft turn broken cup assy off. Install new cups in reverse order.

Larry Lindsay - Responder

Adicione um comentário

Exibir estatísticas:

Últimas 24 horas: 0

Últimos 7 dias: 3

Últimos 30 dias: 8

Duração total: 1,579