Introdução
The iPhone fell and crashed? I'll show you how to replace a broken rear glass on an iPhone XR. This guide is the equivalent of a teardown, except you reassemble it after into the new frame.
O que você precisa
Vídeo de Apresentação
-
-
Power off your iPhone before beginning disassembly.
-
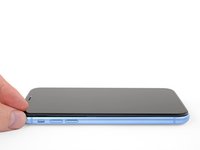
Remove the two 6.7 mm-long pentalobe screws at the bottom edge of the iPhone.
-
-
-
Lay overlapping strips of clear packing tape over the iPhone's screen until the whole face is covered.
-
If you can't get the suction cup to stick in the next few steps, fold a strong piece of tape (such as duct tape) into a handle and lift the screen with that instead.
-
-
Ferramenta utilizada neste passo:Clampy - Anti-Clamp$24.95
-
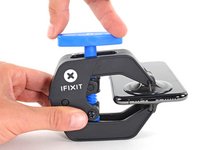
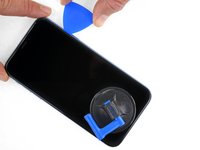
Pull the blue handle backwards to unlock the Anti-Clamp's arms.
-
Slide the arms over either the left or right edge of your iPhone.
-
Position the suction cups near the bottom edge of the iPhone—one on the front, and one on the back.
-
Squeeze the cups together to apply suction to the desired area.
-
-
-
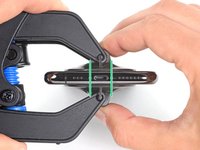
Heat an iOpener and thread it through the arms of the Anti-Clamp.
-
Fold the iOpener so it lays on the bottom edge of the iPhone.
-
Wait one minute to give the adhesive a chance to release and present an opening gap.
-
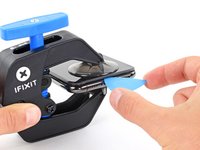
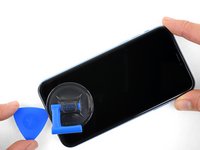
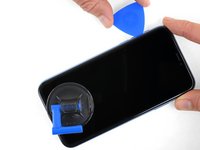
Insert an opening pick under the screen and the plastic bezel, not the screen itself.
-
Skip the next three steps.
-
-
-
Use a hairdryer or heat gun, or prepare an iOpener and apply it to the lower edge of the iPhone for about a minute in order to soften up the adhesive underneath.
-
-
-
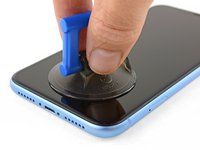
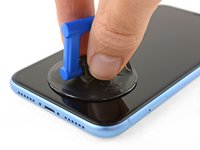
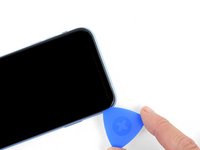
Pull up on the suction cup with firm, constant pressure to create a slight gap between the front panel and rear case.
-
Insert an opening pick under the screen and the plastic bezel, not the screen itself.
-
-
-
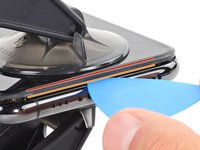
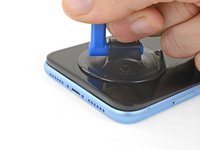
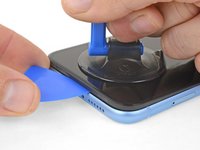
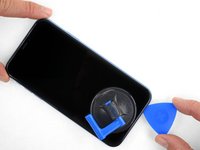
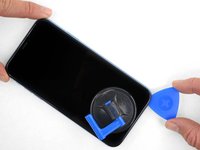
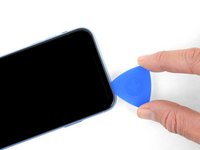
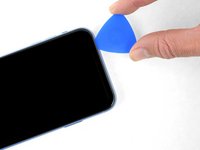
Slide the opening pick around the lower left corner and up the left edge of the iPhone, slicing through the adhesive holding the display in place.
-
-
-
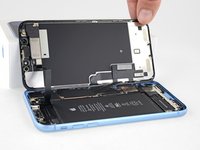
Open the iPhone by swinging the display up from the left side, like the back cover of a book.
-
Lean the display against something to keep it propped up while you're working on the phone.
-
-
Ferramenta utilizada neste passo:Magnetic Project Mat$19.95
-
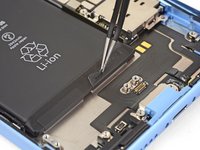
Remove three 1.2 mm Y000 screws securing the battery connector cover bracket.
-
Remove the bracket.
-
-
-
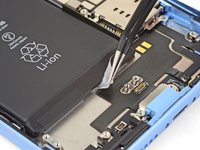
Use the point of a spudger to pry the battery connector straight up out of its socket.
-
Bend the connector slightly away from the logic board to prevent it from accidentally making contact with the socket and providing power to the phone during your repair.
-
-
-
-
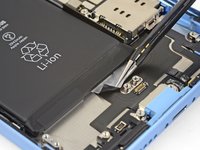
Remove the two 1.2 mm Y000 screws securing the display connector bracket.
-
Remove the bracket.
-
-
-
Use the tip of a spudger to pry up and disconnect the digitizer cable.
-
-
-
Use the tip of a spudger to disconnect the display cable connector.
-
-
-
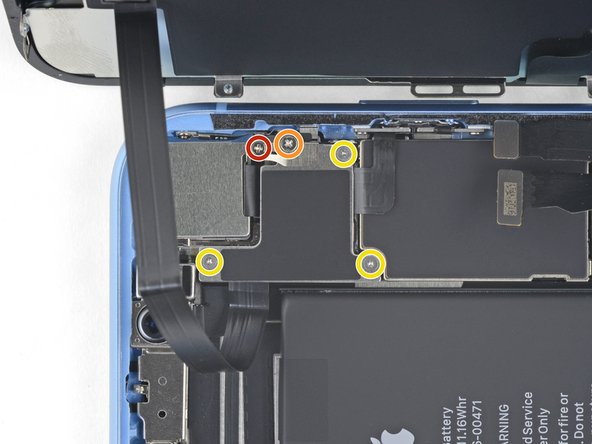
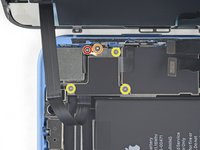
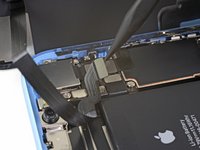
Remove the five screws securing the logic board connector bracket to the rear case:
-
One 1.3 mm Phillips #000 screw
-
One 1.5 mm Phillips #000 screw
-
Three 1.2 mm Y000 screws
-
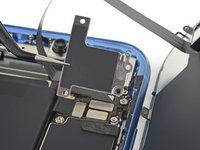
Remove the bracket.
-
-
-
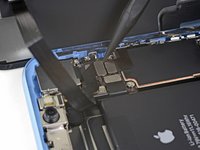
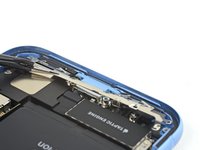
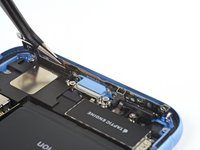
Use the tip of a spudger to pry the front sensor assembly connector up from its socket.
-
-
-
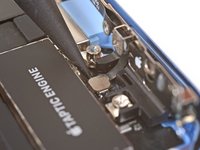
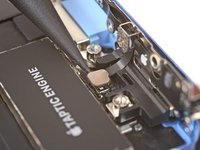
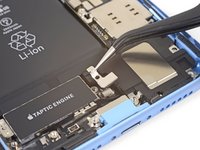
Remove the seven screws securing the bracket below the Taptic engine and speaker:
-
Three Phillips 1.4 mm screws
-
Two Phillips 1.7 mm screws
-
One Phillips 1.9 mm screw
-
One Phillips 1.6 mm screw
-
-
-
Each piece of adhesive has a black pull-tab at the end, which is lightly adhered to the side edge of the battery.
-
-
Ferramenta utilizada neste passo:Tweezers$4.99
-
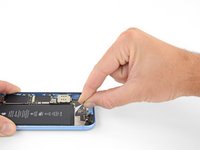
Slowly pull one battery adhesive tab away from the battery, towards the bottom of the iPhone.
-
Pull steadily, maintaining constant tension on the strip until it slips out from between the battery and the rear case. For best results, pull the strip at as low an angle as possible, without snagging it on any of the iPhone's other components.
-
If the battery adhesive tabs break during the removal process, use your fingers or blunt tweezers to retrieve the remaining length of adhesive, and continue pulling.
-
-
-
If any of the adhesive strips broke off and the battery remains stuck to the rear case, prepare an iOpener or use a hair dryer to heat the rear case directly behind the battery. This will help soften the adhesive.
-
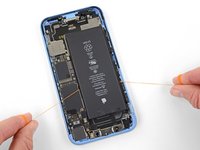
Flip the iPhone back over and thread a strong piece of string (such as dental floss or a length of thin guitar string) underneath the battery.
-
Pull the string from side to side in a sawing motion all along the length of the battery to separate the adhesive. This can take some time since the adhesive is slow to deform, but with patience it will come free. Do not deform or damage the battery.
-
-
-
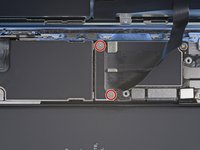
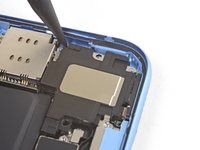
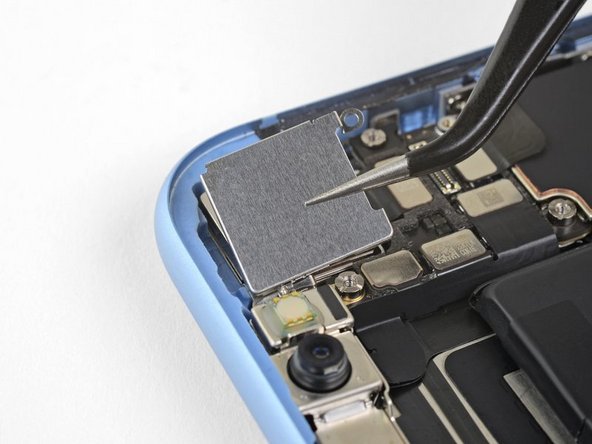
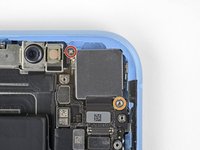
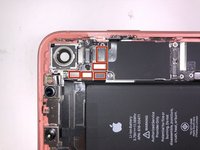
Remove the 2 screws securing the camera plate
-
One 1.6 mm Phillips screw
-
One 2.4 mm standoff screw
-
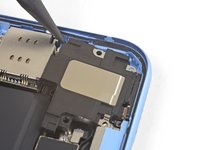
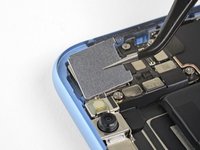
Remove the camera plate
-
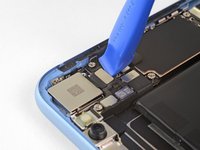
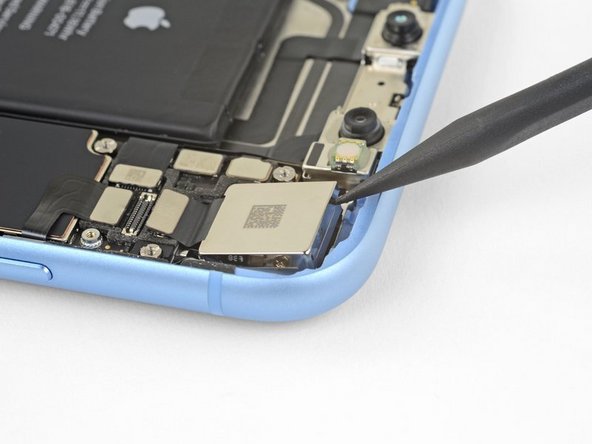
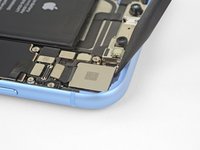
With an opening tool, disconnect the camera connector
-
-
-
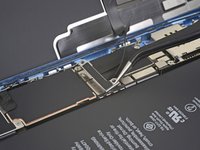
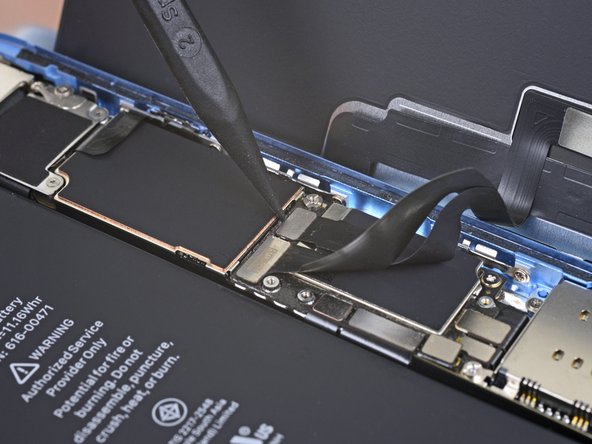
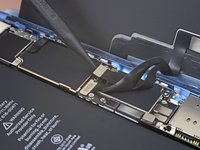
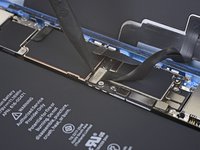
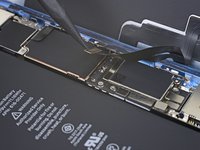
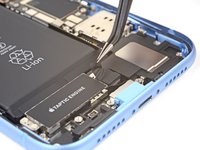
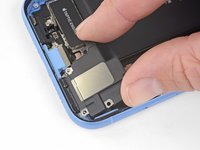
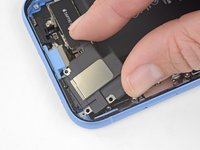
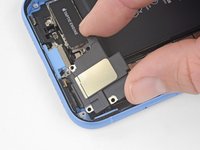
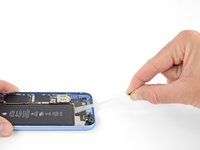
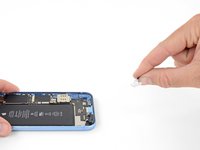
Use an opening tool or a fingernail to remove 9 connectors from the logic board.
-
-
-
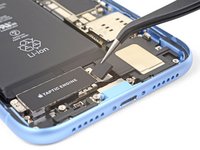
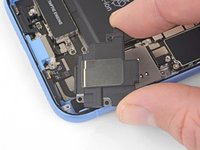
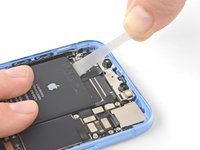
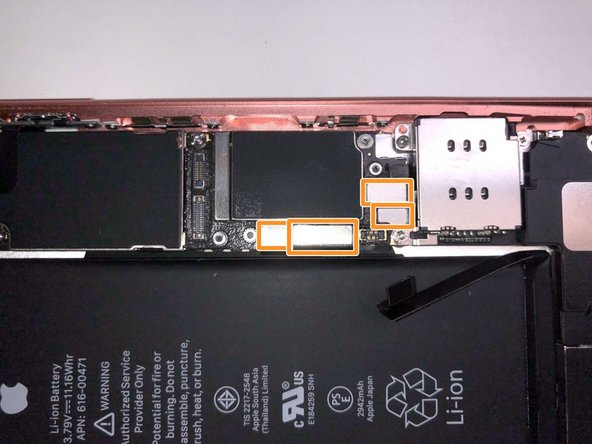
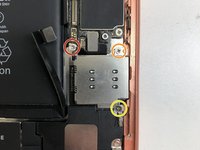
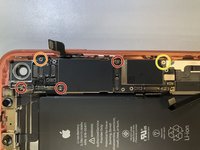
Remove the following screws:
-
2.9mm standoff screw
-
1.5mm Phillips #000
-
1.6mm Phillips #000
-
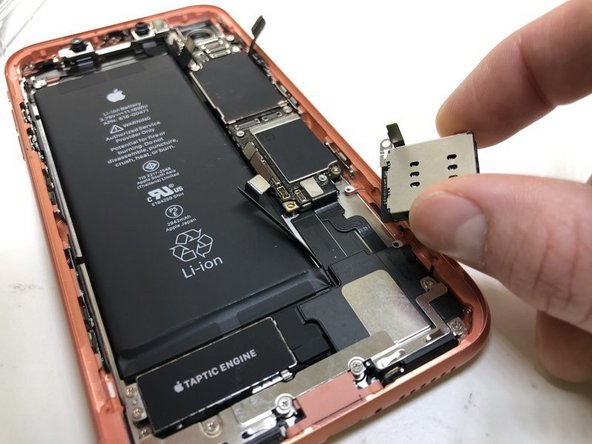
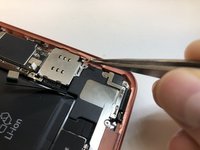
Remove the grounding bracket
-
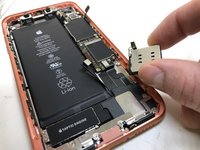
Remove the SIM reader
-
-
-
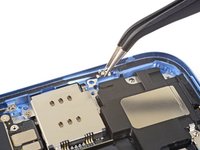
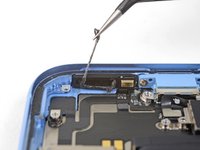
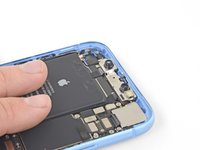
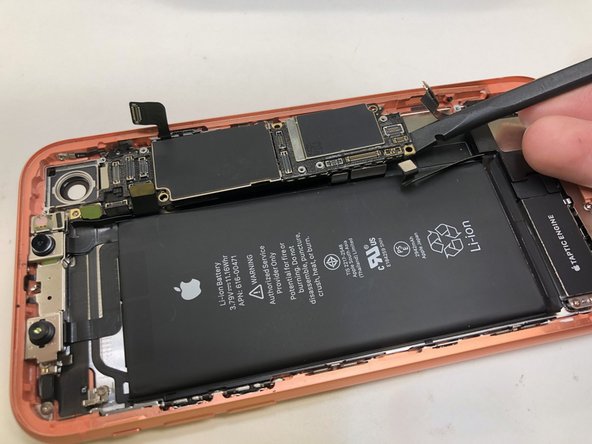
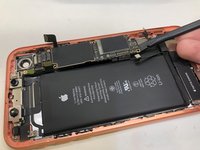
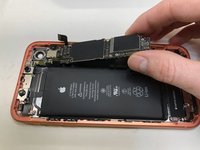
Remove the 5 screws securing the logic board to the case
-
2.9mm Standoff screw
-
2.8mm Standoff screw
-
1.8mm Phillips #000
-
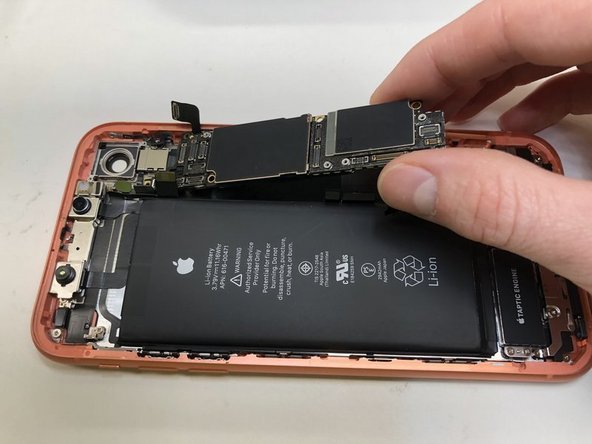
Remove the logic board.
-


To reassemble your device, follow these instructions in reverse order.
To reassemble your device, follow these instructions in reverse order.
Cancelar: não concluí este guia.
56 outras pessoas executaram este guia.

8 comentários
Muy buena explicacion, me salio perfecto, hasta la taza de café me tome mientras se secaba jaja. Saludos
Excellent instruction step by step guide. Great video. This is very complete and very easy guide with superb narrative style . Thank you Mr Arty. This 40 step format , illustration and photo quality, and description narrative is gold standard practice . Thank you !