Introdução
Guia tipo pré-requisito exclusivo para a remoção do conjunto da tela.
O que você precisa
-
-
Desligue o iPhone antes de iniciar a desmontagem.
-
Remova os dois parafusos pentalobe de 6,9 mm na borda inferior do iPhone.
-
-
-
Coloque tiras sobrepostas de fita adesiva transparente sobre a tela do iPhone até que toda a superfície fique coberta.
-
Se não conseguir fazer com que a ventosa grude nas próximas etapas, dobre um pedaço de fita adesiva resistente (como fita adesiva vedante) na forma de uma pega e levante a tela com ela.
-
-
-
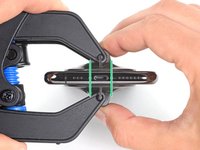
Puxe a pega azul para trás para destravar os braços do Anti-Clamp.
-
Deslize os braços pela borda esquerda ou direita do iPhone.
-
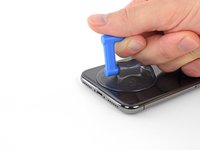
Posicione as ventosas próximo à borda inferior do iPhone - uma pela frente e a outra pela traseira.
-
Aperte as ventosas uma contra a outra para aplicar sucção na área desejada.
-
-
-
Puxe a pega azul para a frente para travar os braços.
-
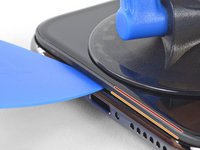
Gire a pega 360 graus no sentido horário ou até que as ventosas comecem a se esticar.
-
Certifique-se de que as ventosas permaneçam alinhadas uma com a outra. Se elas começarem a ficar desalinhadas, solte um pouco as ventosas e realinhe os braços.
-
-
-
Aqueça uma bolsa térmica iOpener e passe-a pelos braços do Anti-Clamp.
-
Dobre a bolsa térmica iOpener de modo que ela fique sobre a borda inferior do iPhone.
-
Aguarde um minuto para que o adesivo tenha a chance de se soltar e apresentar uma vão para a abertura.
-
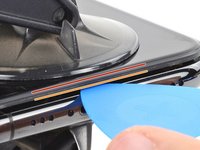
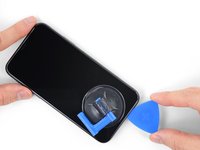
Insira uma palheta de abertura sob a tela e o painel de plástico, mas não abaixo da própria tela.
-
Pule as próximas três etapas.
-
-
-
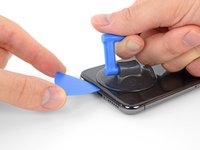
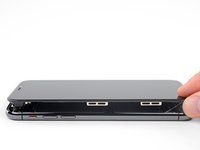
Use um secador de cabelo, uma pistola de ar quente ou prepare uma bolsa térmica iOpener e aplique-o(a) na borda inferior do iPhone por cerca de um minuto para amolecer o adesivo que se encontra por baixo.
-
-
-
Ferramenta utilizada neste passo:Magnetic Project Mat$19.95
-
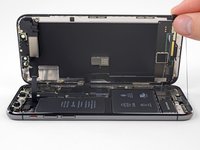
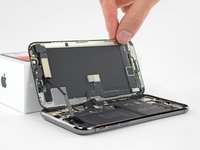
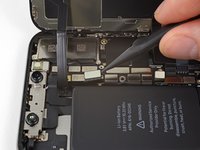
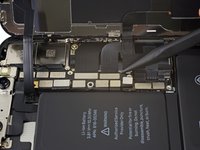
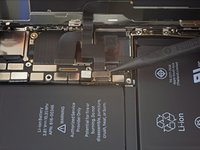
Remova os cinco parafusos Y000 que prendem o suporte do conector da placa lógica, com os seguintes comprimentos:
-
Três parafusos de 1,1 mm
-
Um parafuso de 3,1 mm
-
Um parafuso de 3,7 mm
-
-
-
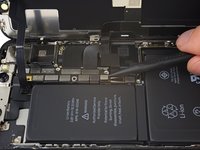
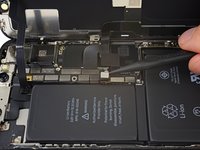
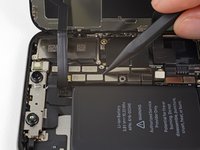
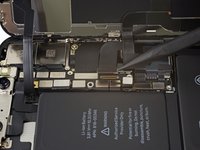
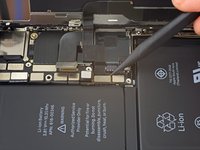
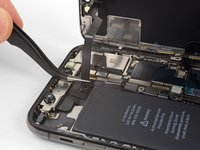
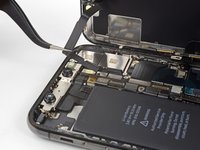
Com a ponta pontiaguda de uma espátula ou uma unha limpa, erga o conector da bateria de seu soquete na placa lógica.
-
Vire o conector ligeiramente para fora da placa lógica para evitar que ele entre acidentalmente em contato com o soquete e alimente o telefone com energia elétrica durante o reparo.
-


Para a remontagem de seu dispositivo, siga essas instruções na ordem inversa.
Cancelar: não concluí este guia.
13 outras pessoas executaram este guia.
Um agradecimento especial a esses tradutores:
100%

Udo Baingo está nos ajudando a consertar o mundo! Quer contribuir?
Comece a traduzir ›


1Comentário do guia
Meh, i had to Replace the sensors and camera unit thingy too, but i managed it without advice, the iPhone X is nicer to repair as any other iPhone.
Thanks for the detailed step by step description. :)
(the iphone 8 teardown for example lacks extremely much Details)