Introdução
The Taptic Engine produces your iPhone's vibration and haptic feedback functions. Use this guide to remove and/or replace the Taptic Engine in an iPhone 8 Plus.
This guide instructs you to fully detach and remove the display assembly; this is intended to make the phone easier to work with and to prevent accidental damage to the display cables. If you feel comfortable removing the Taptic Engine while keeping the display cables attached, you can skip the steps for disconnecting the display.
O que você precisa
-
-
Power off your iPhone before beginning disassembly.
-
Remove the two 3.5 mm pentalobe screws from the bottom edge of the iPhone.
-
-
-
Measure 3 mm from the tip and mark the opening pick with a permanent marker.
-
-
-
Lay overlapping strips of clear packing tape over the iPhone's screen until the whole face is covered.
-
If you can't get the suction cup to stick in the next few steps, fold a strong piece of tape (such as duct tape) into a handle and lift the screen with that instead.
-
-
-
Pull the blue handle backwards to unlock the Anti-Clamp's arms.
-
Slide the arms over either the left or right edge of your iPhone.
-
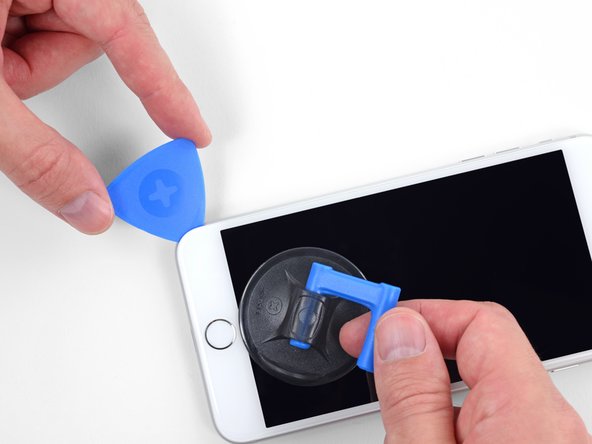
Position the suction cups near the bottom edge of the iPhone just above the home button—one on the front, and one on the back.
-
Squeeze the cups together to apply suction to the desired area.
-
-
-
Heat an iOpener and thread it through the arms of the Anti-Clamp.
-
Fold the iOpener so it lays on the bottom edge of the iPhone.
-
Wait one minute to give the adhesive a chance to release and present an opening gap.
-
Insert an opening pick under the screen when the Anti-Clamp creates a large enough gap.
-
Skip the next three steps.
-
-
-
Use a hairdryer or prepare an iOpener and apply it to the lower edge of the iPhone for about 90 seconds in order to soften up the adhesive underneath.
-
-
-
-
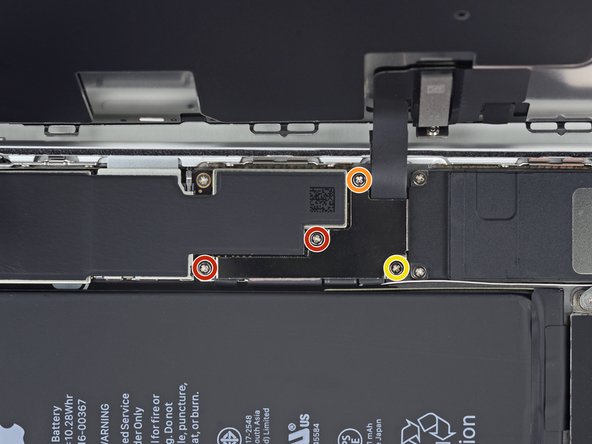
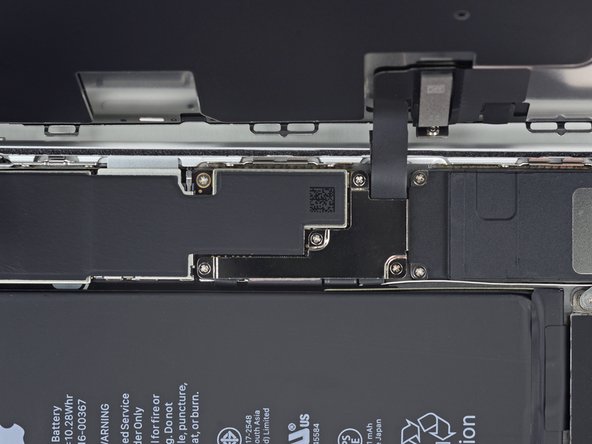
Remove four Phillips (JIS) screws securing the lower display cable bracket to the logic board, of the following lengths:
-
Two 1.3 mm screws
-
One 1.4 mm screw
-
One 2.7 mm screw
-
-
-
Use the tip of a spudger or a fingernail to disconnect the large lower display connector by prying it straight up from its socket.
-
-
-
Remove the three screws securing the L-shaped bracket next to the Taptic Engine:
-
One 1.3 mm Y000 screw
-
One 2.6 mm Phillips screw
-
One 3.5 mm Phillips screw
-
-
-
Remove the three screws securing the Taptic Engine:
-
Two 1.5 mm Phillips screws
-
One 2.4 mm standoff screw
-
Compare your new replacement part to the original part—you may need to transfer remaining components or remove adhesive backings from the new part before installing.
To reassemble your device, follow the above steps in reverse order.
Take your e-waste to an R2 or e-Stewards certified recycler.
Repair didn’t go as planned? Check out our Answers community for troubleshooting help.
Cancelar: não concluí este guia.
23 outras pessoas executaram este guia.
6 comentários
After that , printfinger will work ?
iPhone had back glass crack and vibration feedback from the haptic engine and thought “dang, engine must be messed up from being dropped and cracked”. Well looking online and seeing common issues with “screws being lose”, I figured… Let us tackle this fix. 10 minutes later, screen is removed carefully and professionally and 2 screws were sliding around in the phone with 2 more barley holding the engine. Screwed in. Phone haptic is feeling good as new :D
Is it true that you cannot replace the engine? It have heard it will not work without some kind of data transfer? I broke the flex during a repair and need an answer!


