Introdução
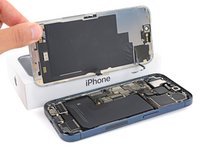
Use this guide to replace a broken, cracked, or non-responsive screen on your iPhone 15 Pro.
You'll need replacement screen adhesive to complete this repair.
Note: Due to Apple's parts pairing restrictions, on iOS 17.6 and earlier, True Tone and auto brightness are disabled after a screen replacement, even when using an original Apple screen. On iOS 18 and newer, you can calibrate your new screen using Apple's Repair Assistant to restore functionality on genuine parts.
O que você precisa
-
-
Unplug all cables from your phone.
-
Hold the power and either volume button and slide to power off your phone.
-
-
-
If your screen or back glass is cracked, lay overlapping strips of packing tape over the glass to protect yourself and make disassembly easier.
-
-
-
Measure 3 mm from the tip and mark the opening pick with a permanent marker.
Got to step 2 and realized the fix kit doesn't include an opening pick! Looks like a guitar pick, and I have those lying around. Is that expected? Looks like the pick is used in many steps below. There's a little blue crowbar that isn't mentioned in the instructions. Perhaps that replaces the opening pick?
Hi! I can't see which guide you were using when writing this comment. Can you reply here with which guide and fix kit you used?
I see you posted this in Meta. I hope it's resolved soon! In the meantime, a guitar pick may work well enough for your repair.
what fix kit?
My fix kit didn't include an opening pick either
My AliExpress refurbished screen came with a pick that has a coin-like circle that pops out, so no modification was necessary
It's not an Ifixit KIT if it doesn't include everything. You'll need to order the opening pic separately. Or head to Walmart like myself and look for guitar pics. Hopefully, this will work just as well.
No pick in mine as well. It’s really not clear that you have to order this separately when ordering an IPhone SE 202/2022 screen repair kit. Is this the case?
Frustrated, I ordered a compact package where everything was encapsulated. Useless suction tools could not separate the screen. If it is unable to decouple the screen, then why sucking suction tools you have provided.
For my kit the triangle pick was stuck inside the box with the screen not with the other tools maybe it's also there for you
Y’all are getting far, FAR too detailed with some of this stuff…. Measuring and marking the pick that you won’t actually use to open the device?!? lol that’s kinda funny. Just heat it up, grab a spudger, and the back just pops right off! The iFixit tech need to stick to the KISS method more often, you know KEEP IT SIMPLE STUPID!!! Like l, for reals, I’ve been doing this stuff for YEARS and using iFixit guides regularly and this is just ridiculous at this point!
Will the phone still work if the sensor assembly on the back of the screen is damaged?
-
-
-
Use a P2 pentalobe screwdriver to remove the two 7 mm‑long screws on either side of the charging port.
-
-
Ferramenta utilizada neste passo:Clampy - Anti-Clamp$24.95
-
Cut two strips of tape, apply them along the long edges of the phone, and fold them over the back glass to secure it.
-
-
-
Pull the Anti-Clamp's blue handle backward to unlock the arms.
-
With the screen facing up, slide the arms over the left edge of your phone, with one suction cup on the screen and the other on the back glass. Center the suction cups near the bottom edge.
-
Support your phone so it rests level while between the Anti-Clamp's arms—a small box works well.
-
Squeeze the cups together to create suction.
-
-
-
Pull the blue handle forward to lock the arms.
-
Turn the handle one full turn (360 degrees) or until the cups start to stretch.
-
As the cups stretch, make sure they stay vertically aligned with each other. If they tend to slip, remove the Anti-Clamp and apply tape for the cups to stick to.
-
-
-
Use a hair dryer or heat gun to heat the bottom edge of the screen until it's hot to the touch.
-
Wait up to a minute for the adhesive to separate and a gap to form between the screen and the frame.
-
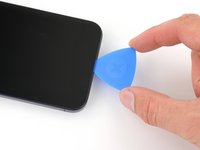
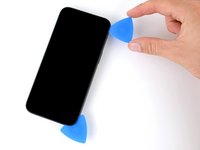
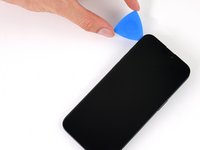
Insert an opening pick into the gap.
-
Remove the Anti-Clamp using the pull tabs on the suction cups.
-
Skip the next two steps.
-
-
-
Use a hair dryer or heat gun to heat the bottom edge of the screen until it's hot to the touch.
-
-
-
-
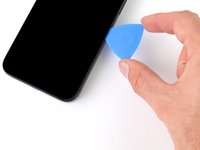
Apply a suction handle to the bottom edge of the screen.
-
Pull up on the handle with a strong, steady force to create a gap between the screen and the frame.
-
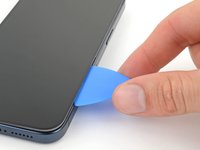
Insert the tip of an opening pick into the gap.
-
-
-
There are two delicate cables connecting the screen to the phone: one just above the action button, and the other near the middle of the left edge.
-
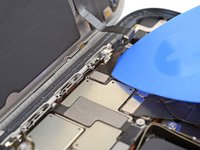
There are multiple spring contacts around the perimeter of the phone. Be extra careful not to insert your pick deeper than suggested in these locations to avoid bending the contacts.
-
-
-
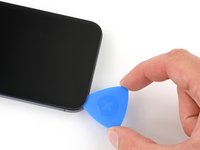
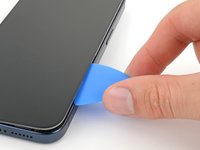
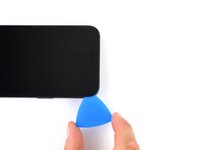
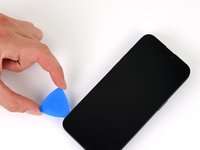
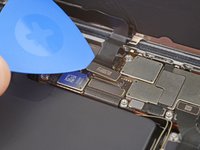
Slide your pick back and forth along the bottom edge to separate the adhesive.
-
Leave your pick inserted in the bottom right corner to prevent the adhesive from re-sealing.
-
-
-
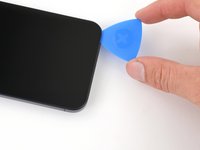
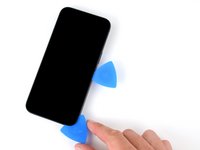
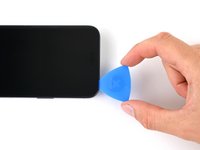
Slide your pick around the bottom right corner of the screen and toward the power button until you feel a hard stop at a clip securing the screen.
-
Rotate your pick so the flat edge is under the screen.
-
-
-
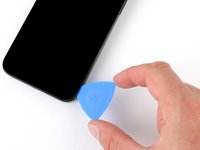
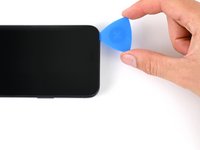
Twist the pick to increase the gap between the screen and the frame until the right clip releases.
-
Insert a second opening pick to the right of the first pick.
-
-
-
Slide the first pick back to the bottom right corner of the screen.
-
Slide the second pick to the top right corner of the screen to separate the adhesive.
-
Leave these picks inserted to prevent the adhesive from resealing.
-
-
-
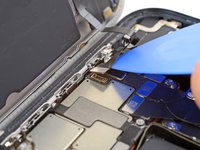
Slide your pick around the top right corner and along the top edge to release the two clips and adhesive securing it.
-
-
-
Rotate your pick around the top left corner of the screen.
-
Slide your pick to the bottom left corner of the screen to separate the adhesive.
-
-
-
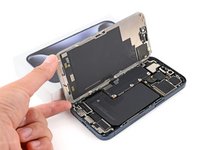
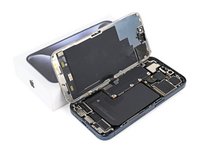
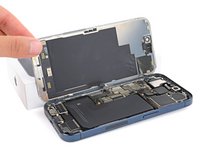
Place a small box or stack of books to the left of your phone so you can prop up the screen while disconnecting its cables.
-
Swing up the right edge of the screen like the front cover of a book.
-
Prop up the screen so you can access its cables without straining them.
-
-
-
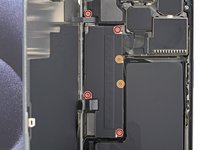
Use a Y000 screwdriver to remove the six screws securing the logic board cover:
-
Four 1.6 mm‑long screws
-
Two 1.3 mm‑long screws
-
-
-
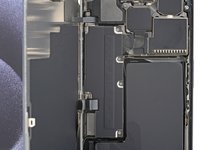
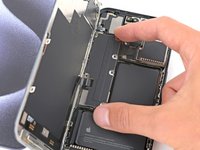
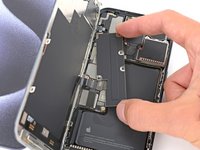
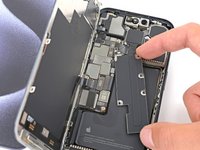
Rotate the bottom of the logic board cover counterclockwise and slide the top left corner out from under the ambient light sensor cable to remove it.
-
-
-
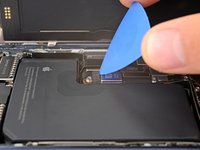
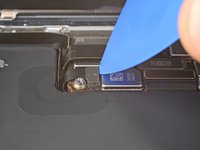
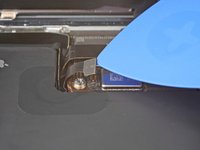
Use the tip of an opening pick to pry up and disconnect the battery press connector from the bottom right corner of the logic board.
-
-
-
Use the tip of an opening pick to pry up and disconnect the screen cable from the center of the logic board.
-
-
-
Gently slide the tip of an opening pick under the ambient light sensor cable near the top left corner of the logic board.
-
Lift the cable to disconnect it.
-


To reassemble your iPhone, follow this guide to apply new adhesive and install your screen.
After your repair, depending on the replacement part, you may be able to calibrate it using Apple's Repair Assistant, available as of iOS 18. Update your device, navigate to Settings → General →About → Parts & Service History, tap Restart & Finish Repair, and follow the onscreen prompts.
Take your e-waste to an R2 or e-Stewards certified recycler.
Repair didn’t go as planned? Try some basic troubleshooting, or ask our Answers community for help.
Cancelar: não concluí este guia.
6 outras pessoas executaram este guia.


5 comentários
Very helpful
You can buy it at selfservicerepair.com it is a lot cheaper there
This adhesive is way more annoying than it has any logical reason to be.