Introdução
Use this guide to remove and replace the rear-facing cameras in the iPhone 13 Pro. All the camera modules are replaced as a single unit.
Note: On iOS 18 and newer, you can calibrate new, genuine camera modules using Apple's Repair Assistant.
O que você precisa
-
-
Power off your iPhone before beginning disassembly.
-
Remove the two 6.8 mm-long pentalobe P2 screws at the bottom edge of the iPhone.
-
-
-
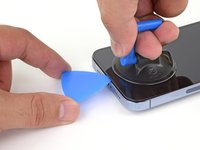
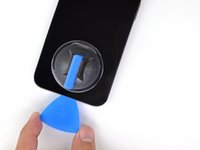
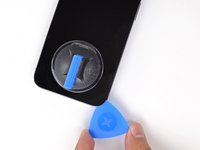
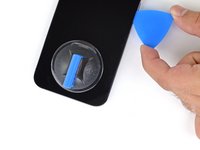
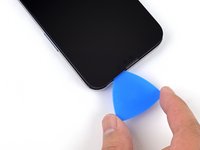
Measure 3 mm from the tip and mark the opening pick with a permanent marker.
-
-
-
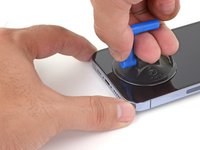
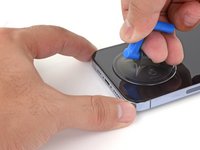
Lay overlapping strips of clear packing tape over the iPhone's screen until the whole face is covered.
-
If you can't get the suction cup to stick in the next few steps, fold a strong piece of tape (such as duct tape) into a handle and lift the screen with that instead.
-
-
Ferramenta utilizada neste passo:Clampy - Anti-Clamp$24.95
-
Pull the blue handle backwards to unlock the Anti-Clamp's arms.
-
Slide the arms over either the left or right edge of your iPhone.
-
Position the suction cups near the bottom edge of the iPhone—one on the front, and one on the back.
-
Squeeze the cups together to apply suction to the desired area.
-
-
-
Support your iPhone on something sturdy such as a hardcover book so it rests hands-free and parallel to the ground; this makes it easier to work with in the following steps.
-
Use a hair dryer to heat along the bottom edge of the iPhone. The screen should feel slightly too hot to touch.
-
Wait one minute to give the adhesive a chance to release and present an opening gap.
-
Insert an opening pick under the screen's plastic bezel when the Anti-Clamp creates a large enough gap.
-
Skip the next two steps.
-
-
-
Use a hair dryer or a heat gun to heat the bottom edge of the iPhone for 90 seconds or until the screen is slightly too hot to touch.
-
-
-
Apply a suction handle to the bottom edge of the phone, while avoiding the very edge of the glass.
-
Pull up on the suction cup with firm, constant pressure to create a slight gap between the screen and the frame.
-
Insert an opening pick into the gap under the screen's plastic bezel.
-
-
-
Use a hair dryer to heat the right edge of the iPhone (the edge with the power button) for 90 seconds or until the screen is slightly too hot to touch.
-
-
-
Slide the opening pick around the bottom right corner of the iPhone to separate its adhesive.
-
Continue sliding up the right edge of the iPhone until you reach the top right corner.
-
Leave the pick in the top right corner before continuing.
-
-
-
Use a hair dryer to heat the top edge of the iPhone for 90 seconds or until the screen is slightly too hot to touch.
-
-
-
-
Slide the opening pick around the top right corner of the iPhone to separate the top adhesive.
-
Leave the pick in the top left corner before continuing.
-
-
-
Use a hair dryer to heat the left edge of the iPhone for 90 seconds or until the screen is slightly too hot to touch.
-
-
-
Insert a second opening pick in the bottom left corner of the iPhone.
-
Twist both picks simultaneously until the left edge clips release.
-
-
-
Remove your suction handle from the screen.
-
Rotate your iPhone so the right edge faces you.
-
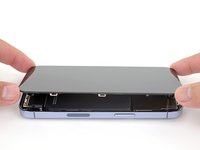
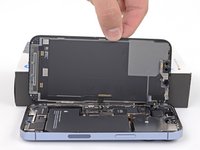
Open your iPhone by swinging the display up from the right side, like the front cover of a book.
-
Lean the display against something to keep it propped up while you're working on the phone.
-
-
Ferramenta utilizada neste passo:Magnetic Project Mat$19.95
-
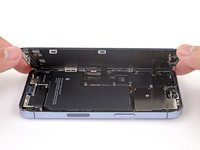
Use a Y000 screwdriver to remove the three 1.3 mm screws securing the battery connector cover.
-
-
-
Use the pointed end a spudger or a clean fingernail to pry the battery connector up from its socket on the logic board.
-
Bend the connector slightly away from the logic board to prevent it from accidentally making contact with the socket and providing power to the phone during your repair.
-
-
-
Use the pointed end of a spudger or a clean fingernail to pry the display connector up from its socket on the logic board.
-
-
-
Use a Y000 screwdriver to remove two 1.1 mm screws from the front sensor connector cover.
-
Use a Phillips screwdriver to remove the remaining two screws from the cover:
-
One 1.5 mm screw
-
One 1.8 mm screw
-
-
-
Use a Y000 driver to remove the four screws securing the rear-facing camera sensor cover:
-
Three 1.4 mm screws
-
One 1.3 mm screw
-
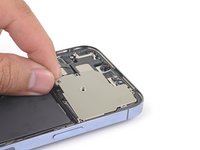
Use a Phillips screwdriver to remove one 1.6 mm screw.
-
-
-
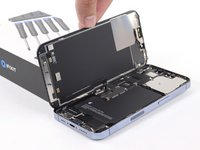
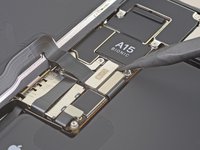
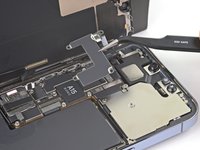
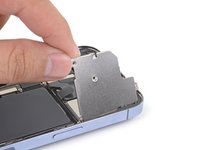
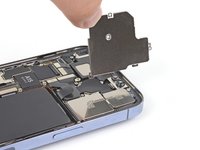
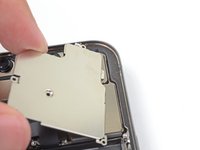
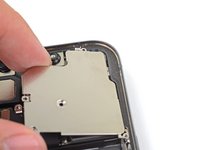
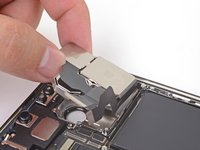
Lift the camera cover from the edge closest to the logic board, and remove it.
-
-
-
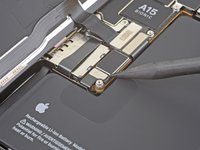
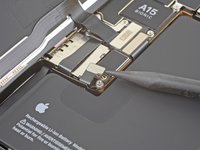
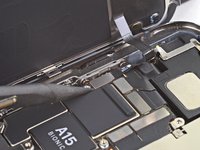
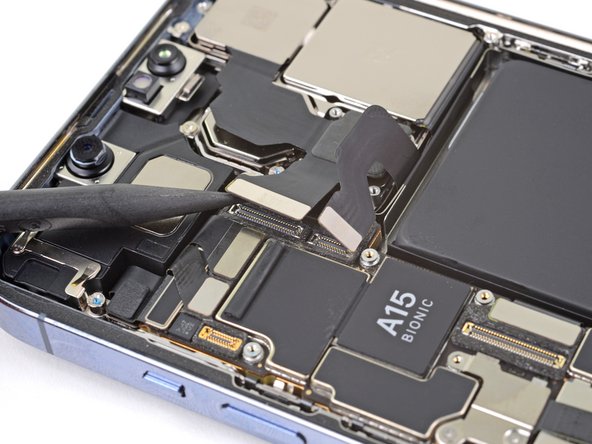
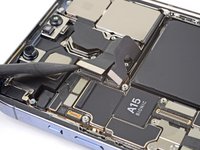
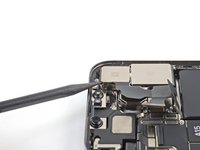
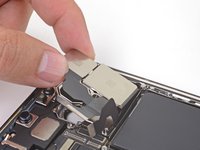
Pry up with the pointed end of a spudger to disconnect the two camera cables from the logic board.
-
-
-
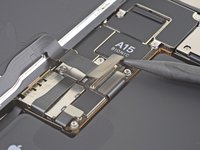
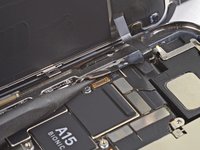
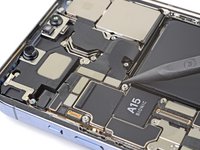
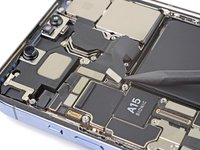
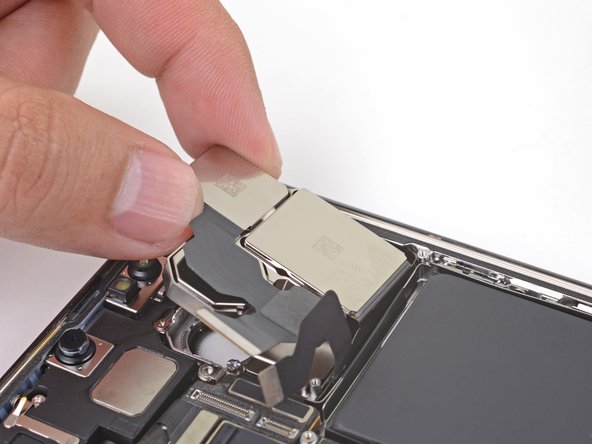
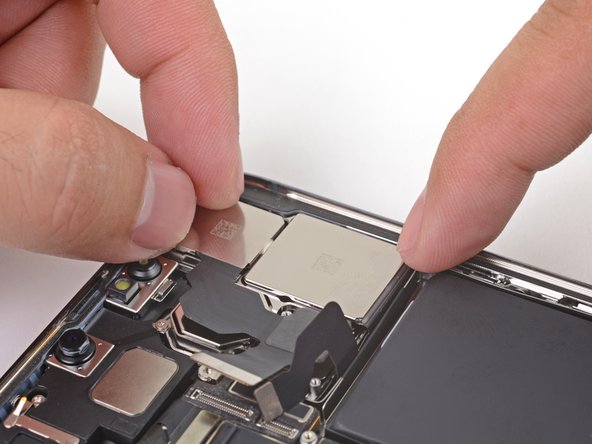
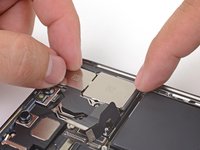
Use the tip of a spudger to lift the camera assembly out of the iPhone.
-


Compare your new replacement part to the original part—you may need to transfer remaining components or remove adhesive backings from the new part before installing.
To reassemble your device, follow these instructions in reverse order.
After your repair, depending on the replacement part, you may be able to calibrate it using Apple's Repair Assistant, available as of iOS 18. Update your device, navigate to Settings → General →About → Parts & Service History, tap Restart & Finish Repair, and follow the onscreen prompts.
Take your e-waste to an R2 or e-Stewards certified recycler.
Repair didn’t go as planned? Try some basic troubleshooting, or ask our iPhone 13 Pro Answers community for help.
Cancelar: não concluí este guia.
14 outras pessoas executaram este guia.

4 comentários
Hi, i replaced the camera with a new one and now the camera only shows a black screen.
Luke & Tom: unless the rear facing itself is broken, there is no need to dissemble the phone. If it is only the lens, replacement lens kits are available on Amazon and, much more cost effective, eBay - along with tempered glass lens protectors: you can peel the affected lenses from the housing; just be cautious if you are using heat to soften the adhesive - the camera sensors are very sensitive and are easily damaged - and be sure to dislodge all glass fragments (tip the phone upside down and tap lightly; a little compressed air won't harm either). Hope this helps.