Introdução
Follow this guide to replace the screen in your iPad Pro 12.9" 4th generation.
Some common reasons to repair your screen are if it's cracked, it doesn't respond to touch, or has dead pixels.
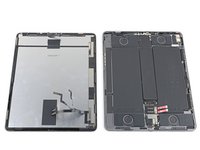
The screen consists of the display and the top sensor assembly. If you don't transfer the top sensor assembly, you will lose Face ID and True Tone. The sensor assembly is heavily glued onto the screen and is easy to break. Work very slowly when you pry the top sensor assembly up.
You'll need replacement adhesives such as thin double-sided tape and adhesive glue to complete this repair.
Some photos show the battery connector blocked with two card strips. While this is an optional method, it's more reliable to fully discharge the battery. Ignore this visual discrepancy as you work through the guide.
O que você precisa
-
-
Unplug any cables and fully shut down your iPad.
 Pergunte ao FixBot
-
-
-
Apply a heated iOpener to the right edge of the screen for two minutes.
-
-
Ferramenta utilizada neste passo:Clampy - Anti-Clamp$24.95
-
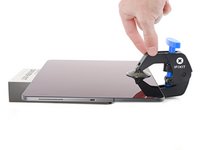
Pull the blue handle backwards to unlock the Anti-Clamp's arms.
-
Place an object under your iPad so it rests level between the suction cups.
-
Position the suction cups near the middle of the right edge—one on the top, and one on the bottom.
-
Hold the bottom of the Anti-Clamp steady and firmly press down on the top cup to apply suction.
-
-
-
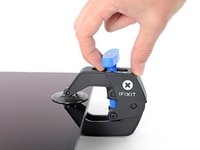
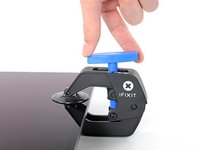
Pull the blue handle forward to lock the arms.
-
Turn the handle clockwise 360 degrees or until the cups start to stretch.
-
Make sure the suction cups remain aligned with each other. If they begin to slip out of alignment, loosen the suction cups slightly and realign the arms.
-
-
-
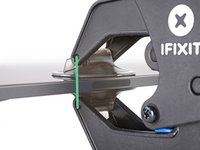
Wait one minute to give the adhesive a chance to release and present an opening gap.
-
If your screen isn't getting hot enough, you can use a hair dryer to heat along the right edge of the iPad.
-
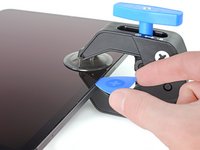
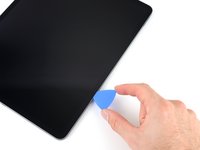
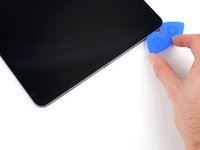
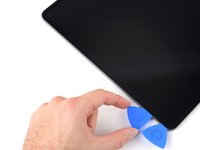
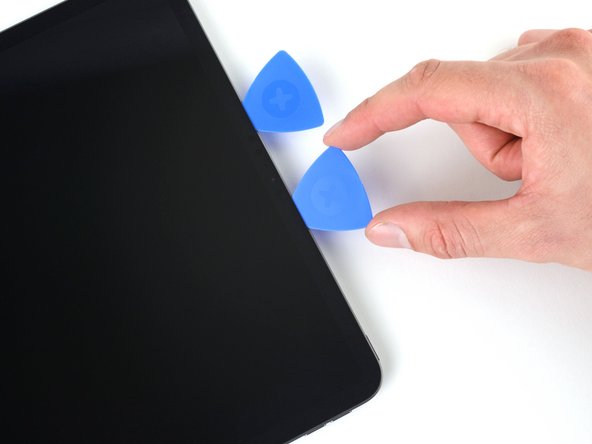
Insert an opening pick under the screen when the Anti-Clamp creates a large enough gap.
-
Skip the next step.
-
-
-
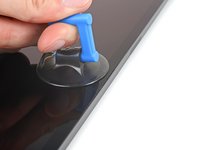
Apply a suction handle to the screen as close to the center of the right edge as possible.
-
Pull up on the suction handle with a strong, steady force to create a small gap between the frame and screen.
-
Insert an opening pick into the gap.
-
-
-
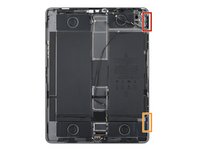
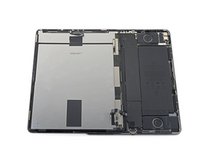
One magnet begins 2 cm from the top edge and is 2.5 cm long.
-
The second magnet begins 3 cm from the bottom edge and is 2.5 cm long.
-
-
-
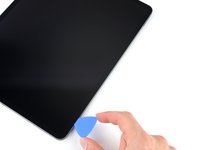
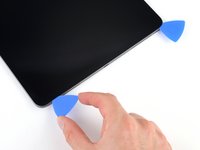
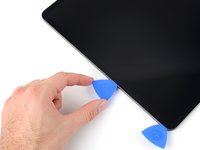
Slide your opening pick back and forth along the right edge of the screen to slice the adhesive.
-
-
-
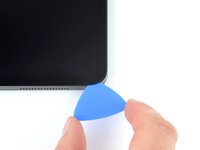
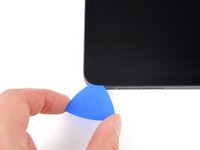
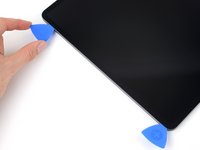
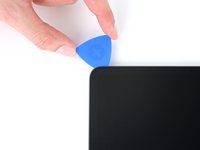
Rotate your opening pick around the bottom right corner of the screen.
-
Leave your pick in the bottom right corner to prevent the adhesive from resealing.
-
-
-
Apply a heated iOpener to the bottom edge of the screen for two minutes.
-
-
-
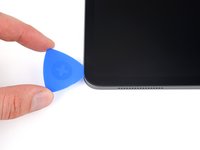
Insert a second opening pick in the bottom right corner of the screen.
-
Slide your pick to the bottom left corner to slice the bottom edge adhesive.
-
-
-
Rotate your opening pick around the bottom left corner of the screen.
-
Leave your pick in the bottom left corner to prevent the adhesive from resealing.
-
-
-
Apply a heated iOpener to the left edge of the screen for two minutes.
-
-
-
The upper cutout begins 4 cm from the top edge and is 2.5 cm long.
-
The middle cutout is exactly in the middle of the frame and is 2.5 cm long.
-
The lower cutout begins 4 cm from the bottom edge and is 2.5 cm long.
-
-
-
Insert a third opening pick in the bottom left corner of the screen.
-
Slide your pick to the top left corner to slice the left edge adhesive.
-
-
-
Rotate your opening pick around the top left corner of the screen.
-
Leave your pick in the top left corner to prevent the adhesive from resealing.
-
-
-
-
Apply a heated iOpener to the top edge of the screen for two minutes.
-
-
-
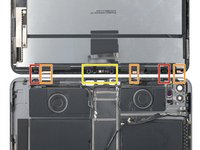
While the top edge adhesive softens, note the following:
-
There are two ambient light sensors near the corners. Only insert the very tip of your pick here to avoid damaging them.
-
There are three strips of heat dispersion tape. Angle your pick upward as you slice here.
-
The front-facing camera assembly is in the center of the top edge. Don't insert your pick here to avoid damaging them.
-
-
-
Slide your opening pick 9 cm toward the center of the top edge to slice the adhesive, paying attention to the spots mentioned in the previous step.
-
-
-
Insert a fourth opening pick to the right of the front camera assembly, 4 cm from the previous opening pick and 9 cm from the right edge of the screen.
-
Slide your pick to the top right corner to slice the remaining adhesive.
-
-
-
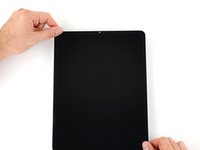
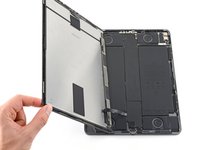
Grab two opposing corners of the screen and gently shift it around to separate it from the frame.
-
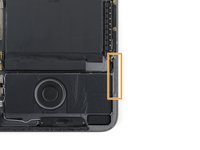
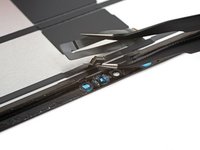
Shift the screen towards the bottom right corner of the frame until the ribbon cable near the top edge is uncovered.
-
-
Ferramenta utilizada neste passo:FixMat$36.95
-
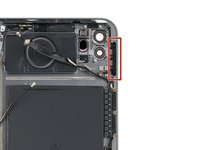
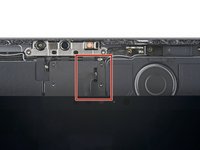
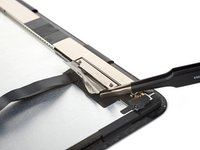
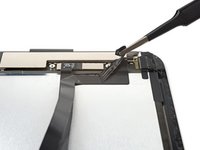
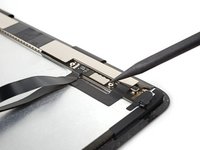
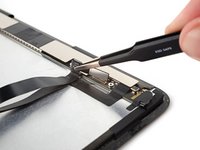
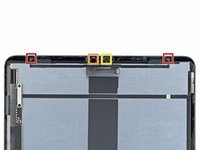
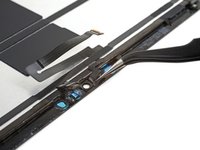
Use your Phillips screwdriver to remove the two screws securing the upper cable shield:
-
One 1.8 mm-long screw
-
One 2.0 mm-long screw
-
-
Ferramenta utilizada neste passo:Tweezers$4.99
-
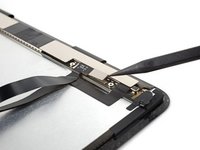
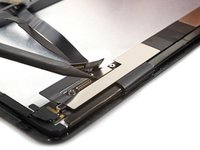
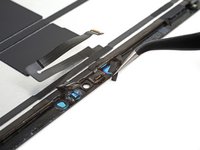
Use tweezers or your fingers to grab and remove the upper cable shield.
-
-
-
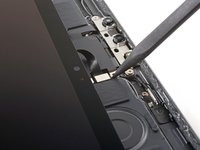
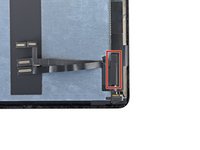
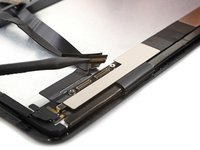
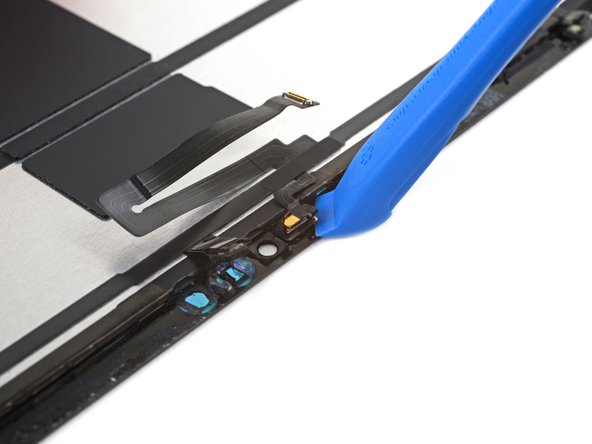
Use the point of your spudger to pry up and disconnect the upper sensors press connector.
-
-
-
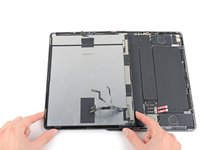
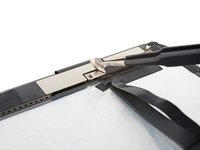
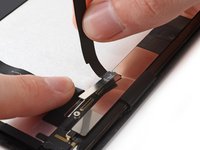
Grip the right edge of the screen and fold it open like a book.
-
Lay the screen down over the left edge of the iPad.
-
-
-
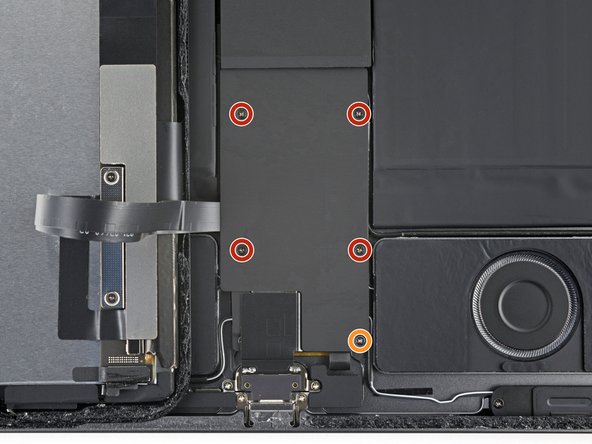
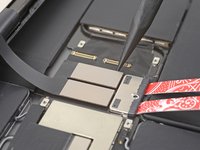
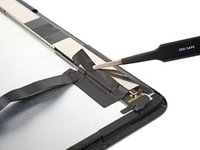
Use your Phillips screwdriver to remove the five screws securing the lower cable shield:
-
Four 1.1 mm screws
-
One 2.0 mm screw
-
-
Ferramenta utilizada neste passo:Tweezers$4.99
-
Use tweezers or your fingers to grab and remove the lower cable shield.
-
-
-
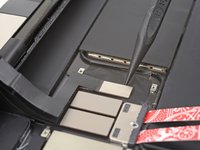
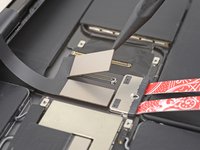
Use the point of your spudger to pry up and disconnect the upper two display press connectors from the logic board.
-
-
-
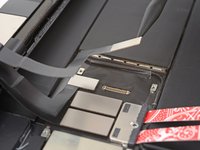
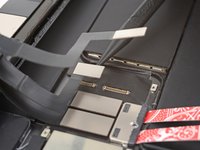
Use the point of your spudger to pry up and disconnect the lower two display press connectors from the logic board.
-
-
-
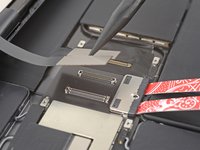
Peel back the tape from the display cable bracket located at the bottom right of the screen.
-
-
-
Continue peeling the tape along its outer edge until the bracket is fully exposed.
-
-
-
Use a Phillips screwdriver to remove the two 1.3 mm-long screws securing the display cable bracket.
-
-
-
Remove the display cable bracket.
-
-
-
Peel off the tape connecting the display and digitizer cables.
-
-
Ferramenta utilizada neste passo:Tweezers$4.99
-
Use a spudger to pry up and disconnect the bottom display cable press connector on the screen.
-
Use tweezers to bend the bottom press connector away from the screen—exposing the top press connector.
-
-
-
Use a spudger to pry up and disconnect the top display cable press connector on the screen.
-
-
-
Use your fingers to peel the display cable from the screen.
-
Remove the display cable.
-
-
-
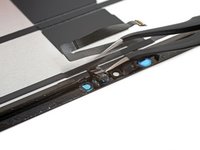
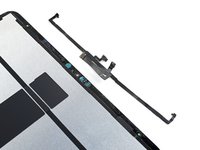
The top sensor assembly is composed of four sensors:
-
Two ambient light sensors
-
One proximity sensor
-
One microphone
-
-
-
Heat an iOpener and apply it to the top of the screen for two minutes.
-
-
-
Insert one arm of your angled tweezers between the ambient light sensor and the screen.
-
Pry up to separate the sensor from the screen.
-
Repeat this procedure for the other ambient light sensor.
-
-
-
Insert one arm of your angled tweezers between the proximity sensor cable and the screen.
-
Slide the tweezers toward the screen while prying to separate the sensor from the screen.
-
-
-
Slide an opening tool under the microphone to separate its adhesive.
-
Pry up to separate the microphone from the screen.
-
-
-
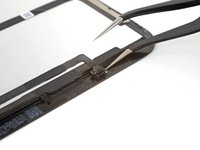
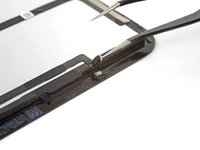
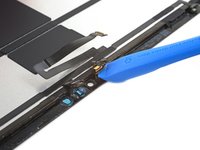
Slide an opening pick under the top sensor assembly cable to separate it from the screen.
-
-
-
Continue sliding your opening pick along the top sensor assembly until it's completely separated from the screen.
-
Remove the top sensor assembly.
-
-
Ferramenta utilizada neste passo:Tesa 61395 Tape$8.95
-
Align the top sensor assembly on your replacement screen.
-
Use Tesa tape, or similar double-sided tape, to secure the cables to the screen.
-
Use E6000 adhesive, or similar adhesive, to secure the sensors to their cutouts on the screen.
-


Compare your new replacement screen to the original one—you may need to transfer remaining components or remove adhesive backings from the new display before installing it.
To reassemble your device, follow these instructions in reverse order.
Take your e-waste to an R2 or e-Stewards certified recycler.
Repair didn’t go as planned? Try some basic troubleshooting, or ask our iPad Pro 12.9" 4th Gen Answers community for help.
Cancelar: não concluí este guia.
14 outras pessoas executaram este guia.

Equipe

7Comentários do guia
I completed this process today. I had a cracked screen on a 2020 12.9" iPad. Great guide but a couple of things I think should be mentioned.
1. Screen magnets along the right edge are not included on the replacement screen I got from iFixit, which I should have noticed but didn't. So don't forget to transfer these over. I did not realize this until I had sealed it up again, unfortunately, and I don't want to damage the adhesive or risk damaging the new screen just to have my case magnetize properly. Luckily my case has a latch piece that comes up around the Apple pencil and then attaches to the screen cover so these magnets are not necessary for me.
2. The description of the reattachment of the press connectors could use some clarification. "One side" refers to the short edges of the rectangular connector which could be nice to clarify, as I first assumed it meant the rows of pins. Though once you see how it works it is fairly obvious.
Overall I am happy with the result! No more cracks and fully functional!
I would also add that if you have a cracked screen be very careful with the opening process, the suction cup will only pull up larger shards individually, even with a lot of packing tape. Wear safety goggles because the shards can spring out when tension is suddenly released by cracking! I ended up having to remove a lot of smaller pieces with tweezers and eventually, I was able to finish cutting the adhesive and remove the old screen.
Follow up to this 4 months later - the screen is not good. It becomes completely unresponsive and randomly taps things on screen sometimes. It’s totally random when it does this which is stressful if I am trying to use the ipad for sheet music. I wouldn’t recommend the ifixit screen unfortunately. It also has a bright spot that is visible when scrolling on a page toward the bottom left of the screen. I didn’t notice at first - not nearly as much of a problem as the screen responsiveness issues that have appeared.
I know these issues are with the screen because when I use an external keyboard/trackpad the ipad is fully responsive, only the touch input is very spotty. I wish I could say it has to do with how I repaired it but all of the cables were securely attached and the top sensors (including FaceID) function perfectly. The screen looks great otherwise, it’s just intermittently unusable. I have tried restarting the ipad, restoring, etc. It doesn’t matter. It’s not an OS thing.
I'm sorry to hear your replacement screen isn't working as expected, Will. You may have some luck getting in touch with our customer service: https://help.ifixit.com/article/136-emai...
Thanks for all the extra tips (I'm sure I would have missed the magnets if it wasn't for your remark!), it helped me get through the steps! I got the full repair kit, but the iOpener never got hot enough (it was always just warm to the touch in the middle, never hot, and when I heated it some more, it exploded. While it was "warm" it never managed to loosen any glue). However the hair dryer worked like a charm.
It took a lot of effort to remove all small glass pieces, but it was worth it, everything works as before again! All in all I think I spent 5 hours.
I hope my replacement screen will last longer than yours!
My replacement screen already had sticky tape on it, so I didn't use the extra installation adhesive that was provided.