Introdução
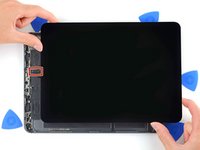
Follow this guide to replace the USB-C port on your iPad Pro 11" 3rd-gen.
This guide is written with an A2301 (cellular + mmWave) model iPad Pro. If you're fixing a Wi-Fi model, you can still use this guide—there will be some visual discrepancies, and you'll need to skip the steps related to the cellular antennas.
Some photos in this guide show the screen disconnected and fully removed. This isn't necessary for the procedure, so this guide skips those steps. If you wish to remove the screen, follow this guide.
Some photos show the battery connector blocked with two card strips. While this is an optional method, it's more reliable to fully discharge the battery. Ignore this visual discrepancy as you work through the guide.
O que você precisa
-
-
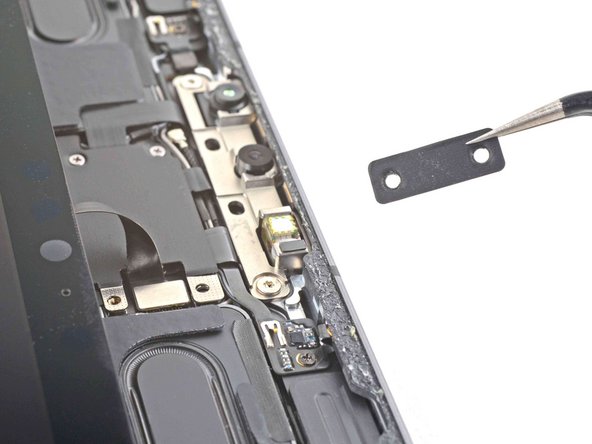
Camera module, ambient light sensors, proximity senor, and front microphone
-
Display cables
-
Screen magnets
-
LCD edges
-
-
-
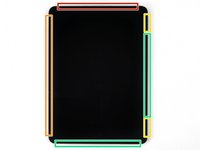
Apply a heated iOpener to the right edge of the screen for two minutes.
-
-
Ferramenta utilizada neste passo:Clampy - Anti-Clamp$24.95
-
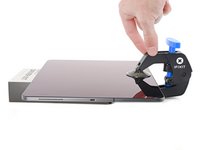
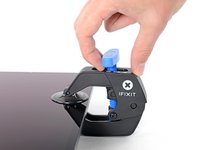
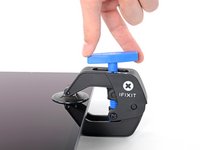
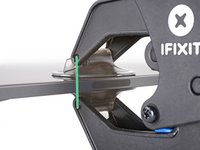
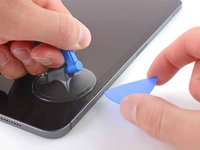
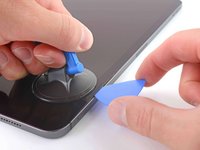
Pull the blue handle backward to unlock the Anti-Clamp's arms.
-
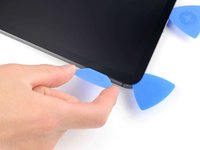
Place an object under your iPad so it rests level between the suction cups.
-
Position the suction cups near the middle of the right edge—one on the top, and one on the bottom.
-
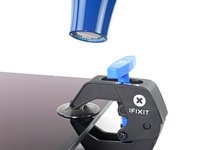
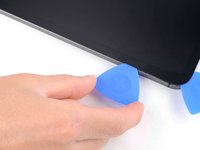
Hold the bottom of the Anti-Clamp steady and firmly press down on the top cup to apply suction.
-
-
-
Wait one minute to give the adhesive a chance to release and present an opening gap.
-
If your screen isn't getting hot enough, you can use a hair dryer to heat along the right edge of the iPad.
-
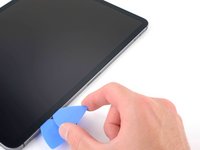
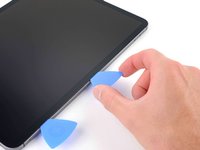
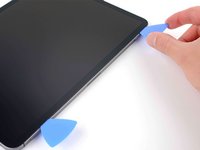
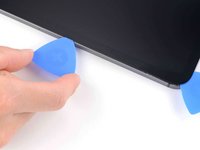
Insert an opening pick under the screen when the Anti-Clamp creates a large enough gap.
-
Skip the next step.
-
-
-
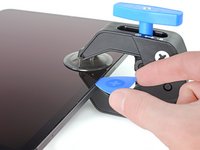
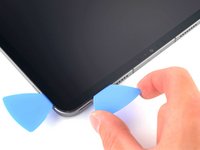
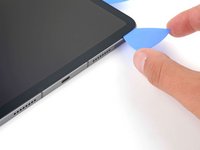
Apply a suction handle to the right edge of the screen, about 5 cm from the bottom edge.
-
Pull up on the suction handle with firm, constant pressure to create a gap just small enough to insert an opening pick.
-
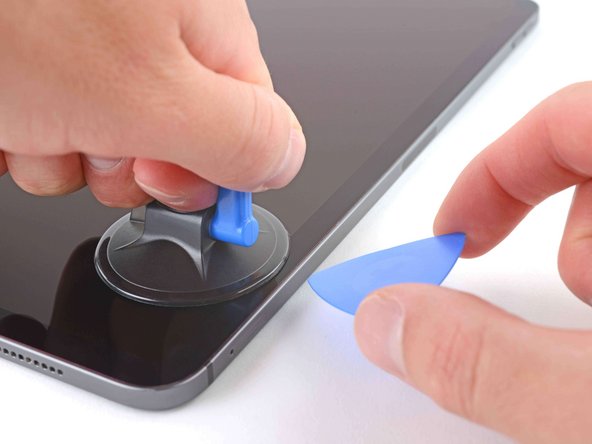
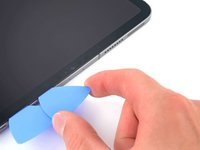
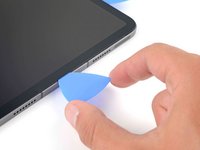
Insert the tip of an opening pick into the gap.
-
-
-
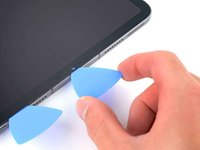
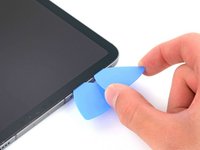
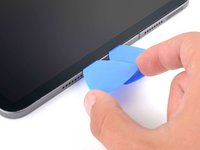
Insert a new opening pick in the gap you just created.
-
Slide the pick along the right edge to separate the adhesive.
-
Leave the pick in the top right corner to prevent the adhesive from re-sealing.
-
-
-
Apply a heated iOpener to the top edge of the screen for two minutes.
-
-
-
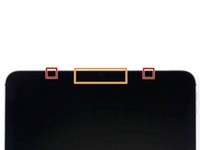
Don't insert an opening pick more than 2 mm near the top left and right edges or you'll damage the ambient light sensors.
-
Don't insert an opening pick more than 1 mm near the middle of the top edge or you'll damage the camera module, proximity sensor, and front microphone.
-
-
-
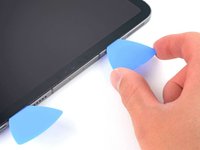
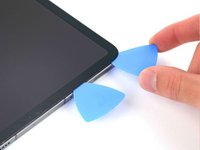
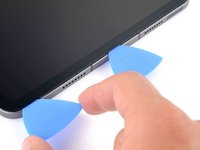
Insert a new opening pick in the gap you just created.
-
Slide the pick along the top right edge, stopping when you reach the right ambient light sensor.
-
Leave the pick in to prevent the adhesive from re-sealing.
-
-
-
-
Apply a heated iOpener to the bottom edge of the screen for two minutes.
-
-
-
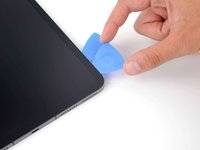
Insert a new opening pick in the bottom right corner below the existing pick.
-
Slide the pick around the bottom right corner to separate the adhesive.
-
-
-
Apply a heated iOpener to the left edge of the screen for two minutes.
-
-
-
The display cables are located within small indents of the frame and require an opening pick to be inserted at a 45° angle.
-
There are flat sections of the frame which require an opening pick to be inserted horizontally.
-
-
-
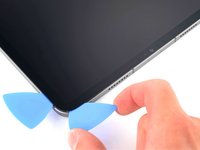
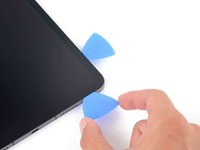
Insert an opening pick at a 45˚ angle just above the bottom left corner.
-
Carefully slide the pick along the left edge, stopping when you reach the flat section of the frame.
-
-
-
Separate the remaining adhesive, making sure to follow the instructions exactly as written.
-
Slide the pick at a 45˚ downward angle and don't insert the pick more than 5 mm.
-
Slide the pick horizontally and don't insert the pick more than 5 mm.
-
-
-
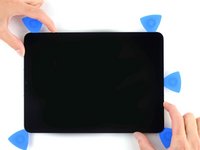
Use an opening pick to remove any remaining adhesive keeping the screen stuck to the frame.
-
Grab the top right and bottom left corners of the screen.
-
Slowly slide the screen towards the bottom right corner to separate it from the frame.
-
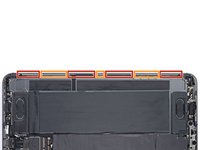
Shift the screen towards the bottom right corner of the frame until the ambient light sensor ribbon cable near the top edge is uncovered.
-
-
Ferramenta utilizada neste passo:FixMat$36.95
-
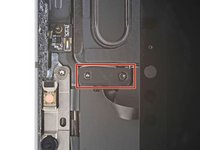
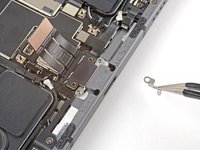
Use a Phillips screwdriver to remove the two screws securing the ambient light sensor cable bracket to the logic board:
-
One 1.3 mm screw
-
One 2.0 mm screw
-
-
Ferramenta utilizada neste passo:Tweezers$4.99
-
Use a pair of tweezers or your fingers to remove the bracket.
-
-
-
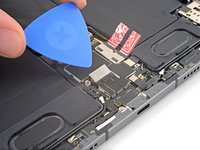
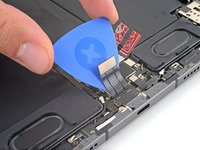
Use the flat end of a spudger to disconnect the ambient light sensor cable by lifting straight up on the press connectors.
-
-
-
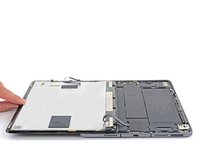
Grip the right edge of the screen and fold it open like a book.
-
Lay the screen down over the left edge of the iPad.
-
-
-
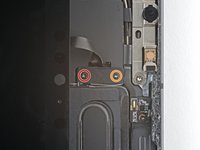
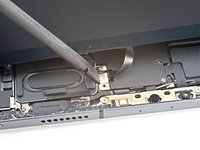
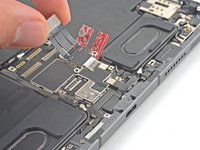
Use a Phillips screwdriver to remove the five screws securing the lower cable shield to the logic board:
-
Two 2.0 mm screws
-
Three 1.3 mm screws
-
-
Ferramenta utilizada neste passo:Tweezers$4.99
-
Use tweezers or your fingers to grab and remove the lower cable shield.
-
-
-
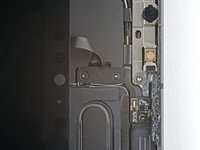
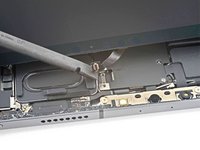
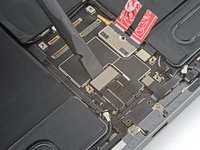
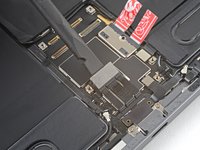
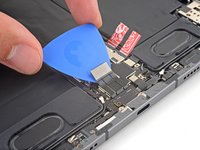
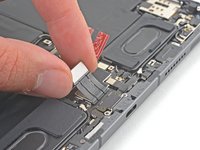
Use the flat end of a spudger to disconnect the USB-C port cable.
-
-
-
Slide an opening pick between the cable and the logic board to separate the adhesive.
-
-
-
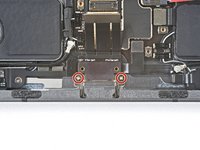
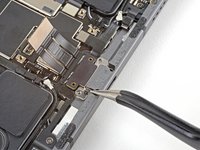
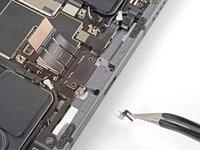
Use a Phillips screwdriver to remove the two 1.9 mm screws securing the USB-C port to the frame.
-
-
Ferramenta utilizada neste passo:Tweezers$4.99
-
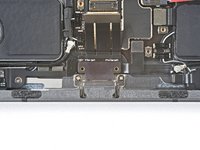
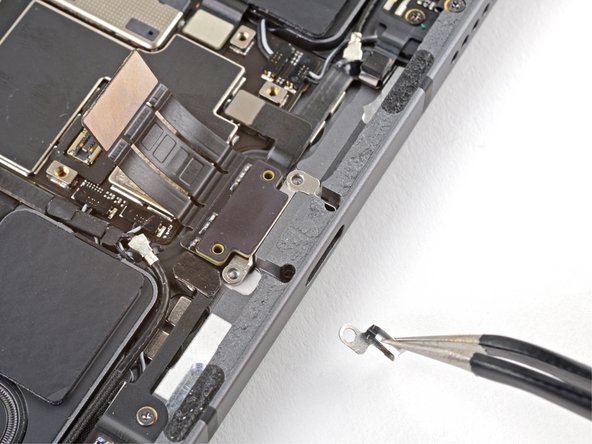
Use tweezers to remove the two grounding contacts from each side of the USB-C port.
-


Compare your new replacement part to the original part—you may need to transfer remaining components or remove adhesive backings from the new part before installing.
To reassemble your device, follow these instructions in reverse order.
Take your e-waste to an R2 or e-Stewards certified recycler.
Repair didn’t go as planned? Try some basic troubleshooting, or ask our iPad Pro 11" 3rd Gen Answers community for help.
Cancelar: não concluí este guia.
2 outras pessoas executaram este guia.

Equipe

2 comentários
Full disclosure: I haven't been inside an idevice since iPhone 4S, and neither eye-sight nor dexterity has gotten better since, but this operation IMHO most definitely deserve the "difficult" label. Apple had told me that my USB-C port had rusted [sic!] due to humidity and the only repair was a replacement at almost the price of a refurbished (but with much less warranty), so trying this was a cheap investment. I got it open, replaced the port and reassembled, but at the cost of a cracked screen (step 23 is quite tricky), and the patient still wouldn't charge. It's satisfying proving apple wrong (that or the spare I got was broken, ifixit didn't have one, so I had to turn to ebay, which is a lot less reassuring), but if you can't afford to lose your ipad and aren't particularly skilled with fragile mechanics, consider professional help for this. The guide is most excellent, any blame for my cracked screen lies squarely on me and I don't regret trying.
einge gute Anleitung, der Schritt zum entfernen des Diplay´s fehtl zwar ist aber easy. bei mir war der USB-C tatsächlich kaputt, konnte nur noch schnell laden, jetzt gehts auch wieder im Auto.
Danke sehr
connector 24€ kleber 8€ Werkzeug von ifixit (plektren etc.) 10€ alkohol wattestäbchen mehr braucht man nicht besser als 700 für ein austauschgerät zu zahlen