Ir para o conteúdo principal
Participe da comunidade de reparos - Criar conta

Google Pixel 3 XL Back Cover Replacement

O que você precisa

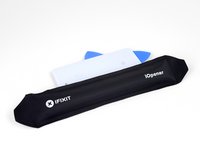
  1. Google Pixel 3 XL Back Cover Replacement, Heat the edge of the back cover: passo 1, imagem 1 %32 Google Pixel 3 XL Back Cover Replacement, Heat the edge of the back cover: passo 1, imagem 2 %32 Google Pixel 3 XL Back Cover Replacement, Heat the edge of the back cover: passo 1, imagem 3 %32
    • Heat an iOpener and apply it to the right edge of the back cover for a minute.

    • A hair dryer, heat gun, or hot plate may also be used, but be careful not to overheat the phone—the display and internal battery are both susceptible to heat damage.

    • While you wait, note the following areas on the back cover:

    • Strong adhesive—there are large patches of adhesive near the bottom of the phone.

    • Fingerprint sensor cable—be careful not to slice through the cable as you pry

    Pergunte ao FixBot
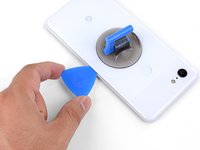
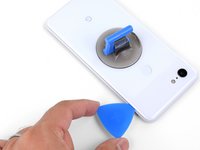
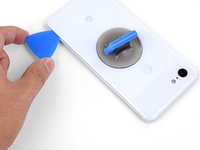
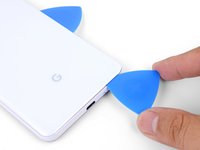
  2. Google Pixel 3 XL Back Cover Replacement, Create a gap under the back cover: passo 2, imagem 1 %32 Google Pixel 3 XL Back Cover Replacement, Create a gap under the back cover: passo 2, imagem 2 %32 Google Pixel 3 XL Back Cover Replacement, Create a gap under the back cover: passo 2, imagem 3 %32
    • Apply a suction cup to the heated edge of the back cover, as close to the edge as possible.

    • Pull up on the suction cup with strong, steady force to create a gap.

    • Depending on the age of your phone, this may be difficult. If you are having trouble, apply heat to the edge and try again.

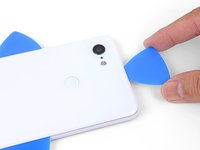
    • Insert the point of an opening pick into the gap.

    Pergunte ao FixBot
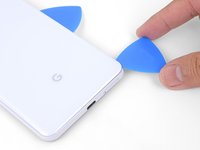
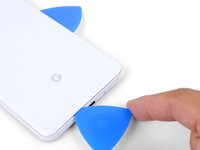
  3. Google Pixel 3 XL Back Cover Replacement, Loosen the right edge adhesives: passo 3, imagem 1 %32 Google Pixel 3 XL Back Cover Replacement, Loosen the right edge adhesives: passo 3, imagem 2 %32 Google Pixel 3 XL Back Cover Replacement, Loosen the right edge adhesives: passo 3, imagem 3 %32
    • Slide the opening pick along the right edge to slice through the adhesive.

    • The adhesive gums up and becomes hard to slice once it cools. If that happens, re-apply heat to the edge to make slicing easier.

    • Once you have sliced through the edge, leave an opening pick in the seam to prevent the adhesive from re-sealing.

    Pergunte ao FixBot
  4. Google Pixel 3 XL Back Cover Replacement, Heat the bottom edge of the back cover: passo 4, imagem 1 %32
    • Apply a heated iOpener to the bottom of the back cover for a minute.

    Pergunte ao FixBot
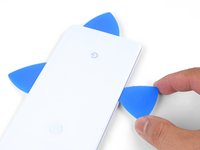
  5. Google Pixel 3 XL Back Cover Replacement, Slice through the bottom adhesives: passo 5, imagem 1 %32 Google Pixel 3 XL Back Cover Replacement, Slice through the bottom adhesives: passo 5, imagem 2 %32 Google Pixel 3 XL Back Cover Replacement, Slice through the bottom adhesives: passo 5, imagem 3 %32
    • Use an opening pick to slice around the bottom right corner and continue along the bottom edge of the phone.

    • Work slowly as you slice around the corner to prevent the panel from cracking. If the slicing becomes hard, re-apply heat.

    • Leave a pick in the edge to prevent the adhesive from re-sealing.

    Pergunte ao FixBot
  6. Google Pixel 3 XL Back Cover Replacement, Slice through the remaining edges: passo 6, imagem 1 %32 Google Pixel 3 XL Back Cover Replacement, Slice through the remaining edges: passo 6, imagem 2 %32 Google Pixel 3 XL Back Cover Replacement, Slice through the remaining edges: passo 6, imagem 3 %32
    • Continue heating and slicing the remaining edges of the phone.

    • Be careful as you slice along the left edge of the phone. If your pick feels like it's stuck near the top, you may have snagged the fingerprint sensor. Retract the pick out of the seam slightly and try again.

    • Be sure to cut through the thick portions of adhesive near the bottom and right edge of the phone.

    Pergunte ao FixBot
  7. Google Pixel 3 XL Back Cover Replacement, Slice through the leftover adhesive: passo 7, imagem 1 %32
    • Gently pry up the right edge of the back cover.

    • Use an opening pick to slice through any remaining adhesive along the edges.

    Pergunte ao FixBot
  8. Google Pixel 3 XL Back Cover Replacement, Swing open the back cover: passo 8, imagem 1 %32 Google Pixel 3 XL Back Cover Replacement, Swing open the back cover: passo 8, imagem 2 %32 Google Pixel 3 XL Back Cover Replacement, Swing open the back cover: passo 8, imagem 3 %32
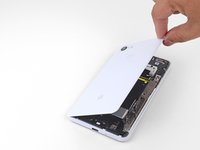
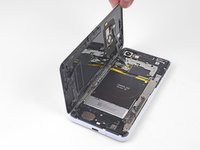
    • Swing the right edge of the back cover upwards and rest the flipped panel along the left side of the phone.

    • Be sure to maintain slack on the fingerprint sensor cable and prevent it from being pinched.

    • During reassembly, this is a good point to power on your phone and test all functions before sealing it up. Be sure to power your phone back down completely before you continue working.

    • During reassembly, follow this guide to install custom-cut adhesives for your back cover.

    • If you replaced the fingerprint sensor, you'll need to use this software tool to make the phone recognize the new sensor.

    Pergunte ao FixBot
  9. Google Pixel 3 XL Back Cover Replacement, Remove the fingerprint sensor tape: passo 9, imagem 1 %32
    Ferramenta utilizada neste passo:
    Tweezers
    $4.99
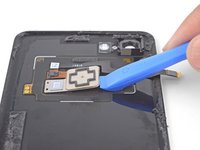
    • User tweezers to carefully peel up the yellow tape over the fingerprint sensor connector.

    Pergunte ao FixBot
  10. Google Pixel 3 XL Back Cover Replacement, Disconnect the fingerprint sensor: passo 10, imagem 1 %32 Google Pixel 3 XL Back Cover Replacement, Disconnect the fingerprint sensor: passo 10, imagem 2 %32 Google Pixel 3 XL Back Cover Replacement, Disconnect the fingerprint sensor: passo 10, imagem 3 %32
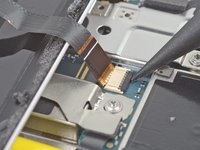
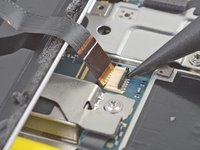
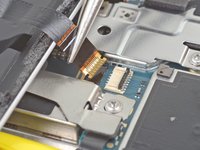
    • Use the point of a spudger to carefully flip up the black lock bar on the fingerprint sensor's ZIF socket.

    • Grasp the cable's tab with your fingers or tweezers and gently walk the flex cable out of the socket.

    • To prevent shorting, be careful not to touch the metal contacts on the flex cable with your tweezers.

    Pergunte ao FixBot
  11. Google Pixel 3 XL Back Cover Replacement, Remove the back cover: passo 11, imagem 1 %32
    • Remove the back cover.

    • Follow this guide to correctly apply new back cover adhesive.

    Pergunte ao FixBot
  12. Google Pixel 3 XL Back Cover Replacement, Heat the fingerprint sensor: passo 12, imagem 1 %32
    • Apply a heated iOpener over the fingerprint sensor for a minute.

    Pergunte ao FixBot
  13. Google Pixel 3 XL Back Cover Replacement, Pry up the fingerprint sensor: passo 13, imagem 1 %32 Google Pixel 3 XL Back Cover Replacement, Pry up the fingerprint sensor: passo 13, imagem 2 %32 Google Pixel 3 XL Back Cover Replacement, Pry up the fingerprint sensor: passo 13, imagem 3 %32
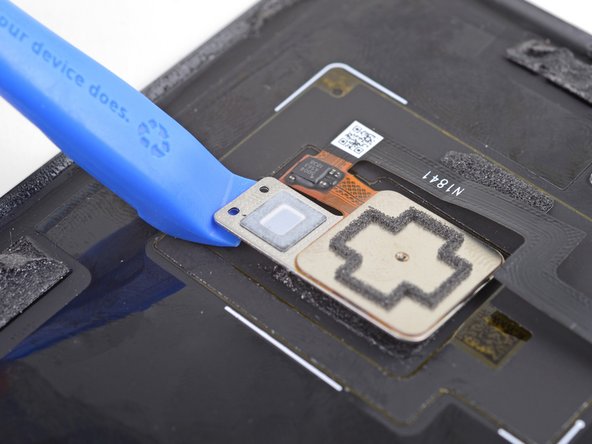
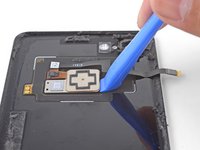
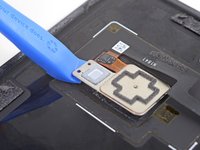
    • Insert the edge of an opening tool underneath the square portion of the fingerprint sensor and slowly pry up to loosen the sensor.

    • Continue prying around the perimeter of the fingerprint sensor until it is loosened.

    Pergunte ao FixBot
  14. Google Pixel 3 XL Back Cover Replacement, Loosen the fingerprint sensor: passo 14, imagem 1 %32
    • From the outer side of the back cover, use your finger to push the fingerprint sensor out of its cutout.

    Pergunte ao FixBot
  15. Google Pixel 3 XL Back Cover Replacement, Remove the fingerprint sensor: passo 15, imagem 1 %32
    Ferramenta utilizada neste passo:
    Tesa 61395 Tape
    $8.95
    • Remove the fingerprint sensor.

    • If you are transferring the fingerprint sensor to a new back cover, use some double-sided tape such as Tesa tape to affix it to the new panel.

    Pergunte ao FixBot
  16. Google Pixel 3 XL Back Cover Replacement, Remove the flash diffuser: passo 16, imagem 1 %32
    • Insert the edge of an opening tool underneath the plastic flash diffuser and slowly pry up to loosen the diffuser.

    • Remove the diffuser.

    Pergunte ao FixBot
  17. Google Pixel 3 XL Back Cover Replacement, Remove the rear camera bracket: passo 17, imagem 1 %32
    • Insert the edge of an opening tool underneath the camera bracket and pry up to loosen it.

    • Remove and transfer the camera bracket to your replacement part.

    • Compare your new replacement back cover to the original part. You may need to transfer additional components or remove adhesive backings from the new part before installing.

    Pergunte ao FixBot
Conclusão

To reassemble your device, follow these instructions in reverse order.

Take your e-waste to an R2 or e-Stewards certified recycler.


Repair didn’t go as planned? Try some basic troubleshooting, or ask our Answers community for help.

11 outras pessoas executaram este guia.

Arthur Shi

Membro desde: 01/03/18

335.857 Reputação

Autoria de 848 guias

Equipe

iFixit Membro de iFixit

Staff

123 Membros

Autoria de 25.719 guias

11Comentários do guia

What’s the flat pice that surrounds the fingerprint sensor? It appears to have two pieces that connect with a terminal on the logic board.

Grant Pauli - Responder Compartilhar
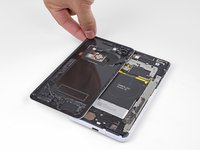
Is it the NFC reader?

Grant Pauli - Responder Compartilhar

Correct! That is the NFC coil.

Arthur Shi - Responder Compartilhar

I successfully installed the screen but accidentally broke off the gold tab sticking up from the mother board shield. It can be seen on the picture of step 11 next to the NFC connectors. Do you know what this is for and how it will affect the function of the phone?

Sal Arias - Responder Compartilhar

Hi Sal!

That tab looks to be a grounding clip, which would normally touch the fingerprint sensor bracket. I don’t think it is vital for daily function.

Arthur Shi - Responder Compartilhar

Comentar

Visualizações:

Últimas 24 horas: 4

Últimos 7 dias: 25

Últimos 30 dias: 150

Ao todo: 17,325