Introdução
Use this guide to replace the loudspeaker in an iPhone 6s.
O que você precisa
-
-
Insert a SIM card eject tool or a paperclip into the small hole in the SIM card tray.
-
Press to eject the tray.
-
-
-
Remove the two 3.4 mm P2 Pentalobe screws on the bottom edge of the iPhone, on either side of the Lightning connector.
-
-
Ferramenta utilizada neste passo:Clampy - Anti-Clamp$24.95
-
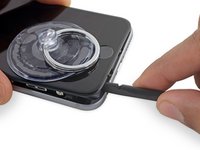
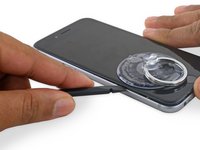
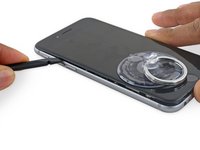
Pull the blue handle backwards to unlock the Anti-Clamp's arms.
-
Slide the arms over either the left or right edge of your iPhone.
-
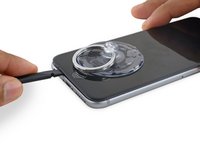
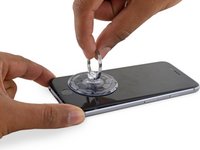
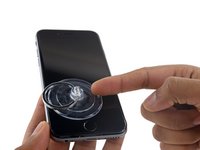
Position the suction cups near the bottom edge of the iPhone just above the home button—one on the front, and one on the back.
-
Squeeze the cups together to apply suction to the desired area.
-
-
Ferramenta utilizada neste passo:Clampy - Anti-Clamp$24.95
-
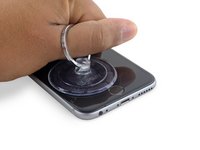
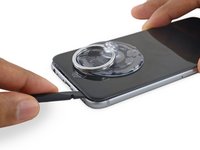
If you don't have an Anti-Clamp, follow the next three steps to use a suction handle.
-
Apply mild heat to the lower edge of the iPhone using an iOpener or hair dryer for about a minute.
-
-
-
-
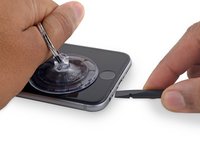
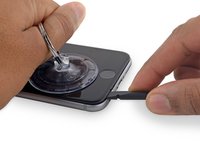
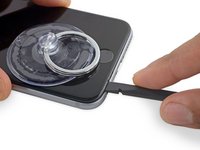
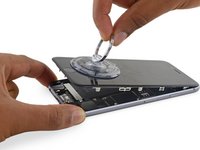
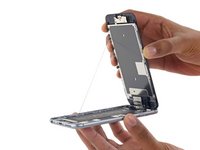
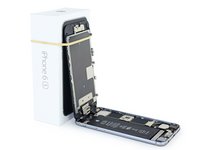
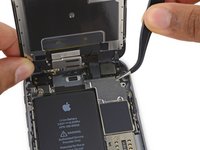
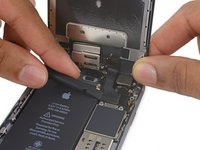
Gently grasp the display assembly and lift it up to open the phone, using the clips at the top of the front panel as a hinge.
-
Open the display to about a 90º angle, and lean it against something to keep it propped up while you're working on the phone.
-
Add a rubber band to keep the display securely in place while you work. This prevents undue strain on the display cables.
-
-
Ferramenta utilizada neste passo:Magnetic Project Mat$19.95
-
Remove two Phillips screws securing the battery connector bracket, of the following lengths:
-
One 2.9 mm screw
-
One 2.2 mm screw
-
-
-
Remove the following four Phillips screws securing the display cable bracket:
-
Three 1.2 mm screws
-
One 2.8 mm screw
-
-
-
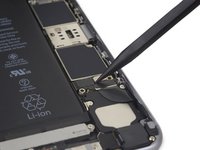
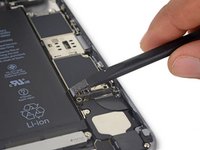
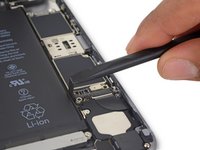
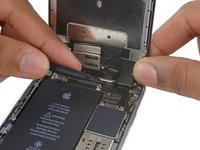
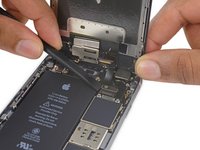
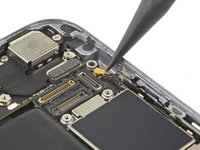
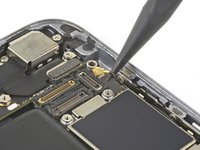
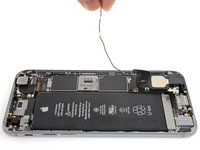
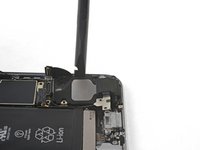
Use the point of a spudger to lift and disconnect the antenna cable from the bottom end of the logic board.
-
-
-
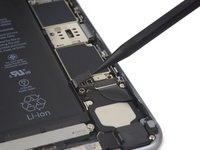
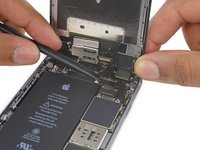
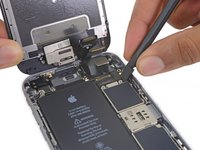
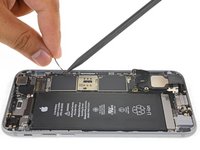
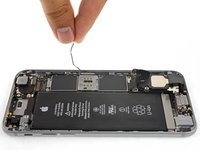
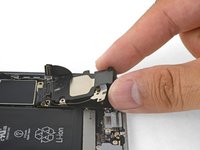
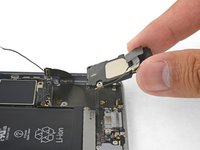
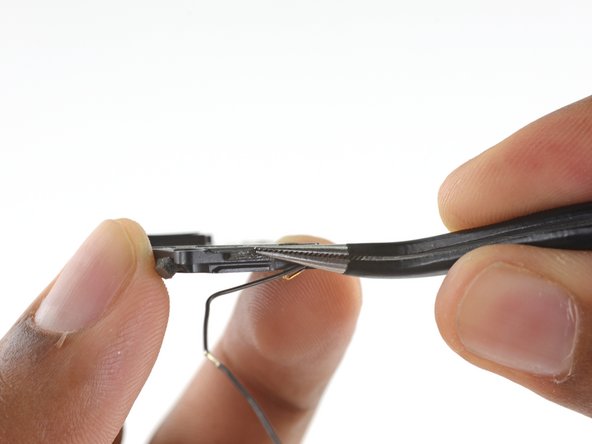
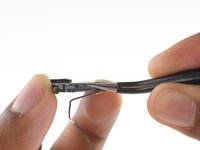
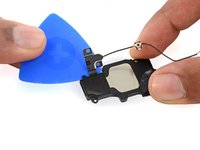
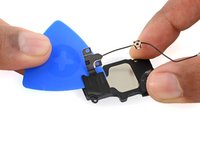
Remove the tape covering the antenna cable on the edge of the speaker.
-


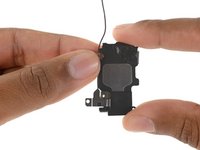
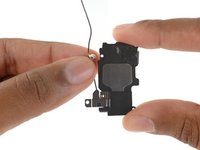


Compare your new replacement part to the original part. You may need to transfer remaining components or remove adhesive backings from the new part before installing.
To reassemble your device, follow these instructions in reverse order.
Repair didn’t go as planned? Check out our iPhone 6s Answers community for troubleshooting help.
Cancelar: não concluí este guia.
60 outras pessoas executaram este guia.


10 comentários
Skip steps 16 to 34. Those steps are unnecessary and are added work. Make sure you prop up the front display securely.
The steps as posted in this guide are far too cumbersome. This fix is super easy.. here you go
1) Complete Steps 1-15 as shown
2) Scroll all.... the way down
3) Pick it back up at step 34-53 **before putting your new speaker back in, just give the ports a cleaning with a toothpick or the tweezers provided by iFixit.
Total time was maybe 30 mins.. It's easy no worries
Is iPhone 6 Speaker compatible with an iPhone 6S?