Introdução
Use este guia para substituir o cabo do conector Lightning e da porta de áudio do seu iPhone 5c. Se você tentou limpar a porta Lightning sem sucesso, substituir o conector Lightning pode resolver problemas de carregamento e conectividade.
Você também pode usar este guia como referência ao substituir a junta de vedação do microfone.
O que você precisa
Vídeo de Apresentação
-
-
Se o vidro da tela estiver trincado, evite que os danos aumentem e previna ferimentos durante o seu reparo colocando fita adesiva sobre o vidro.
-
Aplique tiras sobrepostas de fita adesiva transparente sobre a tela do iPhone até que toda a face esteja coberta.
 Pergunte ao FixBot
-
-
-
Desligue o seu iPhone antes de iniciar a desmontagem.
-
Remova os dois parafusos Pentalobe P2 de 3,8 mm em cada lado do conector Lightning.
-
-
-
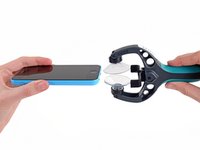
Feche a alça do iSclack, abrindo as garras das ventosas de sucção (boca única).
-
Coloque a parte inferior do seu iPhone entre as ventosas de sucção (boca única), contra o medidor de profundidade de plástico.
-
A ventosa de sucção (boca única) superior deve ficar posicionada logo acima do botão home.
-
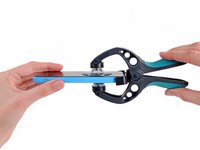
Abra as alças para fechar as garras do iSclack. Centralize as ventosas de sucção (boca única) e pressione-as firmemente na parte superior e inferior do iPhone.
-
-
-
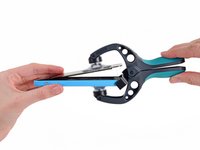
Segure o seu iPhone com firmeza e feche a alça do iSclack para separar as ventosas de sucção, puxando o painel frontal para longe da carcaça traseira.
-
O iSclack foi projetado para abrir o seu iPhone com segurança o suficiente para separar as peças, mas não o bastante para danificar qualquer cabo.
-
Pule as próximas três etapas e continue no Passo 8.
-
-
-
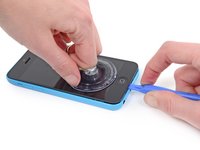
Pressione uma ventosa de sucção (boca única) na tela, logo acima do botão home.
-
-
-
Enquanto segura o iPhone com uma mão, puxe a ventosa de sucção (boca única) para cima para separar levemente o conjunto do painel dianteiro da carcaça traseira.
-
Com uma Ferramenta de abertura, comece a separar gentilmente a carcaça traseira para baixo, afastando-a do conjunto do display, enquanto puxa para cima com a ventosa de sucção (boca única).
-
-
-
Puxe a aba de plástico para liberar o selo de vácuo da ventosa de sucção (boca única).
-
Remova a ventosa de sucção (boca única) do conjunto do display.
-
-
-
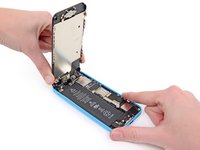
Levante a extremidade do painel do display onde se encontra o botão home para acessar os conectores próximos ao topo do celular.
-
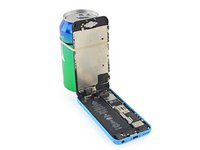
Abra o painel do display até um ângulo de 90° e apoie-o contra algo para mantê-lo sustentado enquanto trabalha no celular.
-
Em caso de necessidade, você pode usar uma lata de bebida fechada para segurar o painel do display.
-
Coloque um elástico para manter o painel do display firmemente no lugar enquanto trabalha. Isso evita tensão indevida nos cabos do painel do display.
-
-
-
Remova os dois parafusos Phillips #000 de 1,6 mm que prendem o suporte metálico do conector da bateria à placa lógica.
-
-
-
Remova o suporte metálico do conector da bateria do iPhone.
-
-
-
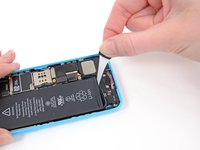
Use uma espátula ou uma unha limpa para erguer suavemente o conector da bateria do seu soquete na placa lógica.
-
-
-
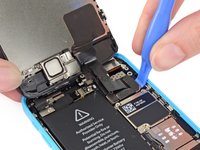
Remova os seguintes parafusos Phillips #000 que prendem o suporte do cabo do conjunto do painel dianteiro à placa lógica:
-
Dois parafusos de 1,3 mm
-
Um parafuso de 1,7 mm
-
Um parafuso de 3,25 mm
-
-
-
Remova o suporte do cabo do conjunto do painel dianteiro da placa lógica.
-
-
-
-
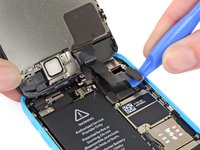
Use uma Ferramenta de abertura de plástico ou a unha para desconectar o conector do cabo da câmera frontal e dos sensores.
-
-
-
Use uma Ferramenta de abertura ou a unha para desconectar o conector do cabo do LCD.
-
-
-
Remova o conjunto do painel dianteiro da estrutura traseira.
-
-
-
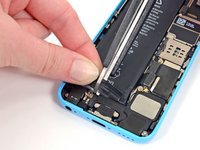
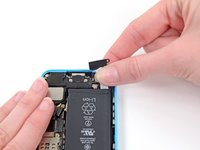
Passe a ponta de uma espátula entre a bateria e a entrada para fone de ouvido para desdobrar a aba do adesivo da bateria.
-
-
-
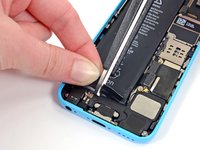
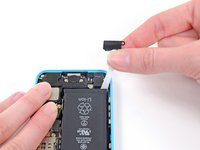
Corte a aba adesiva preta da bateria entre as duas tiras adesivas brancas, separando-as.
-
-
-
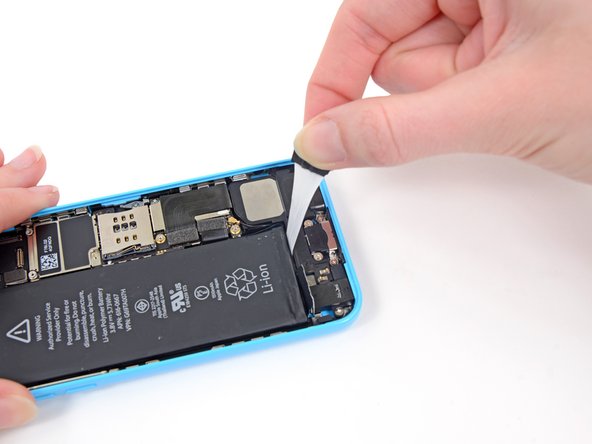
Puxe lentamente uma das faixas adesivas da bateria para longe da bateria, em direção à parte inferior do iPhone.
-
Puxe com firmeza, mantendo uma tensão constante na faixa adesiva enquanto ela desliza para fora entre a bateria e a carcaça traseira. Para obter melhores resultados, puxe a faixa adesiva em um ângulo de 60º ou menos.
-
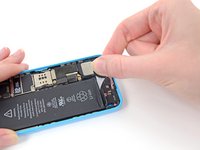
Guie a faixa adesiva cuidadosamente ao redor do canto e ao longo da lateral da bateria. Tome cuidado para não enganchá-la em nenhum dos outros componentes internos do iPhone.
-
-
Ferramenta utilizada neste passo:Tweezers$4.99
-
Remova a bateria do seu iPhone.
-
-
Ferramenta utilizada neste passo:Plastic Cards$2.99
-
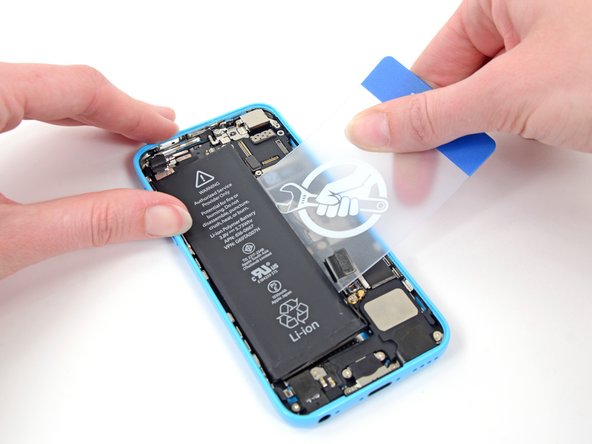
Aplique algumas gotas de álcool isopropílico (90 % ou superior) sob a bateria e deixe que ele escorra ao redor do adesivo para ajudar a enfraquecê-lo. O álcool isopropílico de alta concentração atua como um solvente e seca sem deixar resíduos, portanto, não danificará o seu iPhone.
-
Insira cuidadosamente um cartão de plástico sob a bateria no lado mais próximo da placa lógica.
-
Deslize o cartão da parte superior da bateria para a inferior, empurrando em direção à borda da carcaça.
-
-
-
Se a bateria ainda estiver presa à estrutura, siga nossas [instruções de aquecimento com o iOpener|11677|iOpener heating instructions] ou use um secador de cabelo para aquecer o adesivo que prende a bateria à estrutura traseira.
-
Coloque o iOpener sobre a parte de trás do iPhone, à direita da câmera. Alise-o para que haja um bom contato entre a parte de trás do iPhone e o iOpener.
-
Deixe a bolsa sobre o iPhone por aproximadamente 90 segundos antes de tentar remover a bateria.
-
Se estiver usando um secador de cabelo ou uma pistola de ar quente, aqueça a parte de trás do iPhone até que ela fique levemente quente demais para tocar.
-
-
-
Levante e remova a bateria do iPhone.
-
Cole a bateria, desconecte-a e continue a remontagem do seu dispositivo.
-
-
-
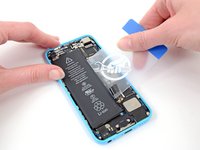
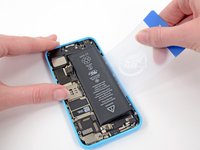
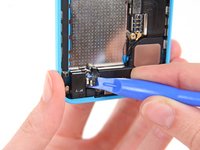
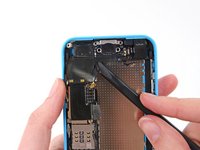
Use uma Ferramenta de abertura de plástico para descolar o cabo de contato à mola do botão home da carcaça do alto-falante.
-
-
-
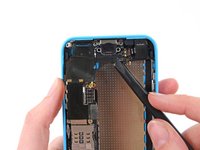
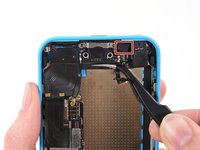
Remova os parafusos a seguir que prendem o gabinete do alto-falante à carcaça traseira:
-
Dois parafusos Phillips #000 de 2,7 mm
-
Um parafuso Phillips #000 de 2,2 mm
-
-
-
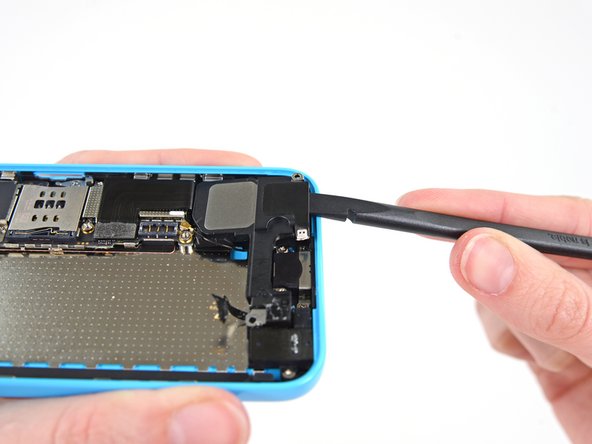
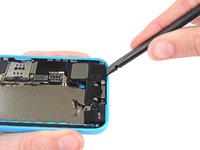
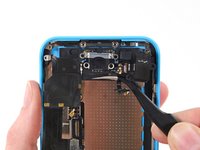
Use a ponta chata da espátula para levantar com cuidado o compartimento do alto-falante da carcaça traseira.
-
-
-
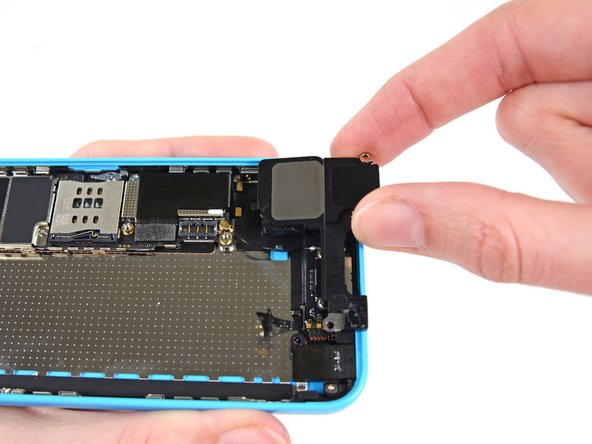
Remova a caixa do alto-falante. Tenha cuidado para não prendê-la no cabo da antena.
-
-
-
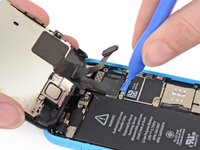
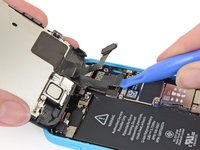
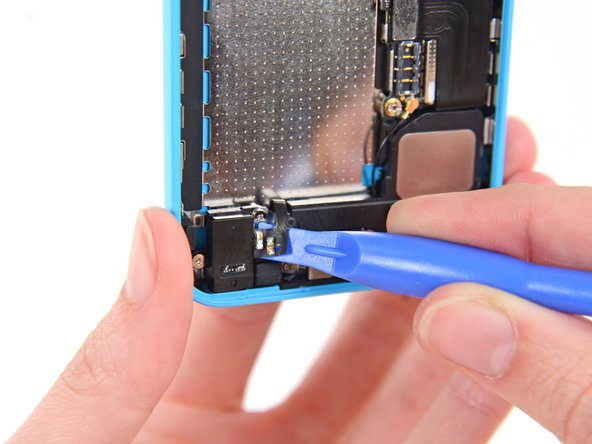
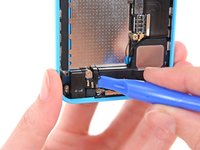
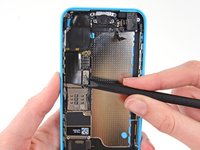
Use uma Ferramenta de abertura de plástico para desconectar o cabo plano do conector Lightning de seu soquete na placa lógica.
-
-
-
O cabo do conector Lightning está levemente colado a uma blindagem na placa lógica. Use a extremidade plana de uma espátula para desgrudar o cabo com cuidado.
-
-
-
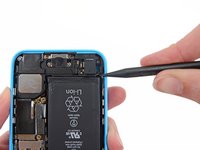
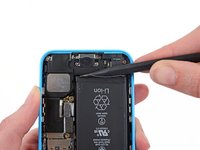
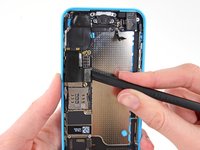
Desconecte o conector da antena de celular da base da placa lógica.
-
-
-
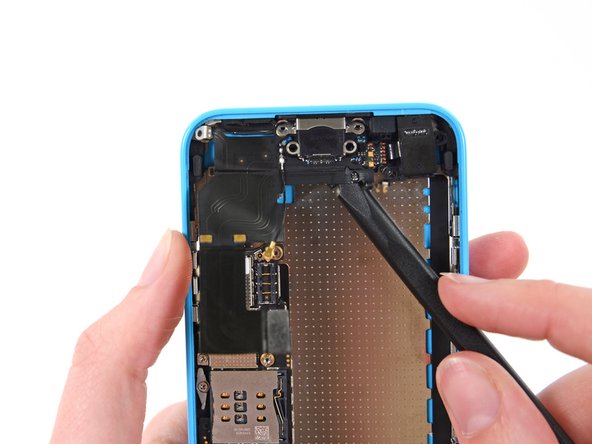
Remova os seguintes parafusos que prendem o conector Lightning à carcaça traseira:
-
Dois parafusos Phillips #000 de 3,4 mm
-
Um parafuso Phillips #000 de 2,2 mm
-
Um parafuso Phillips #000 de 2,7 mm
-
-
-
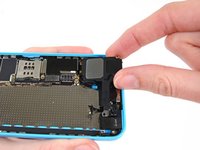
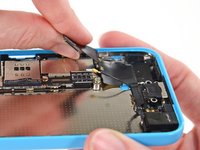
Descole suavemente o conjunto do conector Lightning da carcaça traseira.
-
-
-
Talvez seja necessário usar a ponta chata de uma espátula para soltar completamente o conjunto.
-
-
-
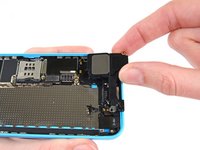
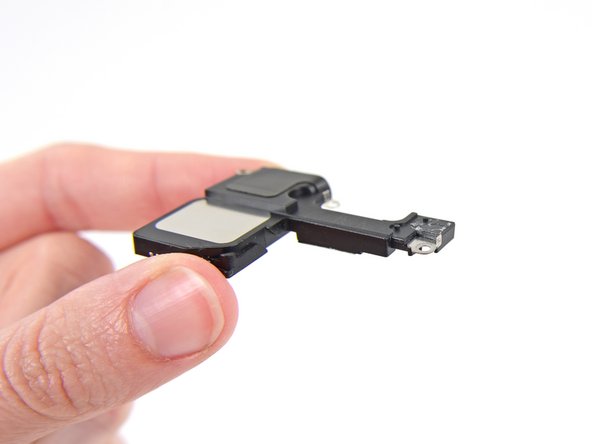
Remova o conjunto do conector Lightning.
-
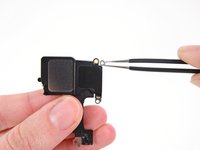
Há uma pequena junta de vedação de borracha presa ao microfone. Certifique-se de transferi-la para o novo conjunto.
-


Para a remontagem de seu dispositivo, siga estas instruções na ordem inversa.
Cancelar: não concluí este guia.
147 outras pessoas executaram este guia.
Um agradecimento especial a esses tradutores:
100%

Translation Bot está nos ajudando a consertar o mundo! Quer contribuir?
Comece a traduzir ›


22Comentários do guia
I fix it. Tomorrow I was got my packet from ifixit.com with lightning assembly and today my iPhone 5c can charge again.
And I would like to tell you several words about a process:
1. Thanks Ifixit for the tools - pentalope screwdriver and a magnet mat - it was great
2. All was simple with a step by step instructions on site.
3. IMPORTANT!!!! Unnecessary to remove a battery before the Lightning assembly replace - replacement possible without it)))
4. Don't forget to remove a rubber head from an old microphone - new hasn't such part.
5. Don't forget to lay an antenna cable properly when install a speaker back.
6. All the parts are very small - a magnifying glass required)))
7. I was made it for 1 hour )))
Tried to fix a faulty headphone jack now with the new part, headphones arent recognised at all...
Thanks for any advice
THOSE CHANGING JUST THE DOCK CONNECTOR!
Important! Steps 14, 15, and 19 through 28 are totally unnecessary. The SIM card is fine where it is, and the battery does not need to be removed to access everything. I would recommend disconnecting the battery connector while working, however.
Also, be careful with the little antenna where it connects to the dock connector flex. Mine broke off and had to be resoldered, but I bought the part on eBay.
Thanks for your feedback! We went ahead and removed the SIM card steps. It may be helpful to remove the battery in order to get enough clearance to separate the Lightning cable assembly from the rear case, but folks are certainly welcome to skip those steps if they are comfortable doing so. :)
It is certainly not necessary to remove the battery in order to do this repair. I do not recommend following those steps.