Esta versão pode conter edições incorretas. Mude para o último instantâneo verificado.
O que você precisa
-
Este passo não foi traduzido. Ajude a traduzi-lo
-
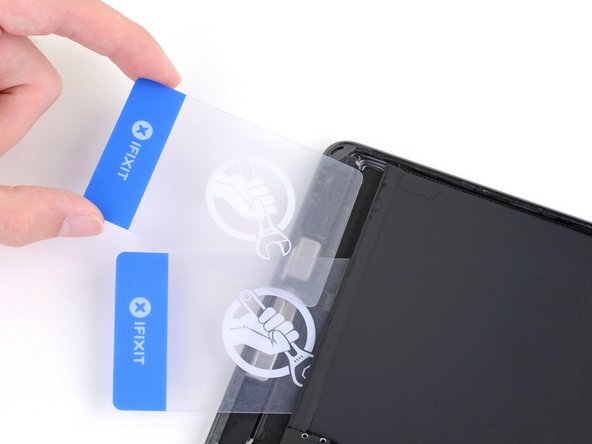
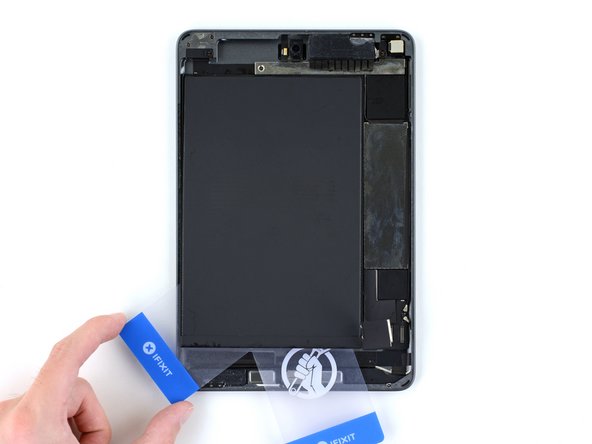
If your display glass is cracked, keep further breakage contained and prevent bodily harm during your repair by taping the glass.
-
Lay overlapping strips of clear packing tape over the iPad's display until the whole face is covered.
-
Do your best to follow the rest of the guide as described. However, once the glass is broken, it will likely continue to crack as you work, and you may need to use a metal prying tool to scoop the glass out.
-
-
Este passo não foi traduzido. Ajude a traduzi-lo
-
Heat an iOpener and apply it to the left edge for two minutes.
-
-
Este passo não foi traduzido. Ajude a traduzi-lo
-
Apply a suction cup halfway up the heated side.
-
Be sure the cup is completely flat on the screen to get a tight seal.
-
While holding the iPad down with one hand, pull up on the suction cup with strong, steady force to create a gap.
-
-
Este passo não foi traduzido. Ajude a traduzi-lo
-
While holding the glass up with the suction cup, insert the point of an opening pick into the gap between the glass and body of the iPad.
-
-
Este passo não foi traduzido. Ajude a traduzi-lo
-
Reheat and reapply the iOpener to the left edge for a few minutes.
-
-
Este passo não foi traduzido. Ajude a traduzi-lo
-
Insert a second opening pick alongside the first and slide the pick down along the edge of the iPad, releasing the adhesive as you go.
-
-
Este passo não foi traduzido. Ajude a traduzi-lo
-
Continue moving the opening pick down the side of the display to release the adhesive.
-
If the opening pick gets stuck in the adhesive, "roll" the pick along the side of the iPad, continuing to release the adhesive.
-
-
Este passo não foi traduzido. Ajude a traduzi-lo
-
Take the first pick you inserted and slide it up toward the top corner of the iPad.
-
-
Este passo não foi traduzido. Ajude a traduzi-lo
-
Reheat the iOpener and place it on the top edge of the iPad, over the front-facing camera.
-
If you have a flexible iOpener, you can bend it to heat both the upper left corner and the upper edge at the same time.
-
-
Este passo não foi traduzido. Ajude a traduzi-lo
-
Slide the opening pick around the top left corner of the iPad to separate the adhesive.
-
-
Este passo não foi traduzido. Ajude a traduzi-lo
-
Slide the opening pick along the top edge of the iPad, stopping just before you reach the camera.
-
As you reach the front-facing camera, pull the pick out slightly and continue sliding it across the top edge.
-
-
Este passo não foi traduzido. Ajude a traduzi-lo
-
Leave the opening pick in the iPad slightly past the front-facing camera.
-
Take a second pick and insert it to the left of the camera, where the first pick just was. Slide it back to the corner to completely cut any remaining adhesive.
-
Leave the second pick in place to prevent the corner adhesive from re-sealing as it cools.
-
-
Este passo não foi traduzido. Ajude a traduzi-lo
-
Insert the previous pick deeper into the iPad and slide it away from the camera toward the corner.
-
-
-
Este passo não foi traduzido. Ajude a traduzi-lo
-
Leave the three picks in the corners of the iPad to prevent re-adhering of the front panel adhesive.
-
Reheat the iOpener and place it on the remaining long side of the iPad—along the volume and lock buttons.
-
-
Este passo não foi traduzido. Ajude a traduzi-lo
-
Insert a new opening pick and slide it down the right edge of the iPad, releasing the adhesive as you go.
-
-
Este passo não foi traduzido. Ajude a traduzi-lo
-
Continue sliding the opening pick down the right edge of the iPad, reheating the edge using an iOpener if necessary.
-
-
Este passo não foi traduzido. Ajude a traduzi-lo
-
Leave the opening picks in place and reheat the iOpener.
-
Set the reheated iOpener on the home button end of the iPad and let it rest for a few minutes to soften the adhesive beneath the glass.
-
-
Este passo não foi traduzido. Ajude a traduzi-lo
-
Insert a new opening pick at the bottom right corner of the display, below the last opening pick you used to slice down the right edge.
-
Rotate the new pick around the lower right corner of the device.
-
-
Este passo não foi traduzido. Ajude a traduzi-lo
-
Slide the pick from the bottom right corner along the lower edge of the device. Stop about half an inch shy of the home button.
-
-
Este passo não foi traduzido. Ajude a traduzi-lo
-
Insert a final opening pick at the lower left corner of the iPad, directly below the existing one.
-
-
Este passo não foi traduzido. Ajude a traduzi-lo
-
Slide the pick around the lower left edge of the iPad.
-
-
Este passo não foi traduzido. Ajude a traduzi-lo
-
Continue sliding the pick at the lower left edge of the display toward the center of the iPad, until it is roughly half an inch from the home button.
-
-
Este passo não foi traduzido. Ajude a traduzi-lo
-
Twist the two picks at the top edge of the iPad to break up the last of the adhesive holding the display assembly in place.
-
Lift the display from the top edge to open the device.
-
-
Este passo não foi traduzido. Ajude a traduzi-lo
-
To avoid stressing any cables, hold the screen perpendicular to the frame.
-
-
Este passo não foi traduzido. Ajude a traduzi-lo
-
Use a Phillips screwdriver to remove the two 1.3 mm screws securing the display cable bracket.
-
-
Este passo não foi traduzido. Ajude a traduzi-lo
-
Lower the screen to about 30 degrees above the frame.
-
-
Este passo não foi traduzido. Ajude a traduzi-lo
-
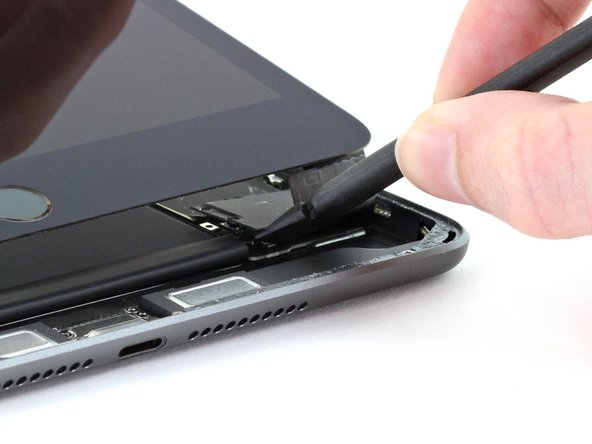
Insert the flat end of a spudger under the display cable bracket and lift up to disconnect the battery press connector from the logic board.
-
-
Este passo não foi traduzido. Ajude a traduzi-lo
-
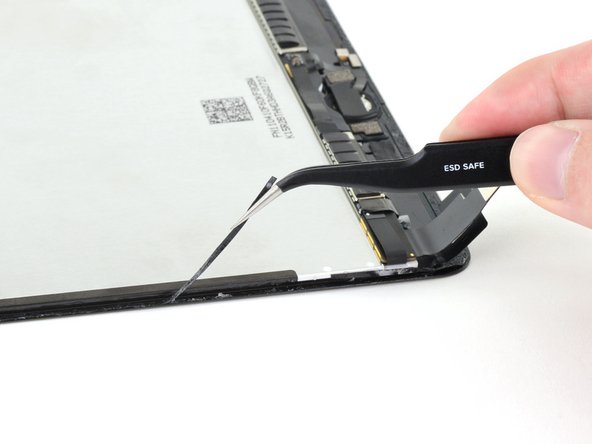
Use a pair of tweezers to pull the display cable bracket's clip out from under the frame's edge.
-
Rotate the display cable bracket toward the battery.
-
-
Este passo não foi traduzido. Ajude a traduzi-lo
-
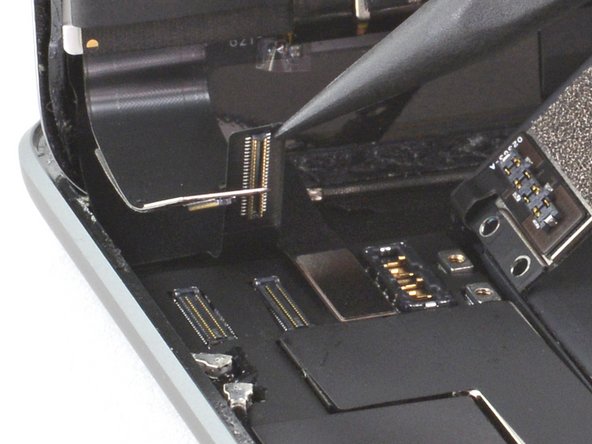
Use the pointed end of a spudger to disconnect the digitizer press connector from the logic board.
-
-
Este passo não foi traduzido. Ajude a traduzi-lo
-
Use the pointed end of a spudger to disconnect the second and third display press connectors.
-
-
Este passo não foi traduzido. Ajude a traduzi-lo
-
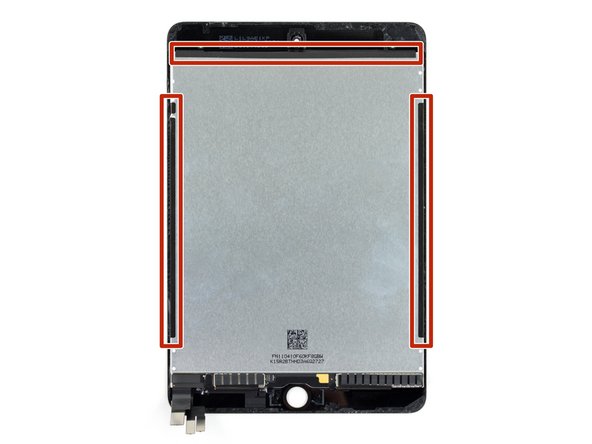
Don't remove the black tape on the left, right, and upper edges of the display. These hold the display to the front glass.
-
-
Este passo não foi traduzido. Ajude a traduzi-lo
-
The adhesive is laid out as shown: two strips along the long edges, and two shorter strips perpendicular in the center.
-
-
Este passo não foi traduzido. Ajude a traduzi-lo
-
Apply a few drops of high-concentration (90% or higher) isopropyl alcohol around the perimeter of the battery.
-
Wait two minutes for the isopropyl alcohol to weaken the adhesive underneath the battery.
-
-
Este passo não foi traduzido. Ajude a traduzi-lo
-
Insert the corner of a plastic card between the lower end of the battery and the frame.
-
Press the card until approximately an inch and a half of it is underneath the battery.
-
-
Este passo não foi traduzido. Ajude a traduzi-lo
-
Insert a second plastic card between the battery and first card, this time with the card edge parallel to the battery.
-
Press the card in until about an inch and a half of it is underneath the battery.
-
-
Este passo não foi traduzido. Ajude a traduzi-lo
-
Rotate the second plastic card around the bottom left corner under the battery.
-
Slide the second plastic card up the left edge of the battery toward the top left corner.
-
-
Este passo não foi traduzido. Ajude a traduzi-lo
-
Lift and remove the battery.
-
Remove the old adhesive and residue from the battery well.
-
If your replacement battery doesn't come with replacement adhesive, apply stretch release adhesive strips, double sided adhesive tape, or pre-cut adhesive in the iPad's battery well.
-
Peel away any tape liners to expose the adhesive.
-
Lay the battery on the adhesive and press firmly.
-


Cancelar: não concluí este guia.
5 outras pessoas executaram este guia.

2 comentários
This whole battery replacement took more than 4 hours. Most of the time was devoted to cleaning the surfaces on both halves of the iPad. The other reason for the time of repair is probably due to my age (mid-70's) and the poor dexterity and eyesight that comes with old age. I bought the appropriate adhesive strips to bond the top case to the bottom but the instructions left much to my imagination. The 3 pieces adhesive installation needs to be updated to match their currently available product.
Thanks, I’m 82. I’ve replaced the battery in my iPhone so I’m somewhat familiar with the general process. I’ll need to fix the iPad mini when my wife isn’t playing her games - hope I can get it done before she starts having withdrawal!