Introdução
Use this guide to replace a cracked or malfunctioning display on your Samsung Galaxy Tab S3 tablet (identified with model number SM-T820).
The display assembly is the output component to present information and is made up of the glass panel, digitizer, and AMOLED display sandwiched together. Your display may need to be replaced if the glass cracks or is broken because this will affect its touch screen capabilities. It could also experience something called “screen burn-in” that happens on AMOLED displays. “Screen burn-in” is when some of the individual light-emitting pixels powering the display will dim the more they are used, causing uneven lighting and colors.
In step 1 of this guide, you will need to use the iOpener, which is a microwavable heating tool used to loosen adhesive attached to the display. Carefully follow the iOpener heating instructions to avoid burning yourself. If your display is shattered, follow this guide to reinforce your screen to avoid injury until you replace the display. Make sure to power off your laptop completely and disconnect from any external power source prior to beginning this guide.
O que você precisa
-
-
-
To soften the adhesive holding the tablet together, heat up the edges of the glass panel using a heated iOpener on the edge of the device. Alternatively you can use a heat gun to loosen the adhesive.
-
Leave the iOpener on edge for two minutes.
 Pergunte ao FixBot
-
-
-
Place a suction cup near edge that you heated up with the iOpener.
-
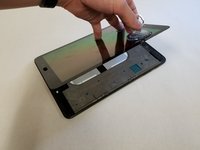
Press down on the suction cup to create a seal, and pull up with force to create a separation between the display and the midframe.
-
Use an opening tool to split apart the glass panel from the midframe.
-
-
-
Ferramenta utilizada neste passo:Plastic Cards$2.99
-
As you continue along the edge using the opening tool, use a plastic card to keep the glass separate from the midframe.
-
-
-
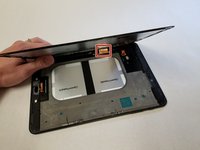
Pull off the glass panel using the suction cup.
-
Carefully disconnect the ribbon cable connecting the display assembly to the motherboard. You can disconnect this ribbon from either end.
-
-
-
Repeat steps 3 through 7 to remove the rear glass panel on the opposite side of the device.
-
-


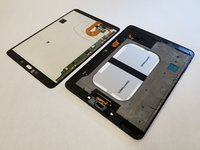


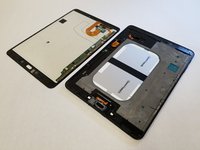
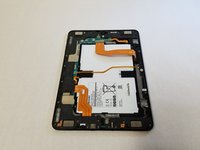
To reassemble your device, follow these instructions in reverse order. If you have removed too much adhesive, you may need to apply more during the reassembly process.
Cancelar: não concluí este guia.
7 outras pessoas executaram este guia.

Equipe

Cal Poly, Team S22-G4, Maness Spring 2018 Membro de Cal Poly, Team S22-G4, Maness Spring 2018
CPSU-MANESS-S18S22G4
5 Membros
Autoria de 15 guias
6Comentários do guia
Thank you so much, It helped me so much.
What if the digitizer is ok and only the glass cover is cracked
if you need more adhesive what is the right type to buy? Want to have some on hand before I open my S3 up.
If my screen freezing exactly half, can that be the connection cable damaged.? It's look like it happens every time I touch or hold the corner where the volume and power buttons are. Never dropped it.
I also have the same issue
How your issue was resolved.
