Introdução
This guide shows how to remove and replace the dual rear camera module for the Samsung Galaxy S10e.
You’ll need to remove the motherboard in order to disconnect the camera module.
O que você precisa
-
-
Insert a SIM card eject tool, bit, or a straightened paperclip into the small hole in the SIM card tray.
-
Press firmly to eject the tray.
-
-
-
Turn your phone off completely before you begin this repair.
-
Prepare an iOpener and heat the back of the phone along the right edge for about two minutes. This will help soften the adhesive securing the back cover.
-
-
-
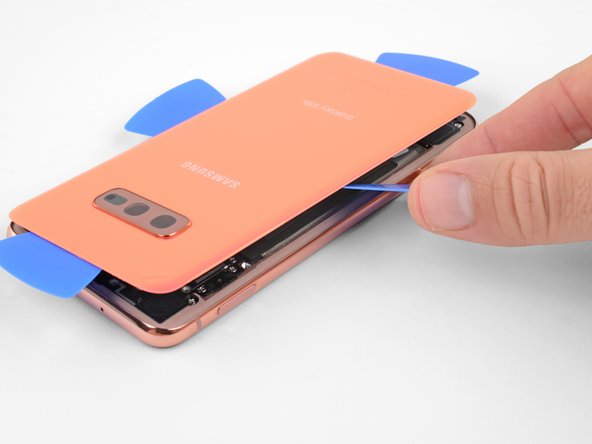
In the following steps, you'll be cutting through the adhesive securing the back cover.
-
As seen from the outside of the phone, you'll be slicing through the adhesive in the highlighted areas.
-
The adhesive is the thinnest on the right side of the phone, just below the Bixby button.
-
-
-
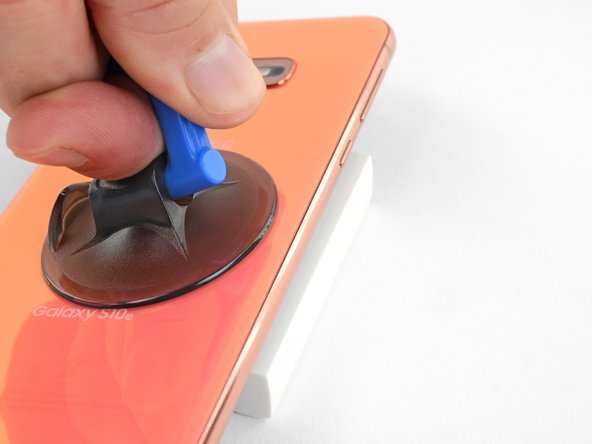
Secure a suction cup to the back cover, as close to the heated edge as possible, just under the Bixby button where the adhesive is thinnest.
-
-
-
Prop up the heated edge of the phone on something that is about 0.5 inches (13 mm) thick. This will angle the phone so that the opening tool is easier to insert.
-
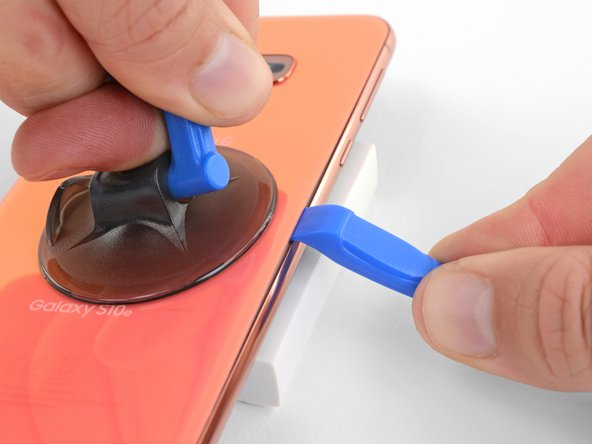
Lift the back cover's right edge with your suction cup, opening a slight gap between the back cover and the frame.
-
This may require a significant amount of force. If you have trouble, apply more heat to further soften the adhesive, and try again. The adhesive cools very fast, so you may need to heat it repeatedly.
-
Press the edge of an opening tool into the gap.
-
-
-
-
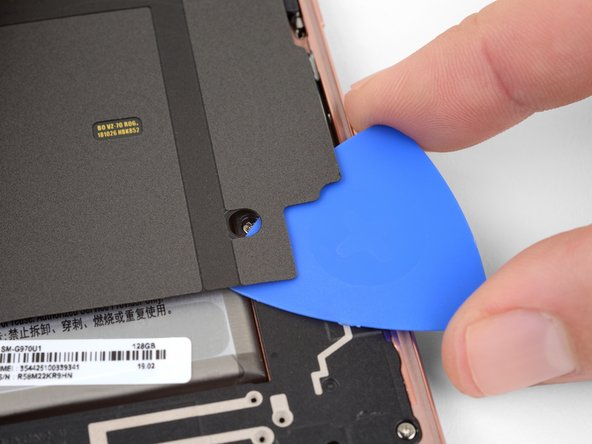
Remove the eight 3.9 mm Phillips screws securing the upper midframe to the phone.
-
-
-
Use the flat end of a spudger to pry the battery connector straight up from its socket and disconnect it.
-
-
-
Use a Phillips driver to remove the seven 3.9 mm screws securing the loudspeaker.
-
-
-
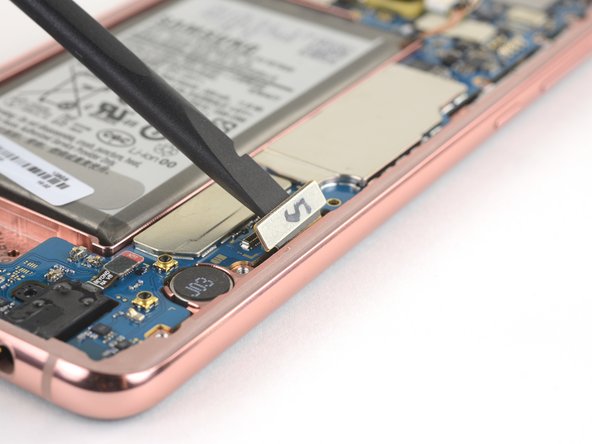
Use the flat end of a spudger to pry up and disconnect the screen connector from its motherboard socket.
-
-
-
Use a spudger to pry up and disconnect the front facing camera connector from its motherboard socket.
-
-
-
Use the point of a spudger to pry up and disconnect the fingerprint sensor connector from its motherboard socket.
-
-
-
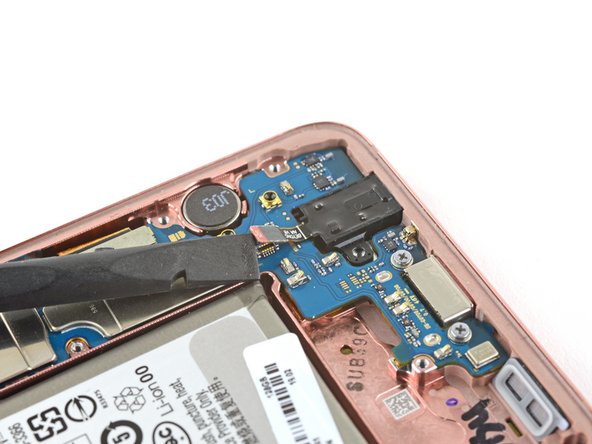
Use a spudger to pry up and disconnect the headphone jack connector from its motherboard socket.
-
-
-
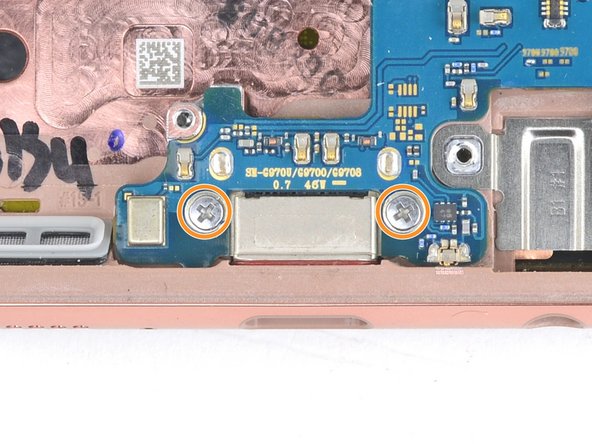
Use a Phillips driver to remove the three screws securing the motherboard:
-
One 3.7 mm screw above the rear-facing camera
-
Two 3.7 mm screws flanking the USB-C port
-
-
-
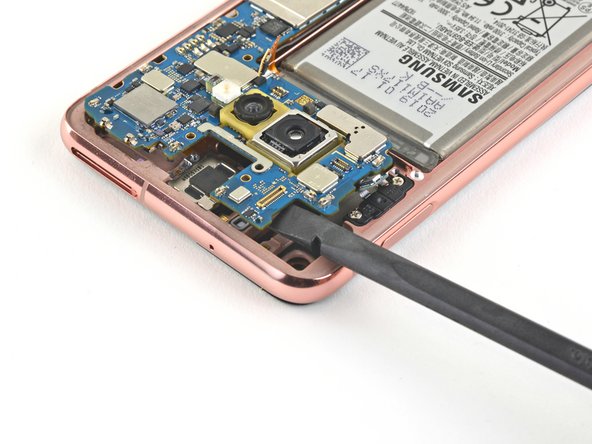
Use your fingers to lift the top edge of the motherboard out of the frame.
-
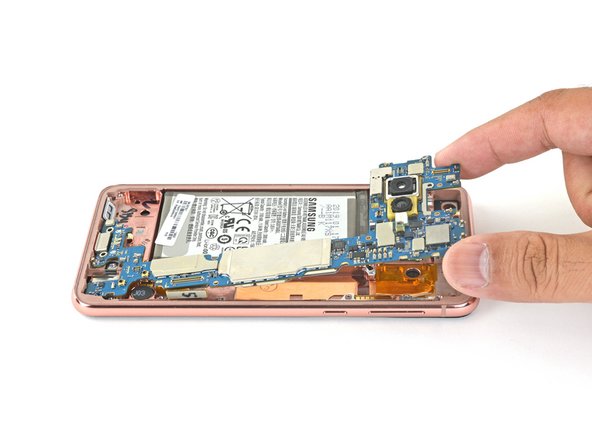
Gently pull the motherboard towards the top of the frame to release the lightly adhered USB-C port.
-
Remove the motherboard.
-
Seat the USB-C port end of the motherboard firmly against the bottom frame edge.
-
Lay the motherboard into the frame and make sure not to trap any connectors underneath it.
-
-
-
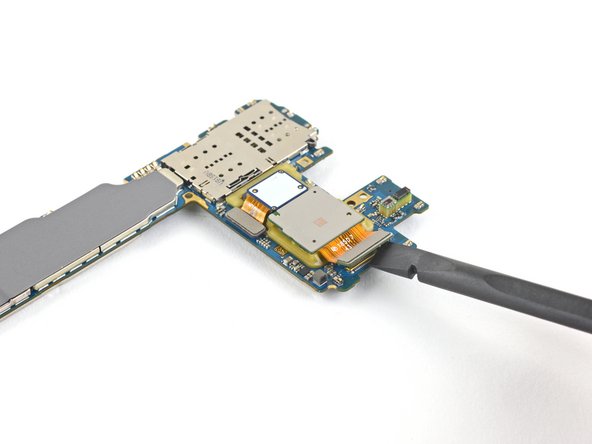
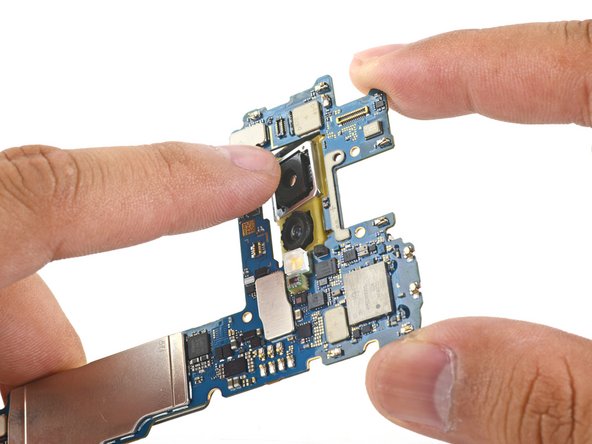
Flip the motherboard over.
-
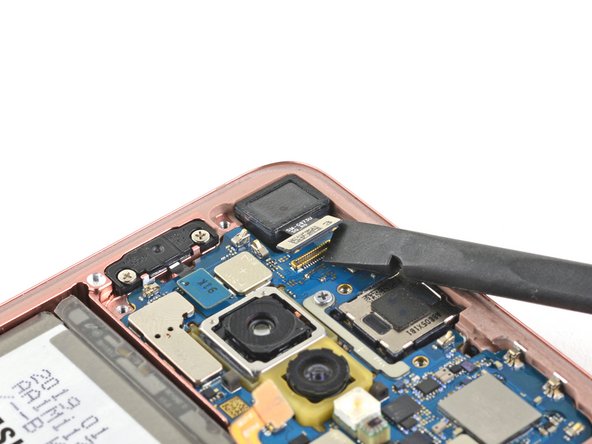
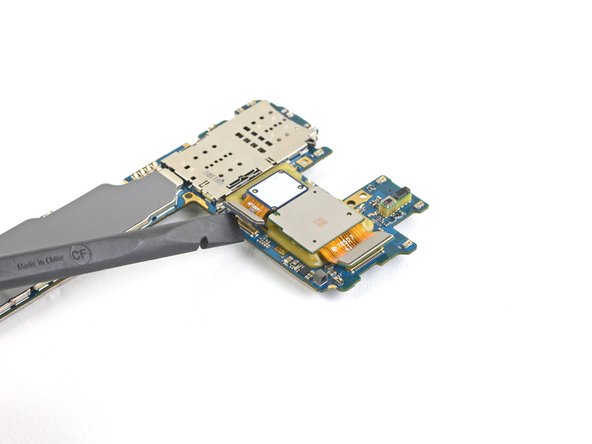
Use a spudger to pry up and disconnect the two camera connectors from their motherboard sockets.
-
-
-
Apply a heated iOpener to the camera module for one minute to loosen the adhesive.
-


Compare your new replacement part to the original part. You may need to transfer remaining components or remove adhesive backings from the new part before you install it.
To reassemble your device, follow these instructions in reverse order.
Take your e-waste to an R2 or e-Stewards certified recycler.
After you've completed the repair, follow this guide to test your repair.
Repair didn’t go as planned? Try some basic troubleshooting, or ask our Answers community for help.
Cancelar: não concluí este guia.
Uma outra pessoa concluiu este guia.


3 comentários
Excellent instructions!!! Worked perfectly for me!!!
Great guide! Reinstalling the mb was a little wonky with more pressure to put back into place than I would like haha
After following this guide and replacing the camera, opening the default Camera app gives "Warning: Camera Failed" and forces it closed. The camera will still work in other apps (Snapchat, Facebook, even downloaded a 3rd party Camera app, etc.) but not on the default app. Attempted to reset app settings, permissions, and booted into safe mode. Could not update because no update was available. Did everything short of factory resetting the phone. Nothing will get the default Camera app to load, despite the cameras working well.
Anyone have any ideas as to a solution?