Ir para o conteúdo principal
Participe da comunidade de reparos - Criar conta

Samsung Galaxy A15 Screen Assembly Replacement

O que você precisa

  1. Samsung Galaxy A15 Screen Assembly Replacement, Prepare the phone for disassembly: passo 1, imagem 1 %32 Samsung Galaxy A15 Screen Assembly Replacement, Prepare the phone for disassembly: passo 1, imagem 2 %32 Samsung Galaxy A15 Screen Assembly Replacement, Prepare the phone for disassembly: passo 1, imagem 3 %32
    • Let the phone's battery drain below 25% before starting this repair. A charged lithium-ion battery may catch fire if damaged.

    • Unplug all cables and completely power off the phone.

    • Press and hold the power and volume down buttons at the same time to bring up the shutdown menu.

    Pergunte ao FixBot

    Comentar

  2. Samsung Galaxy A15 Screen Assembly Replacement, Heat the right edge: passo 2, imagem 1 %32
    • Heat an iOpener and apply it to the right edge of the back cover for two minutes.

    • A hair dryer may also be used, but be careful not to overheat the phone—the display, internal battery, and plastic back are susceptible to heat damage. The phone should be just too hot to touch comfortably.

    Pergunte ao FixBot

    Comentar

  3. Samsung Galaxy A15 Screen Assembly Replacement: passo 3, imagem 1 %32
    • While you're waiting for the adhesive to soften, here is some useful information:

    • There's adhesive securing the back cover around the perimeter of the frame.

    • There is an additional layer of adhesive towards the bottom of the phone. Apart from this area, you should not be deeper than 4 mm from the edge.

    Pergunte ao FixBot

    Comentar

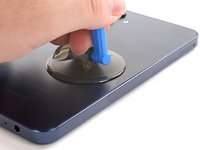
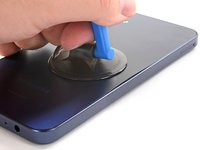
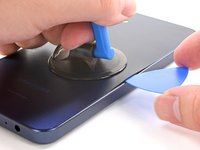
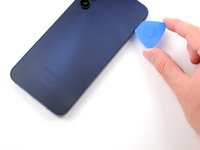
  4. Samsung Galaxy A15 Screen Assembly Replacement, Insert an opening pick: passo 4, imagem 1 %32 Samsung Galaxy A15 Screen Assembly Replacement, Insert an opening pick: passo 4, imagem 2 %32 Samsung Galaxy A15 Screen Assembly Replacement, Insert an opening pick: passo 4, imagem 3 %32
    • Apply a suction handle to the back cover, as close to the center of the right edge as possible.

    • Pull up on the suction handle with strong, steady force to create a gap between the cover and the frame.

    • If you have trouble, apply more heat to further soften the adhesive.

    • Insert an opening pick into the gap.

    Pergunte ao FixBot

    Comentar

  5. Samsung Galaxy A15 Screen Assembly Replacement, Slice the adhesive: passo 5, imagem 1 %32 Samsung Galaxy A15 Screen Assembly Replacement, Slice the adhesive: passo 5, imagem 2 %32 Samsung Galaxy A15 Screen Assembly Replacement, Slice the adhesive: passo 5, imagem 3 %32
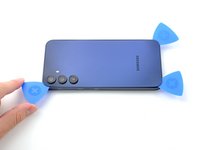
    • Slide the opening pick along the right edge between the back cover and the frame to slice through the adhesive.

    • Leave the opening pick in the bottom right corner to keep the adhesive from resealing.

    Pergunte ao FixBot

    Comentar

  6. Samsung Galaxy A15 Screen Assembly Replacement: passo 6, imagem 1 %32
    • Reheat your iOpener and apply it to the bottom of the back cover for two minutes.

    Pergunte ao FixBot

    Comentar

  7. Samsung Galaxy A15 Screen Assembly Replacement: passo 7, imagem 1 %32 Samsung Galaxy A15 Screen Assembly Replacement: passo 7, imagem 2 %32 Samsung Galaxy A15 Screen Assembly Replacement: passo 7, imagem 3 %32
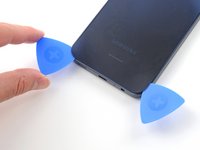
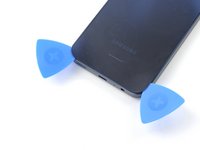
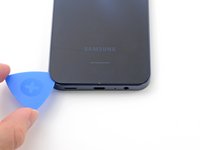
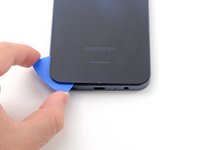
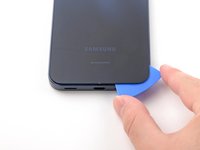
    • Insert another opening pick in the bottom right corner and slide it along the bottom edge to slice through the adhesive.

    • Leave this opening pick in the bottom left edge to prevent the adhesive from resealing.

    Pergunte ao FixBot

    Comentar

  8. Samsung Galaxy A15 Screen Assembly Replacement: passo 8, imagem 1 %32
    • Reheat your iOpener and apply it to the left side of the back cover for two minutes.

    Pergunte ao FixBot

    Comentar

  9. Samsung Galaxy A15 Screen Assembly Replacement: passo 9, imagem 1 %32 Samsung Galaxy A15 Screen Assembly Replacement: passo 9, imagem 2 %32 Samsung Galaxy A15 Screen Assembly Replacement: passo 9, imagem 3 %32
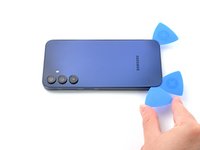
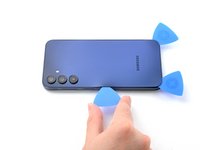
    • Insert another opening pick in the bottom left corner and slide it along the left edge to slice through the adhesive.

    • Leave this opening pick in the top left corner to prevent the adhesive from resealing.

    • Only insert the pick up to 4 mm deep to avoid damaging the rear cameras or flash.

    Pergunte ao FixBot

    Comentar

  10. Samsung Galaxy A15 Screen Assembly Replacement: passo 10, imagem 1 %32
    • Reheat your iOpener and apply it to the top of the back cover for two minutes.

    Pergunte ao FixBot

    Comentar

  11. Samsung Galaxy A15 Screen Assembly Replacement: passo 11, imagem 1 %32 Samsung Galaxy A15 Screen Assembly Replacement: passo 11, imagem 2 %32
    • Insert another opening pick in the top left corner at the same depth and slide it along the top edge to slice through the adhesive.

    • Leave this opening pick in the top right corner to prevent the adhesive from resealing.

    Pergunte ao FixBot

    Comentar

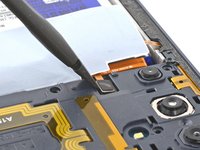
  12. Samsung Galaxy A15 Screen Assembly Replacement, Unfasten the camera clips: passo 12, imagem 1 %32 Samsung Galaxy A15 Screen Assembly Replacement, Unfasten the camera clips: passo 12, imagem 2 %32 Samsung Galaxy A15 Screen Assembly Replacement, Unfasten the camera clips: passo 12, imagem 3 %32
    • Insert an opening pick along the top edge of the phone and twist it gently to unfasten the camera clips.

    • Slide the opening pick around the edge of the camera modules to unfasten the remaining camera clips.

    • Only insert the pick up to 4 mm to avoid damaging the rear cameras or flash.

    Pergunte ao FixBot

    Comentar

  13. Samsung Galaxy A15 Screen Assembly Replacement, Slice remaining adhesive: passo 13, imagem 1 %32 Samsung Galaxy A15 Screen Assembly Replacement, Slice remaining adhesive: passo 13, imagem 2 %32 Samsung Galaxy A15 Screen Assembly Replacement, Slice remaining adhesive: passo 13, imagem 3 %32
    • Once the adhesive around the edges is loose, insert an opening pick deeper into the bottom edge from the bottom left corner.

    • Slide the pick deeper into the phone across the bottom edge, slicing the remaining adhesive.

    Pergunte ao FixBot

    Comentar

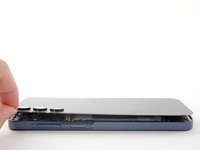
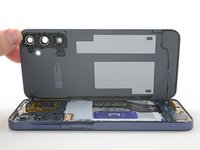
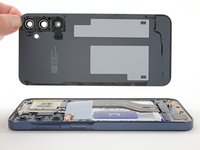
  14. Samsung Galaxy A15 Screen Assembly Replacement, Remove the back cover: passo 14, imagem 1 %32 Samsung Galaxy A15 Screen Assembly Replacement, Remove the back cover: passo 14, imagem 2 %32 Samsung Galaxy A15 Screen Assembly Replacement, Remove the back cover: passo 14, imagem 3 %32
    • Lift and remove the back cover.

    • During reassembly:

    • This is a good point to power on the phone and test all functions before sealing it up. Be sure to power the phone back down completely before you continue working.

    • Remove any adhesive chunks with a pair of tweezers or your fingers. Apply heat and isopropyl alcohol (90% or greater) if you're having trouble removing the adhesive.

    • If you're using custom-cut adhesives, follow this guide.

    • If you're using double-sided tape, follow this guide.

    Pergunte ao FixBot

    Comentar

  15. Samsung Galaxy A15 Screen Assembly Replacement, Remove the SIM tray: passo 15, imagem 1 %32 Samsung Galaxy A15 Screen Assembly Replacement, Remove the SIM tray: passo 15, imagem 2 %32 Samsung Galaxy A15 Screen Assembly Replacement, Remove the SIM tray: passo 15, imagem 3 %32
    Ferramenta utilizada neste passo:
    iFixit Precision 4 mm Screwdriver Bit
    $2.99
    • Insert a SIM card eject tool, bit, or a straightened paperclip into the hole on the SIM tray, located towards the top of the phone on the left edge.

    • Press in firmly to eject the tray and remove it.

    Pergunte ao FixBot

    Comentar

  16. Samsung Galaxy A15 Screen Assembly Replacement, Remove the frame screws: passo 16, imagem 1 %32
    • Remove the fifteen 4 mm-long screws connecting the frame to the chassis.

    Pergunte ao FixBot

    Comentar

  17. Samsung Galaxy A15 Screen Assembly Replacement, Disconnect the fingerprint button: passo 17, imagem 1 %32 Samsung Galaxy A15 Screen Assembly Replacement, Disconnect the fingerprint button: passo 17, imagem 2 %32
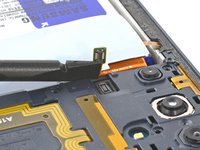
    • Use the flat end of a spudger to pry up and disconnect the fingerprint button press connector from the motherboard.

    Pergunte ao FixBot

    Comentar

  18. Samsung Galaxy A15 Screen Assembly Replacement, Unfasten the frame clips: passo 18, imagem 1 %32 Samsung Galaxy A15 Screen Assembly Replacement, Unfasten the frame clips: passo 18, imagem 2 %32 Samsung Galaxy A15 Screen Assembly Replacement, Unfasten the frame clips: passo 18, imagem 3 %32
    • Flip the phone over so the screen is facing up.

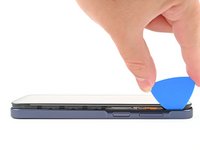
    • Insert an opening pick between the screen and the SIM card tray cutout to form a gap between the frame and the phone.

    • Slide the opening pick down the left edge of the device to unfasten the frame clips.

    Pergunte ao FixBot

    Comentar

  19. Samsung Galaxy A15 Screen Assembly Replacement: passo 19, imagem 1 %32 Samsung Galaxy A15 Screen Assembly Replacement: passo 19, imagem 2 %32 Samsung Galaxy A15 Screen Assembly Replacement: passo 19, imagem 3 %32
    • Continue sliding the opening pick around the perimeter of the phone until all of the clips are unfastened.

    • If the opening pick comes out of the phone, re-insert it at the last unfastened corner.

    Pergunte ao FixBot

    Comentar

  20. Samsung Galaxy A15 Screen Assembly Replacement, Remove the frame: passo 20, imagem 1 %32 Samsung Galaxy A15 Screen Assembly Replacement, Remove the frame: passo 20, imagem 2 %32
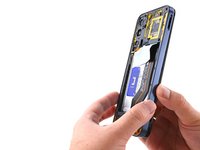
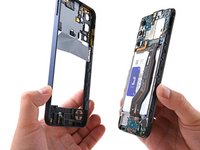
    • Pull the frame straight off of the phone.

    Pergunte ao FixBot

    Comentar

  21. Samsung Galaxy A15 Screen Assembly Replacement, Disconnect the battery: passo 21, imagem 1 %32 Samsung Galaxy A15 Screen Assembly Replacement, Disconnect the battery: passo 21, imagem 2 %32
    • Use the flat end of a spudger to lift up and disconnect the battery press connector from the motherboard.

    Pergunte ao FixBot

    Comentar

  22. Samsung Galaxy A15 Screen Assembly Replacement, Disconnect the interconnect cable: passo 22, imagem 1 %32 Samsung Galaxy A15 Screen Assembly Replacement, Disconnect the interconnect cable: passo 22, imagem 2 %32
    • The connector labeled "OCTA" is not connected to the board but rather the display cable connector. Make sure you disconnect the connectors from each other.

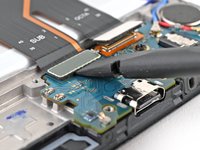
    • Insert the flat end of a spudger under the overhang of the top "OCTA" cable connector.

    • Pry up the top connector away from the bottom one until they're disconnected.

    Pergunte ao FixBot

    Comentar

  23. Samsung Galaxy A15 Screen Assembly Replacement: passo 23, imagem 1 %32 Samsung Galaxy A15 Screen Assembly Replacement: passo 23, imagem 2 %32
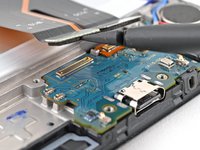
    • Use the flat end of a spudger to pry up the "SUB" connector from the daughterboard and disconnect it.

    Pergunte ao FixBot

    Comentar

  24. Samsung Galaxy A15 Screen Assembly Replacement: passo 24, imagem 1 %32 Samsung Galaxy A15 Screen Assembly Replacement: passo 24, imagem 2 %32
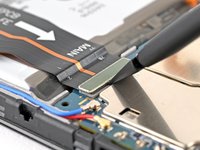
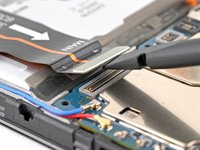
    • Use the flat end of a spudger to pry up the "MAIN" connector from the motherboard and disconnect it.

    Pergunte ao FixBot

    Comentar

  25. Samsung Galaxy A15 Screen Assembly Replacement, Remove the interconnect cable: passo 25, imagem 1 %32 Samsung Galaxy A15 Screen Assembly Replacement, Remove the interconnect cable: passo 25, imagem 2 %32
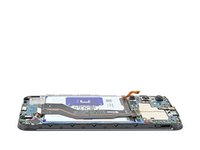
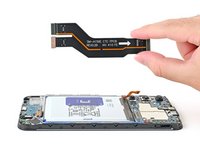
    • Pick up the interconnect cable and remove it from the phone.

    Pergunte ao FixBot

    Comentar

  26. Samsung Galaxy A15 Screen Assembly Replacement, Peel up the pull tabs: passo 26, imagem 1 %32 Samsung Galaxy A15 Screen Assembly Replacement, Peel up the pull tabs: passo 26, imagem 2 %32
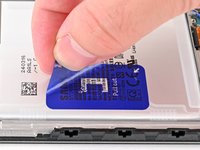
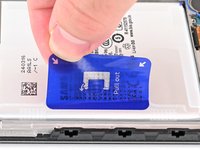
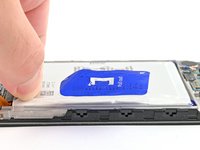
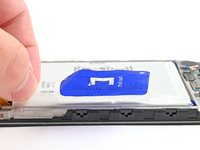
    • Peel up the blue battery pull tab until you can grab it with your fingers.

    Pergunte ao FixBot

    Comentar

  27. Samsung Galaxy A15 Screen Assembly Replacement: passo 27, imagem 1 %32 Samsung Galaxy A15 Screen Assembly Replacement: passo 27, imagem 2 %32 Samsung Galaxy A15 Screen Assembly Replacement: passo 27, imagem 3 %32
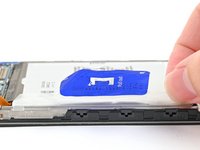
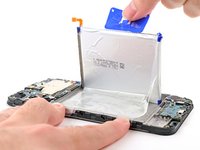
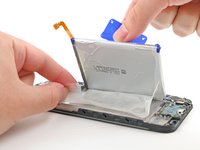
    • Use your fingers to peel the two small tabs from the top and bottom corners of the battery's left edge.

    • If these tabs aren't fully separated, you won't be able to lift the battery in the next step.

    Pergunte ao FixBot

    Comentar

  28. Samsung Galaxy A15 Screen Assembly Replacement, Separate the battery adhesive: passo 28, imagem 1 %32 Samsung Galaxy A15 Screen Assembly Replacement, Separate the battery adhesive: passo 28, imagem 2 %32
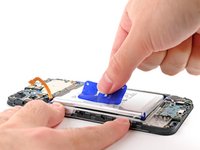
    • Take care not to crease or bend the battery—it can leak dangerous chemicals and/or catch fire.

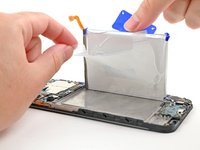
    • With one hand, fold the two upper and lower tabs out of the way of the battery and firmly hold down the frame.

    • Pull up on the blue battery pull tab with strong, steady force until the battery is separated from its adhesive in the phone.

    • If the battery doesn't budge, apply a few drops of isopropyl alcohol (90% or greater) beneath the battery, wait a few minutes, and try again.

    Pergunte ao FixBot

    Comentar

  29. Samsung Galaxy A15 Screen Assembly Replacement, Remove the battery adhesive: passo 29, imagem 1 %32 Samsung Galaxy A15 Screen Assembly Replacement, Remove the battery adhesive: passo 29, imagem 2 %32
    • Completely peel off the remaining battery adhesive attached to the frame of the phone.

    Pergunte ao FixBot

    Comentar

  30. Samsung Galaxy A15 Screen Assembly Replacement, Remove the battery: passo 30, imagem 1 %32
    • Remove the battery and its film.

    Pergunte ao FixBot

    Comentar

  31. Samsung Galaxy A15 Screen Assembly Replacement, Detach the display cable connector: passo 31, imagem 1 %32 Samsung Galaxy A15 Screen Assembly Replacement, Detach the display cable connector: passo 31, imagem 2 %32
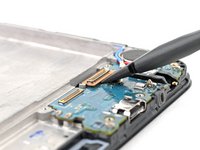
    • Insert the flat end of a spudger underneath the display ribbon connector and pry it off of the board.

    Pergunte ao FixBot

    Comentar

  32. Samsung Galaxy A15 Screen Assembly Replacement, Remove the daughterboard screw: passo 32, imagem 1 %32 Samsung Galaxy A15 Screen Assembly Replacement, Remove the daughterboard screw: passo 32, imagem 2 %32
    • Use a Phillips screwdriver to remove the 3 mm-long screw securing the daughterboard to the phone.

    Pergunte ao FixBot

    Comentar

  33. Samsung Galaxy A15 Screen Assembly Replacement, Remove the motherboard screw: passo 33, imagem 1 %32 Samsung Galaxy A15 Screen Assembly Replacement, Remove the motherboard screw: passo 33, imagem 2 %32
    • Use a Phillips screwdriver to remove the 3 mm-long screw securing the motherboard to the phone.

    Pergunte ao FixBot

    Comentar

  34. Samsung Galaxy A15 Screen Assembly Replacement, Remove the boards: passo 34, imagem 1 %32 Samsung Galaxy A15 Screen Assembly Replacement, Remove the boards: passo 34, imagem 2 %32
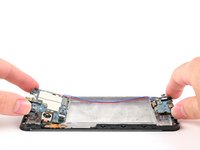
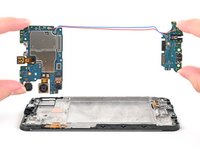
    • Grab the motherboard and daughterboard by their edges and pull them together straight up and out of the phone.

    • Be careful not to strain on the antenna cables connecting the two boards. If it feels stuck, gently pull up on it until it is free.

    Pergunte ao FixBot

    Comentar

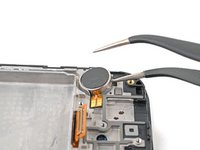
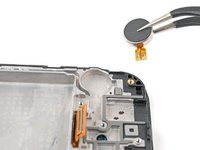
  35. Samsung Galaxy A15 Screen Assembly Replacement, Remove the vibration motor: passo 35, imagem 1 %32 Samsung Galaxy A15 Screen Assembly Replacement, Remove the vibration motor: passo 35, imagem 2 %32 Samsung Galaxy A15 Screen Assembly Replacement, Remove the vibration motor: passo 35, imagem 3 %32
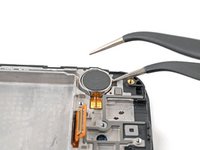
    • Insert one tip of angled tweezers into the gap beneath the vibration motor closest to the bottom of the phone.

    • Grab the vibration motor with the tweezers and lift it up and out of the phone.

    Pergunte ao FixBot

    Comentar

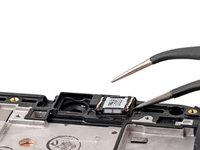
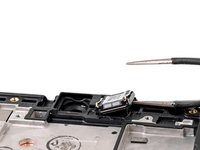
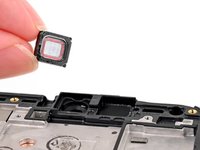
  36. Samsung Galaxy A15 Screen Assembly Replacement, Remove the earpiece speaker: passo 36, imagem 1 %32 Samsung Galaxy A15 Screen Assembly Replacement, Remove the earpiece speaker: passo 36, imagem 2 %32 Samsung Galaxy A15 Screen Assembly Replacement, Remove the earpiece speaker: passo 36, imagem 3 %32
    • Insert the tip of angled tweezers into the gap next to the earpiece speaker. Get underneath the earpiece speaker and gently pry it up.

    • Lift the earpiece speaker out of the phone.

    Pergunte ao FixBot

    Comentar

  37. Samsung Galaxy A15 Screen Assembly Replacement, Only the screen assembly remains: passo 37, imagem 1 %32
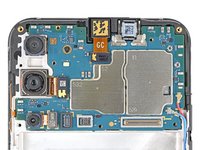
    • You're now left with the screen assembly.

    • Compare your new replacement part to the original part—you may need to transfer remaining components or remove adhesive backings from the new part before you install it.

    Pergunte ao FixBot

    Comentar

Conclusão

To reassemble your device, follow these instructions in reverse order.

Take your e-waste to an R2 or e-Stewards certified recycler.

Repair didn’t go as planned? Try some basic troubleshooting, or ask our Answers community for help.

Cancelar: não concluí este guia.

50 outras pessoas executaram este guia.

Nick Schultz

Membro desde: 03/24/24

58.401 Reputação

Autoria de 316 guias

Equipe

iFixit Membro de iFixit

Staff

123 Membros

Autoria de 28.236 guias

5Comentários do guia

Can someone help me figure out where to purchase the OEM screen for Galaxy a15 5g please?

Daniel Aguilar - Responder Compartilhar

I seen one on Amazon for $85.

Sold by Pishzeo

Martina Mueller - Responder Compartilhar

I bought it on Temu

Federico Bellizia - Responder Compartilhar

Cool 🍎 🇨🇮💪

Arthur yokoré - Responder Compartilhar

If you are in the US, just get a prepaid locked Samsung A15 from Walmart for like $40 and repack the motherboard.

Tomislav - Responder Compartilhar

Comentar

Visualizações:

Últimas 24 horas: 50

Últimos 7 dias: 359

Últimos 30 dias: 1,791

Ao todo: 35,923