Introdução
Follow this guide to replace a nonfunctioning or faulty speaker in your Nintendo Switch game console. This guide details both the left and right speakers. If you’re replacing a faulty speaker because of normal wear and tear, it’s a good idea to replace both speakers for a balanced audio experience.
The Switch uses JIS screws. A JIS 00 driver works best, but you can also use a JIS 000 driver. If you use a Phillips driver, you'll risk stripping the screws.
Note: When you remove the shield plate, you’ll need to replace the thermal compound between the plate and the heatsink. Normal thermal paste isn't designed to bridge large gaps, so you'll need thermal putty or viscous thermal paste.
Note: This guide, and the part we sell, are compatible with the original Nintendo Switch model released in 2017, as well as the newer refreshed model released in 2019 (model numbers HAC-001 and HAC-001(-01), respectively).
O que você precisa
-
-
Press and hold down the small round button on the back of the Joy Con controller.
-
While you hold down the button, slide the controller upward.
-
-
-
Continue sliding the Joy Con upward until it's completely removed from the console.
-
-
Ferramenta utilizada neste passo:Magnetic Project Mat$16.96
-
Use a Y00 screwdriver to remove the four 6.3 mm-long screws securing the rear panel.
-
-
-
Use a JIS 00 driver to remove the following screws securing the rear panel:
-
One 2.5 mm-long screw on the top edge of the device
-
Two 2.5 mm-long screws on the bottom edge of the device
-
-
-
Use a JIS 00 driver to remove the two 3.8 mm center screws on the sides of the device (one on each side).
-
-
-
Use a JIS 00 driver to remove the 1.6 mm screw in the kickstand well.
-
Close the kickstand.
-
-
-
-
Open the game card cartridge flap.
-
Lift the rear panel up from the bottom of the device and remove it.
-
-
-
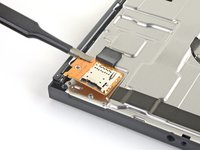
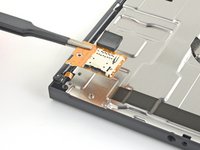
Use a JIS 00 driver to remove the 3.1 mm screw securing the microSD card reader to the device.
-
-
-
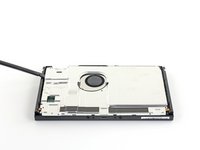
Use a JIS 00 driver to remove the six 3 mm screws securing the shield plate to the device.
-
-
Ferramenta utilizada neste passo:iFixit Thermal Putty$9.95
-
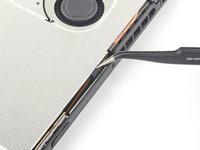
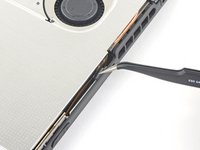
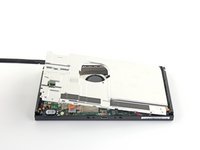
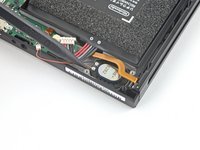
Insert a spudger underneath the shield plate along the edge of the device.
-
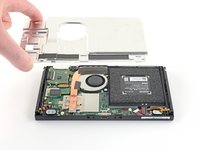
Pry up to lift the shield plate and remove it from the device.
-
You can reuse the pink thermal compound if you're careful. Keep the compound clean and make sure it makes solid contact between the heat sink and the shield during reassembly.
-
If you need to replace it, refer to our thermal paste guide to remove the old thermal compound and replace it with an appropriate compound, such as thermal putty or K5 Pro, during reassembly.
-
-
-
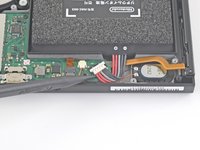
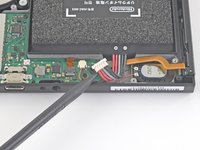
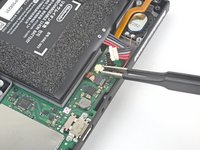
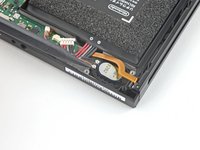
Use the point of a spudger to pry the battery connector straight up and out of its socket on the motherboard.
-
-
Ferramenta utilizada neste passo:Tweezers$4.99
-
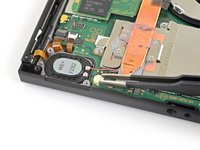
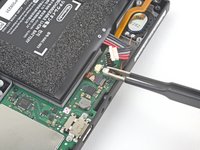
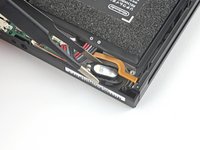
If you're replacing just the left speaker, skip the next two steps.
-
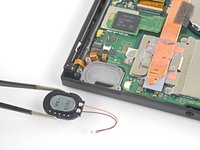
Use your fingers or a pair of tweezers to pull the speaker connector straight out of its socket on the motherboard.
-
-
-
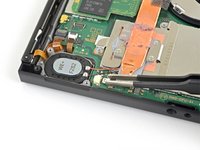
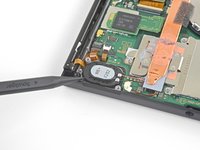
Use your fingers or a pair of tweezers to pull the speaker connector straight out of its socket on the motherboard.
-


Compare your new replacement part to the original part. You may need to transfer remaining components or remove adhesive backings from the new part before installing.
To reassemble your device, follow these instructions in reverse order.
Take your e-waste to an R2 or e-Stewards certified recycler.
Repair didn’t go as planned? Try some basic troubleshooting, or ask our Nintendo Switch Answers community for help.
Cancelar: não concluí este guia.
22 outras pessoas executaram este guia.

6Comentários do guia
Will typical PC thermal paste work? I have a lot of that lying around and I don’t want extra cost (already spending the price of the speakers for the tools alone).
Has anyone tried to change the speakers for better ones? And how would that be done?
I just completed this as my first repair to anything, and it was surprisingly simple & easy! I was worried about the connections not working, but everything worked like a charm!
What do you do if the white connector on the motherboard, where you would connect the speaker, has snapped off? Is there any way to reconnect it?
It sounds like the part that you use to connect the speakers to the motherboard has seperated. This would require microsautering, which is very complicated and difficult to do. I would take it to someone with microsautering experience, or just not use that speaker if it doesn’t bother you. Unfortunately, there isn’t much else you can do about it.
Hope this helped.
Ember -