Ir para o conteúdo principal
Participe da comunidade de reparos - Criar conta

Meta Quest 2 Controller Ring Shell Replacement

O que você precisa

  1. Meta Quest 2 Controller Ring Shell Replacement, Remove the battery cover: passo 1, imagem 1 %32 Meta Quest 2 Controller Ring Shell Replacement, Remove the battery cover: passo 1, imagem 2 %32 Meta Quest 2 Controller Ring Shell Replacement, Remove the battery cover: passo 1, imagem 3 %32
    • Use your fingers to slide the battery cover down towards the strap end of the controller.

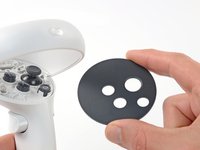
    • Remove the battery cover.

    • If you're taking the controller apart for repairs, remove the batteries in the controller.

    Pergunte ao FixBot

    Comentar

  2. Meta Quest 2 Controller Ring Shell Replacement, Remove the wrist strap: passo 2, imagem 1 %32 Meta Quest 2 Controller Ring Shell Replacement, Remove the wrist strap: passo 2, imagem 2 %32
    • Use your fingers to grasp the wrist strap near the anchor peg.

    • Lift the wrist strap anchor peg straight out of its recess.

    • Remove the wrist strap.

    Pergunte ao FixBot

    Comentar

  3. Meta Quest 2 Controller Ring Shell Replacement, Loosen the faceplate adhesive: passo 3, imagem 1 %32
    • Heat an iOpener and apply it to the bottom edge of the controller faceplate for a minute.

    Pergunte ao FixBot

    Comentar

  4. Meta Quest 2 Controller Ring Shell Replacement, Loosen the controller faceplate: passo 4, imagem 1 %32 Meta Quest 2 Controller Ring Shell Replacement, Loosen the controller faceplate: passo 4, imagem 2 %32 Meta Quest 2 Controller Ring Shell Replacement, Loosen the controller faceplate: passo 4, imagem 3 %32
    • The controller faceplate is secured with adhesive and three friction pegs.

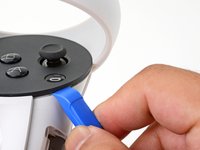
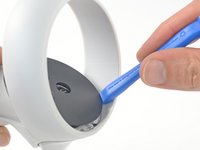
    • Press the edge of an opening tool into the seam between the controller faceplate and shell, near the Oculus button.

    • If you can’t get the opening tool into the seam, heat the area with an iOpener for a minute and try again.

    • Slide the opening tool to the base of the ring shell to loosen the adhesive.

    Pergunte ao FixBot

    Comentar

  5. Meta Quest 2 Controller Ring Shell Replacement: passo 5, imagem 1 %32 Meta Quest 2 Controller Ring Shell Replacement: passo 5, imagem 2 %32
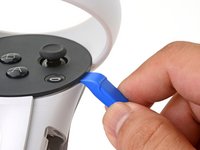
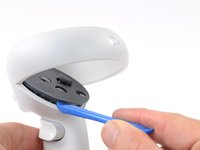
    • Use an opening tool to pry up on the seam to loosen the first friction peg.

    Pergunte ao FixBot

    Comentar

  6. Meta Quest 2 Controller Ring Shell Replacement: passo 6, imagem 1 %32 Meta Quest 2 Controller Ring Shell Replacement: passo 6, imagem 2 %32
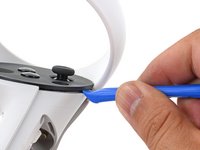
    • Continue prying around the entire faceplate to separate the remaining friction pegs and adhesive.

    • If you're having trouble, apply a heated iOpener to the faceplate for a minute and try again.

    Pergunte ao FixBot

    Comentar

  7. Meta Quest 2 Controller Ring Shell Replacement, Remove the faceplate: passo 7, imagem 1 %32 Meta Quest 2 Controller Ring Shell Replacement, Remove the faceplate: passo 7, imagem 2 %32 Meta Quest 2 Controller Ring Shell Replacement, Remove the faceplate: passo 7, imagem 3 %32
    • Remove the controller faceplate.

    • The three friction pegs should hold the faceplate securely, so you don’t need to replace the adhesive during reassembly. Be sure to firmly press the faceplate onto the controller so that all friction pegs fully engage.

    Pergunte ao FixBot

    Comentar

  8. Meta Quest 2 Controller Ring Shell Replacement, Loosen the controller ring shell: passo 8, imagem 1 %32 Meta Quest 2 Controller Ring Shell Replacement, Loosen the controller ring shell: passo 8, imagem 2 %32
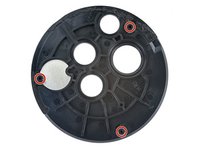
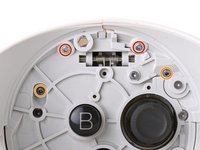
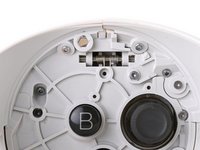
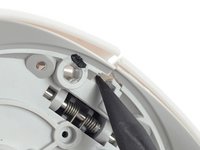
    • Use a Torx T5 driver to remove the four screws securing the controller ring shell to the controller:

    • Two 4.7 mm‑long screws

    • Two 5.9 mm‑long screws

    Pergunte ao FixBot

    Comentar

  9. Meta Quest 2 Controller Ring Shell Replacement: passo 9, imagem 1 %32 Meta Quest 2 Controller Ring Shell Replacement: passo 9, imagem 2 %32
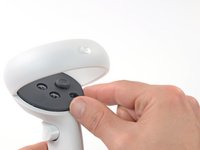
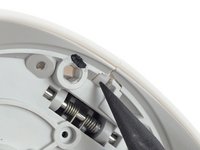
    • Press the point of a spudger firmly against the white alignment square to release the ring shell.

    Pergunte ao FixBot

    Comentar

  10. Meta Quest 2 Controller Ring Shell Replacement, Remove the controller ring shell: passo 10, imagem 1 %32 Meta Quest 2 Controller Ring Shell Replacement, Remove the controller ring shell: passo 10, imagem 2 %32 Meta Quest 2 Controller Ring Shell Replacement, Remove the controller ring shell: passo 10, imagem 3 %32
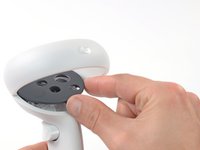
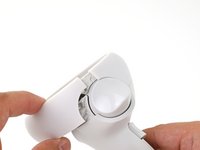
    • Use your fingers to grab the end of the ring shell that doesn’t have the white alignment square.

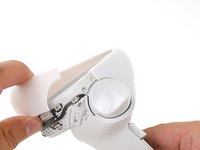
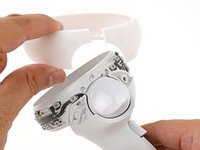
    • Gently lift the ring shell up and away from the controller to unclip it from the controller.

    • Remove the controller ring shell.

    Pergunte ao FixBot

    Comentar

Conclusão

To reassemble your device, follow these instructions in reverse order.

Repair didn’t go as planned? Try some basic troubleshooting, or ask our Answers community for help.

Cancelar: não concluí este guia.

2 outras pessoas executaram este guia.

Arthur Shi

Membro desde: 01/03/18

337.774 Reputação

Autoria de 851 guias

Equipe

iFixit Membro de iFixit

Staff

122 Membros

Autoria de 26.572 guias

1Comentário do guia

This Tutorial was really fast and easy also, I fixed my controller and it works very well now, Thank you!

# “‪Diamond‬” # - Responder Compartilhar

Comentar

Visualizações:

Últimas 24 horas: 8

Últimos 7 dias: 41

Últimos 30 dias: 159

Ao todo: 7,429