Introdução
The Asus ROG G20CB is a powerful compact gaming desktop, but upgrading or replacing its CPU can breathe new life into the system. This guide covers safely removing the old CPU and installing a new one. It requires careful handling to avoid damaging delicate components.
O que você precisa
-
-
-
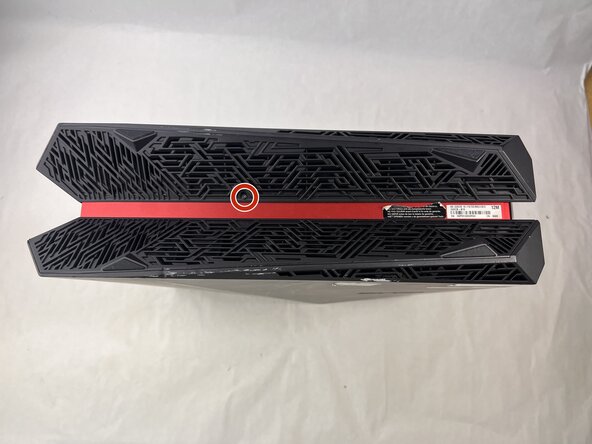
Remove each of the two 4.6 mm Phillips screws on the top and bottom of the tower.
 Pergunte ao FixBot
-
-
-
Disconnect the cable carefully by pulling gently on both sides of the connector.
-
-
-
Remove the five 4.6 mm Phillips screws holding down the fan tray and then pull the fan tray out of the system.
-
-
-
Carefully unplug the two fan cables from the motherboard by pulling straight up from the base of the connector.
-
-
-
-
Remove the six 4.6 mm Phillips screws connecting the fans to the fan tray.
-
-
-
-
-
Remove the 4.6 mm Phillips screw that secures the optical drive.
-
-
-
Pull back the tape on the heat sink and use a long-neck Phillips screwdriver to remove the four screws securing the heat sink.
-
-
-
Remove the 4.6 mm Phillips screw from the heatsink at the top of the case.
-
Lift the CPU cooler out of the system.
-
Be sure to apply fresh thermal paste before reinstalling a cooler.
-
-
-
-
-
Locate the CPU socket retention arm next to the processor.
-
Push the arm down and out, then lift it upward to release the CPU cover.
-
-
-
Reassembly tip: When installing a new CPU make sure to align the gold triangle with the white circle on the motherboard.
-
-



To reassemble your device, follow the above steps in reverse order.
Take your e-waste to an R2 or e-Stewards certified recycler.
Repair didn’t go as planned? Try some basic troubleshooting or ask our Answers community for help.
Cancelar: não concluí este guia.
Uma outra pessoa concluiu este guia.

Equipe

UMass Dartmouth, Team 3-3, Botvin Spring 2025 Membro de UMass Dartmouth, Team 3-3, Botvin Spring 2025
UMASSD-BOTVIN-S25S3G3
3 Membros
Autoria de 5 guias
