Aviso: Você está editando um guia tipo pré-requisito. Todas as alterações que você fizer afetarão todos os 8 guias que incluem este passo.
Traduzindo o passo 6
Passo 6
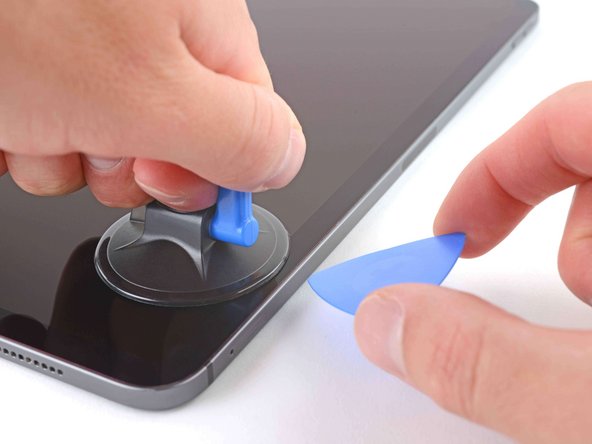


Insert an opening pick
-
Apply a suction handle to the right edge of the display, about 5 cm from the bottom edge.
-
Pull up on the suction handle with firm, constant pressure to create a gap just small enough to insert an opening pick.
-
Insert the tip of an opening pick into the gap.
Suas contribuições são licenciadas pela licença de código aberto Creative Commons.