Ir para o conteúdo principal

Motorola Moto Z Play Displayeinheit austauschen

Aviso: Você está editando um guia tipo pré-requisito. Todas as alterações que você fizer afetarão todos os 6 guias que incluem este passo.

Inglês
Alemão
Passo 3
Motorola Moto Z Play Display Assembly Replacement: passo 0, imagem 1 %32 Motorola Moto Z Play Display Assembly Replacement: passo 0, imagem 2 %32 Motorola Moto Z Play Display Assembly Replacement: passo 0, imagem 3 %32
  • In the following steps, you will separate the display assembly from the Moto Z Play's chassis.

  • For reference, refer to the first image, showing the back of the display assembly (right) after it has been removed from the phone (left).

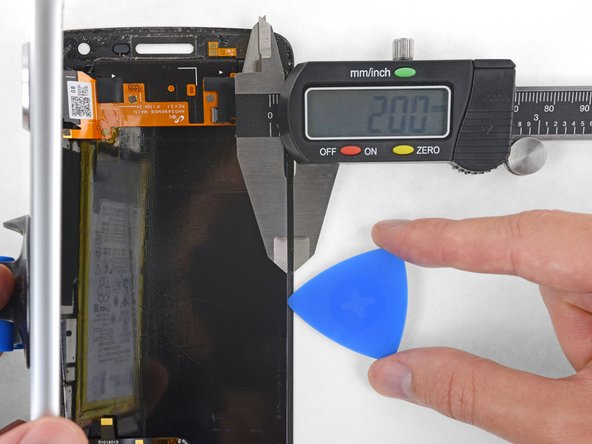
  • If you plan to re-use the display assembly, pay particular attention to the side edges. When slicing through the glue in this area, you must be careful to insert your tool less than 2 mm, or your tool will come in contact with the display panel and damage it.

  • Playing cards are a safer, but much slower, prying tool. The soft paper cards are less likely to damage the display panel, which is good news if you plan to reuse it.

In den folgenden Schritten wirst du die Displayeinheit vom Gehäuse des Moto Z Play entfernen.

Als Vorlage, nimm das erste Bild, das die Rückseite der Displayeinheit zeigt (rechts), nachdem es vom Smartphone entfernt wurde (links).

Wenn du planst die Displayeinheit wiederzuverwenden, achte bitte auf die Seitenkanten. Wenn du in diesen Bereichen den Kleber durchtrennst, musst du sehr darauf achten, das Werkzeug weniger als 2mm tief einzusetzen. Sonst kommt dein Werkzeug mit dem Display Panel in Kontakt und beschädigt es.

Spielkarten sind als Hebelwerkzeug sicherer, aber auch langsamer. Mit weichen Papierspielkarten ist es weniger wahrscheinlich, das Display Panel zu beschädigen, was wichtig ist, wenn du planst, es wieder zu benutzen.

Suas contribuições são licenciadas pela licença de código aberto Creative Commons.