Introdução
Use this guide to replace the upper component cable, a.k.a. audio control cable. It includes the volume control buttons, silent switch, true tone flash, microphone, and sleep/wake button in an iPhone 6s.
You can also use this guide to replace the following parts:
O que você precisa
-
-
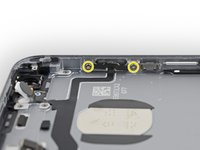
Remove the two 3.4 mm P2 Pentalobe screws on the bottom edge of the iPhone, on either side of the Lightning connector.
-
-
Ferramenta utilizada neste passo:Clampy - Anti-Clamp$24.95
-
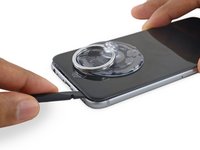
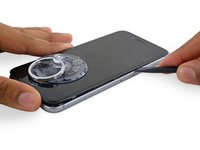
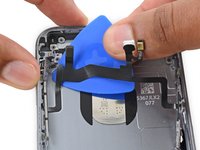
Pull the blue handle backwards to unlock the Anti-Clamp's arms.
-
Slide the arms over either the left or right edge of your iPhone.
-
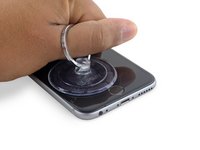
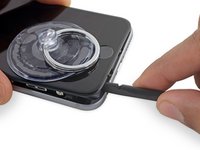
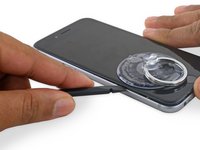
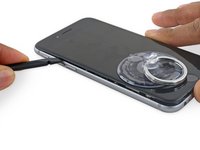
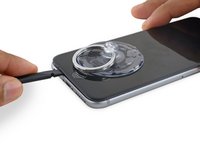
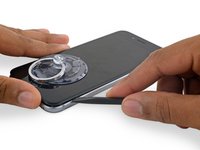
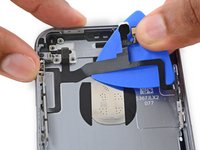
Position the suction cups near the bottom edge of the iPhone just above the home button—one on the front, and one on the back.
-
Squeeze the cups together to apply suction to the desired area.
-
-
Ferramenta utilizada neste passo:Clampy - Anti-Clamp$24.95
-
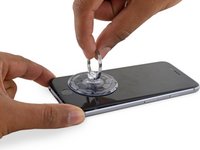
If you don't have an Anti-Clamp, follow the next three steps to use a suction handle.
-
Apply mild heat to the lower edge of the iPhone using an iOpener or hair dryer for about a minute.
-
-
-
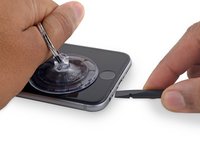
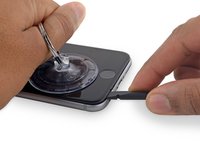
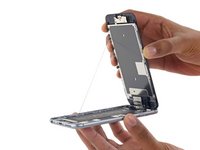
Gently grasp the display assembly and lift it up to open the phone, using the clips at the top of the front panel as a hinge.
-
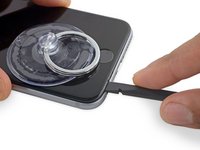
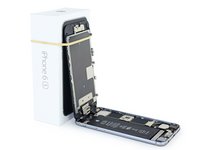
Open the display to about a 90º angle, and lean it against something to keep it propped up while you're working on the phone.
-
Add a rubber band to keep the display securely in place while you work. This prevents undue strain on the display cables.
-
-
Ferramenta utilizada neste passo:Magnetic Project Mat$19.95
-
Remove two Phillips screws securing the battery connector bracket, of the following lengths:
-
One 2.9 mm screw
-
One 2.2 mm screw
-
-
-
Remove the following four Phillips screws securing the display cable bracket:
-
Three 1.2 mm screws
-
One 2.8 mm screw
-
-
-
-
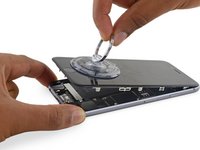
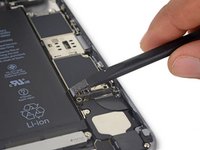
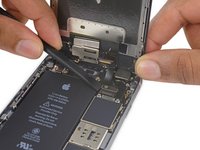
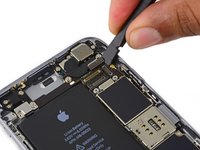
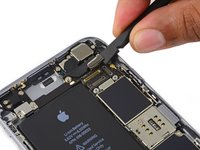
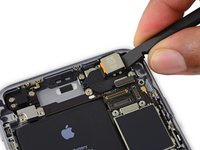
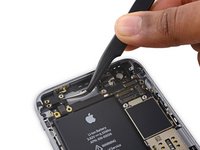
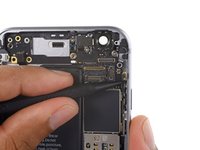
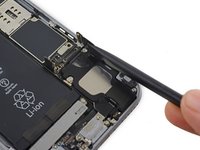
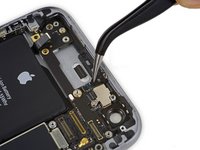
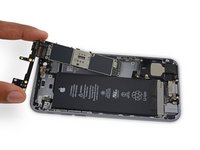
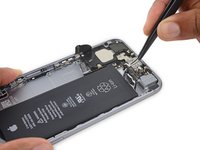
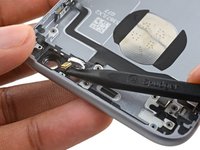
Use the flat end of a spudger to disconnect the rear camera from its socket on the logic board.
-
-
-
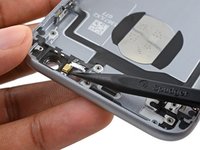
Insert a SIM card eject tool or a paperclip into the small hole in the SIM card tray.
-
Press to eject the tray.
-
-
-
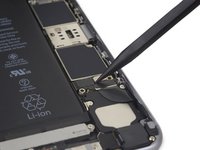
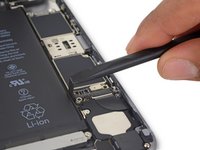
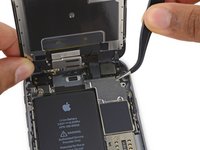
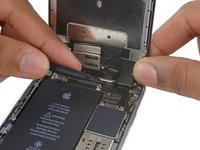
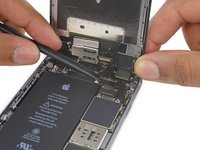
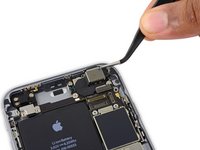
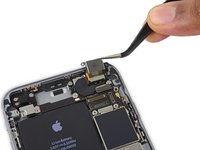
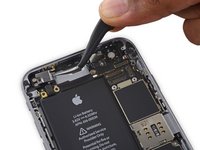
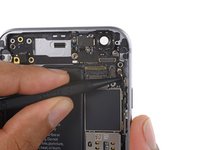
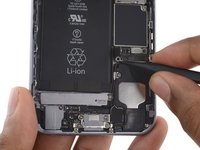
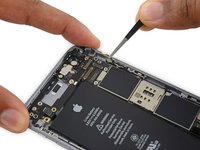
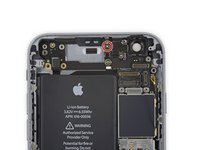
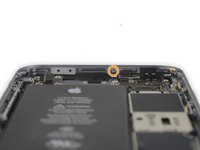
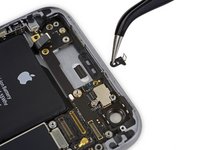
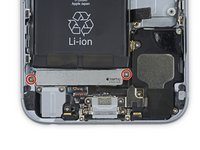
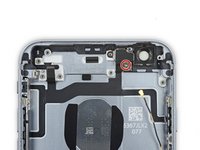
Remove the two 2.3 mm Phillips screws securing the upper component cable connector bracket.
-
-
-
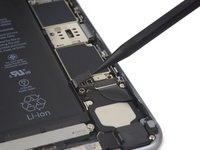
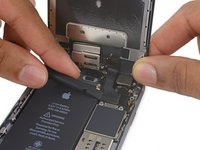
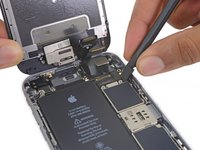
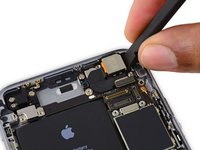
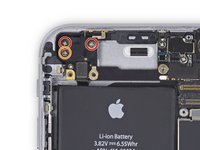
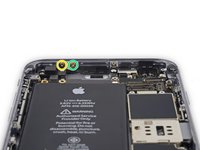
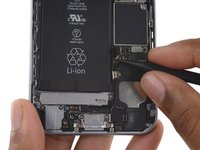
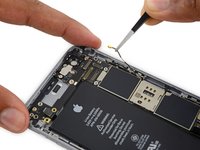
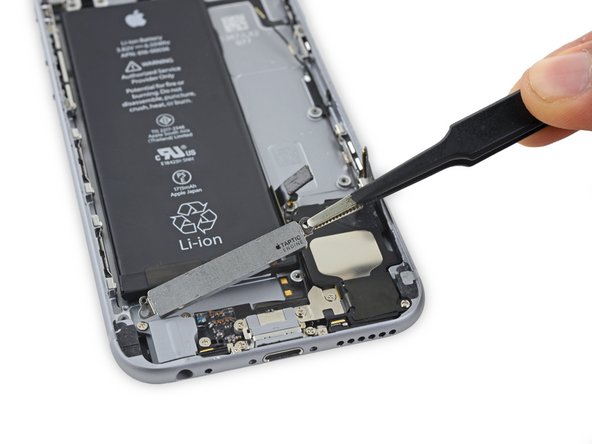
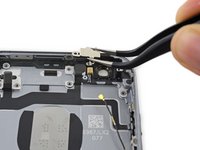
Remove the two 1.5 mm Phillips screws holding the Taptic Engine in place.
-
Remove the Taptic Engine.
-
-
-
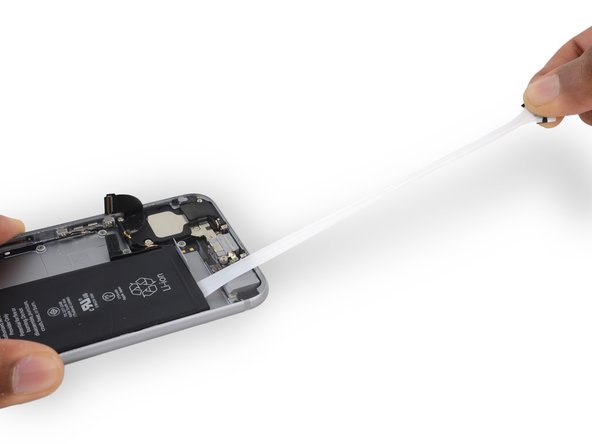
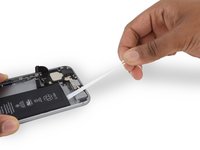
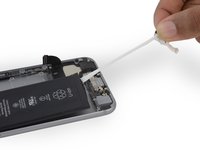
Pull one of the adhesive strips straight out, towards the bottom of the iPhone.
-
For best results, pull the strip at a 60º angle or less.
-
Continue pulling until the strip is fully removed.
-
If one of the adhesive strips breaks under the battery during this procedure, and cannot be retrieved, remove the remaining strip, and then skip to Step 48.
-
-
Ferramenta utilizada neste passo:Plastic Cards$2.99
-
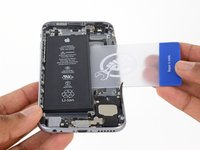
If you successfully removed all three adhesive strips, move on to the next step. Otherwise, you will need to pry the battery from the rear case.
-
Prepare an iOpener and apply it to the back of the rear case, directly over the battery. Alternatively, you can apply heat using a heat gun or hair dryer.
-
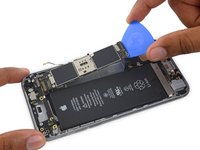
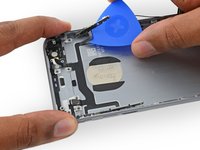
After about a minute, flip the phone over and use a plastic card to break up any remaining adhesive behind the battery.
-
-
-
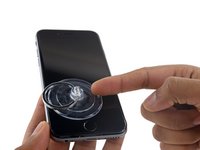
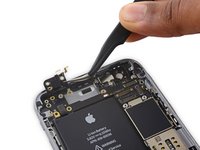
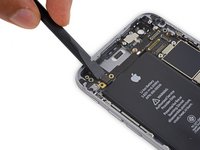
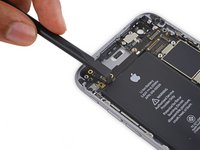
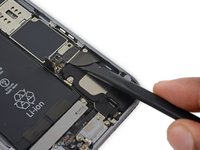
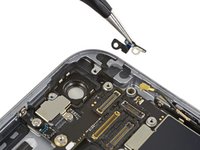
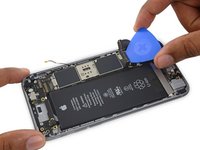
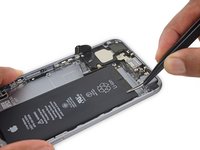
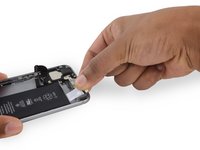
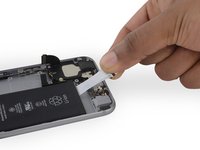
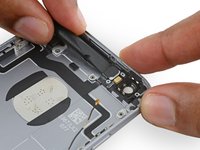
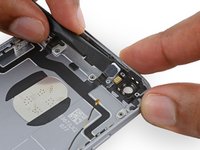
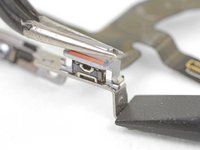
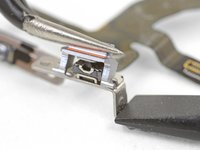
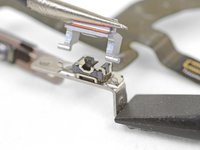
If your replacement part did not come with the mute switch cover, you will need to remove the switch cover and transfer It.
-
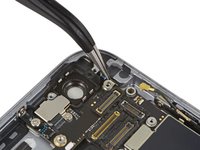
Use the flat end of the spudger to press down and hold the old bracket firmly in place.
-
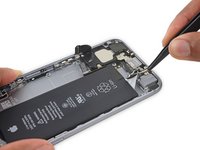
Use tweezers or your fingers to carefully rock the switch cover such that the switch cover pins swing out of their clips.
-
Lift the switch cover straight up.
-


To reassemble your device, follow these instructions in reverse order.
To reassemble your device, follow these instructions in reverse order.
Cancelar: não concluí este guia.
44 outras pessoas executaram este guia.

13 comentários
Does anyone know where the secondary cell antenna is located on the 6S, it's easily visible on the 6S plus.
Is it under the top wifi antenna, built into the board?
Or at step 41 removing a 'plastic clip' which I thought could be the gps antenna
I had a question about the last step. Mine Upper component cable appears to be attached to the brackets that hold it in place. They appear to have very small spot welds which i cannot remove. It looks like the new cable should wrap around the brackets with an adhesive but i cant seem to get the brackets off of the old cable. Why doesn't the new cable come with those brackets attached? Or was i supposed to order those as separate pieces?
Good guide. Should have mentioned that buying the replacement cable WITH the brackets and switch attached is necessary . I bought a cable without and could not remove the mute button. Then went and bought a cable WITH the brackets and everything went together well. Phone works just fine.