Este guia tem alterações mais recentes. Mudar para a última versão não verificada.
Introdução
Use this guide to replace a defective home button or to transfer the home button in the 10.5” iPad Pro onto a new display assembly.
Replacing the home button will not restore Touch ID function. The Touch ID fingerprint scanner in the home button is paired to the iPad's logic board. In order to maintain Touch ID functionality, if you replace the screen, you must carefully transfer your original home button to the new display assembly.
You’ll need replacement adhesive to reattach components when reassembling the device.
Warning: the battery isolation method in this guide is outdated, and may result in irreversible damage to the battery pins of the logic board, effectively destroying it. If you choose to isolate the battery this way, heed all warnings and work extremely carefully. If you choose to complete the guide without isolating the battery, avoid using metal tools except when completely necessary (like when removing screws) to prevent shorting the battery and damaging sensitive circuit components.
O que você precisa
-
-
You may need to reapply heat repeatedly throughout this process to prevent the adhesive from cooling and hardening.
-
Prepare an iOpener and place it on the bottom edge of the iPad's screen for about two minutes.
-
-
-
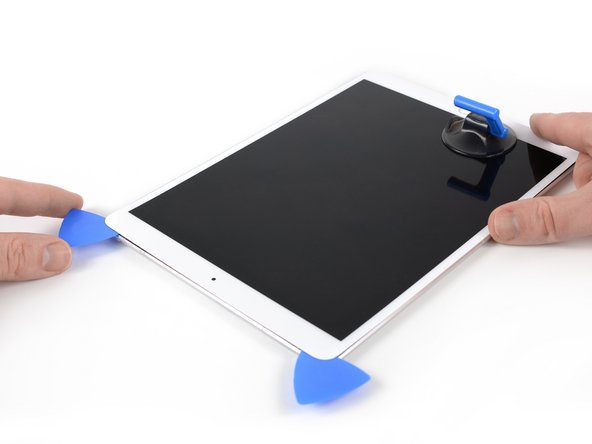
Place a suction cup next to the iPad's home button and press down to create a seal.
-
Firmly pull up on the suction cup to create a small gap between the front panel and the rear case.
-
Once you've opened a sufficient gap, insert an opening pick into the gap.
-
-
-
Slice through the adhesive under the screen by sliding the pick along the edge of the display, towards the bottom left corner.
-
Leave the pick in place temporarily to prevent the adhesive from re-sealing.
-
-
-
Apply heat to the left edge of the iPad for about two minutes, or until it's slightly too hot to touch comfortably.
-
If necessary, re-heat your iOpener for a few seconds or until it's a bit too hot to touch. Be careful not to overheat the iOpener, or it may burst.
-
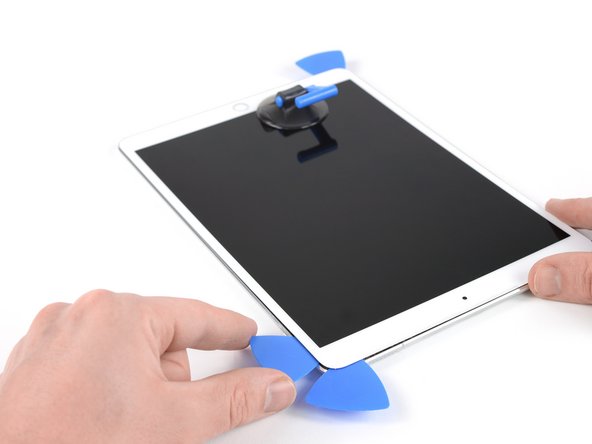
Insert a second opening pick at the bottom left corner of the iPad.
-
Slide the second opening pick along the left side of the display to separate the adhesive underneath.
-
Leave the opening pick inserted near the top left corner of the iPad to prevent the adhesive from re-sealing.
-
-
-
Apply heat to the final, right edge of the iPad for about two minutes, or until it's slightly too hot to touch comfortably.
-
Insert a fourth opening pick at the top right corner of the iPad.
-
Slide the opening pick down to the bottom right corner to cut the adhesive.
-
Slide the opening pick around the bottom right corner—pausing to apply more heat if needed—and cut the remaining adhesive on the bottom edge, but stop before you reach the home button.
-
-
-
-
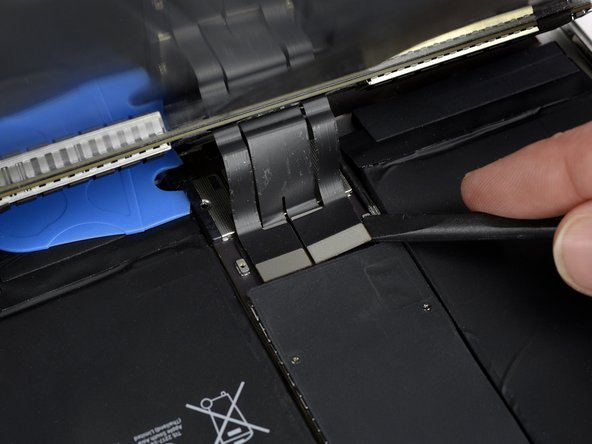
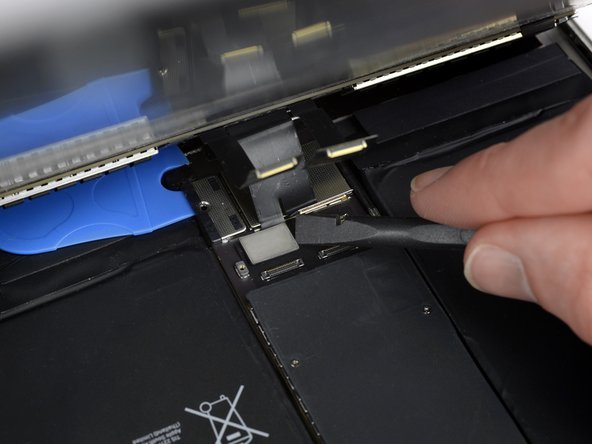
To disconnect the battery, slide one prong of a battery blocker or the tip of an opening pick under the battery power connector to ensure the power circuit is interrupted.
-
Leave the battery blocker in place as you work.
-
-
-
Use your iOpener or hair dryer for about a minute to heat the home button area in order to soften the adhesive securing the home button components.
-
-
-
Lift the home button bracket starting from the left side.
-
Carefully pull it upwards toward the display, making sure not to damage the home button cable.
-
Scrape off as much of the old adhesive residue as you can, then clean it with acetone or high-concentration (90% or greater) isopropyl alcohol.
-
Secure the bracket with hot-melt glue, superglue, or high-strength double-sided tape. Make sure the bracket is aligned correctly before allowing your adhesive to cure, or the home button will not click when pressed.
-


Compare your new replacement part to the original part. You may need to transfer remaining components or remove adhesive backings from the new part before installing.
To reassemble your device, follow this guide in reverse order.
Take your e-waste to an R2 or e-Stewards certified recycler.
Repair didn’t go as planned? Check out our Answers community for troubleshooting help.
Cancelar: não concluí este guia.
7 outras pessoas executaram este guia.

