Ir para o conteúdo principal
Participe da comunidade de reparos - Criar conta

iMac G5 17" Model A1144 Hard Drive Replacement

O que você precisa

  1. iMac G5 17" Model A1144 Hard Drive Replacement, Access Door: passo 1, imagem 1 %32
    • Before you work on the computer, unplug the computer and press the power button for 20-30 seconds to drain the stored energy in the power supply.

    • Loosen the two Phillips screws securing the access door to your iMac.

    • These screws are captive in the access door.

    Pergunte ao FixBot

    Comentar

  2. iMac G5 17" Model A1144 Hard Drive Replacement: passo 2, imagem 1 %32
    • Remove the access door from your iMac.

    Pergunte ao FixBot

    Comentar

  3. iMac G5 17" Model A1144 Hard Drive Replacement, Front Bezel: passo 3, imagem 1 %32
    • Remove the three T8 Torx screws securing the front bezel to the rear panel.

    Pergunte ao FixBot

    Comentar

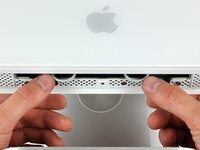
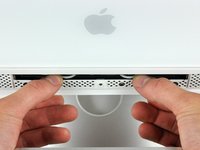
  4. iMac G5 17" Model A1144 Hard Drive Replacement: passo 4, imagem 1 %32 iMac G5 17" Model A1144 Hard Drive Replacement: passo 4, imagem 2 %32
    • Orient the iMac face-up, on its backside.

    • Use your thumbs to press both RAM arms in past the front bezel for enough clearance to lift it off the rear case.

    Pergunte ao FixBot

    Comentar

  5. iMac G5 17" Model A1144 Hard Drive Replacement: passo 5, imagem 1 %32
    • While holding the RAM arms in with your thumbs, lift the lower edge of the front bezel enough to clear the rear case.

    Pergunte ao FixBot

    Comentar

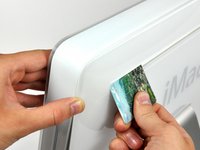
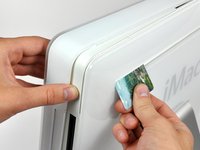
  6. iMac G5 17" Model A1144 Hard Drive Replacement: passo 6, imagem 1 %32 iMac G5 17" Model A1144 Hard Drive Replacement: passo 6, imagem 2 %32 iMac G5 17" Model A1144 Hard Drive Replacement: passo 6, imagem 3 %32
    Ferramenta utilizada neste passo:
    Plastic Cards
    $2.99
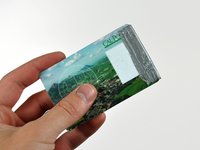
    • Re-orient your iMac so it sits upright on the stand.

    • Insert a plastic card up into the corner of the air vent slot at the top of the rear case.

    • Push the card toward the top of the iMac to release the front bezel latch.

    • Pull the front bezel away from the rear case.

    • Repeat this process for the other side of the front bezel.

    • It may be necessary to apply several layers of duct tape to the top of the access card to aid in releasing the latches.

    • If the bezel refuses to release, try pressing the lower edge back onto the rear case and repeat this opening process.

    Pergunte ao FixBot

    Comentar

  7. iMac G5 17" Model A1144 Hard Drive Replacement: passo 7, imagem 1 %32
    • Lay your iMac stand-side down on a table.

    • Lift the front bezel from its lower edge and rotate it away from the rest of your iMac, minding the RAM arms that may get caught.

    • Lay the front bezel above the rest of the iMac.

    Pergunte ao FixBot

    Comentar

  8. iMac G5 17" Model A1144 Hard Drive Replacement: passo 8, imagem 1 %32
    • If necessary, remove the piece of kapton tape wrapped around the microphone and camera cables.

    Pergunte ao FixBot

    Comentar

  9. iMac G5 17" Model A1144 Hard Drive Replacement: passo 9, imagem 1 %32 iMac G5 17" Model A1144 Hard Drive Replacement: passo 9, imagem 2 %32
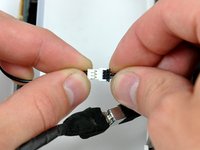
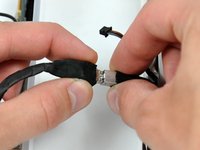
    • Disconnect both the camera and microphone cables.

    Pergunte ao FixBot

    Comentar

  10. iMac G5 17" Model A1144 Hard Drive Replacement, Display: passo 10, imagem 1 %32
    • Peel back the aluminum EMI shield up off the lower three edges of the rear case.

    • It is not necessary to peel the EMI shield off the display.

    • We found it helpful to tape the EMI shield up against the display to keep it out of the way.

    Pergunte ao FixBot

    Comentar

  11. iMac G5 17" Model A1144 Hard Drive Replacement: passo 11, imagem 1 %32 iMac G5 17" Model A1144 Hard Drive Replacement: passo 11, imagem 2 %32
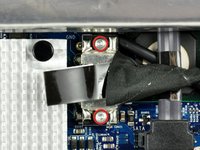
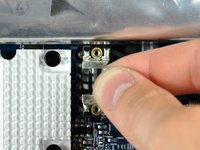
    • Remove the two 5 mm T6 Torx screws securing the display data cable to the logic board.

    • Using its attached black tab, pull the display data cable connector up off the logic board.

    Pergunte ao FixBot

    Comentar

  12. iMac G5 17" Model A1144 Hard Drive Replacement: passo 12, imagem 1 %32
    • Pull the inverter cable connector up off its socket on the logic board.

    Pergunte ao FixBot

    Comentar

  13. iMac G5 17" Model A1144 Hard Drive Replacement: passo 13, imagem 1 %32
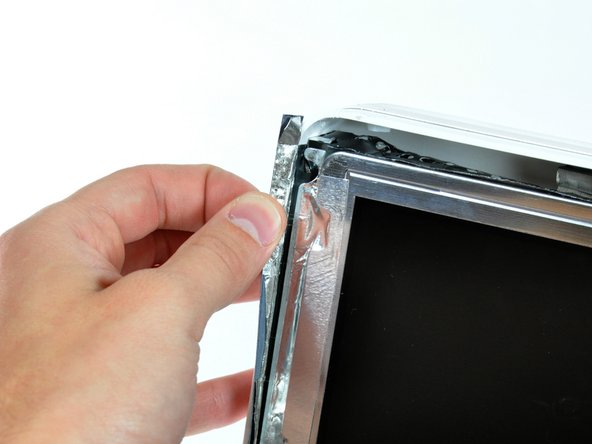
    • Peel back the aluminum EMI tape from the two vertical edges of the display.

    • During reassembly, it is helpful to use several small strips of tape to hold the EMI shielding along the left and right edges of the display footprint out of the way before lowering the display into the rear case of your iMac.

    Pergunte ao FixBot

    Comentar

  14. iMac G5 17" Model A1144 Hard Drive Replacement: passo 14, imagem 1 %32 iMac G5 17" Model A1144 Hard Drive Replacement: passo 14, imagem 2 %32
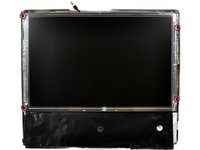
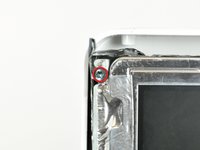
    • Remove the four recessed coarse-thread 7.5 mm T10 Torx screws securing the display to the rear case.

    • These screws are recessed, so a thin screwdriver such as this is essential for removal. Bit drivers tend to be too short for this application.

    Pergunte ao FixBot

    Comentar

  15. iMac G5 17" Model A1144 Hard Drive Replacement: passo 15, imagem 1 %32
    • Lift the display from its lower edge and pull it toward yourself to peel it off the EMI shield attached to its top edge.

    • Be mindful of any cables that may get caught during removal.

    Pergunte ao FixBot

    Comentar

  16. iMac G5 17" Model A1144 Hard Drive Replacement, Hard Drive: passo 16, imagem 1 %32
    • Disconnect the hard drive thermal sensor by pulling the connector away from its socket parallel to the face of the hard drive.

    Pergunte ao FixBot

    Comentar

  17. iMac G5 17" Model A1144 Hard Drive Replacement: passo 17, imagem 1 %32 iMac G5 17" Model A1144 Hard Drive Replacement: passo 17, imagem 2 %32
    • Pressing the top of the hard drive bracket down to release it from the rear case requires a substantial amount of force, so we recommend laying your iMac stand-side down on a table to avoid knocking it over.

    • Press the hard drive bracket down toward the bottom edge of your iMac to free it from the rear case, then rotate the top of the drive toward yourself.

    • Lift the hard drive off its lower pins and pull it out of the rear case, minding the cables that are still attached.

    • When reinstalling the hard drive, be careful not to push the rubber grommets through the chassis with the hard drive pins as retrieving them may require logic board removal.

    Pergunte ao FixBot

    Comentar

  18. iMac G5 17" Model A1144 Hard Drive Replacement: passo 18, imagem 1 %32 iMac G5 17" Model A1144 Hard Drive Replacement: passo 18, imagem 2 %32
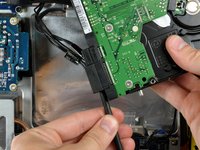
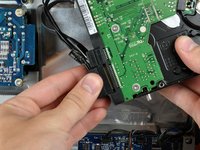
    • Insert the flat end of a spudger into the gap between the SATA power connector and the hard drive.

    • Twist the spudger to separate the SATA power connector from the hard drive.

    • Pull the SATA power connector away from the hard drive.

    Pergunte ao FixBot

    Comentar

  19. iMac G5 17" Model A1144 Hard Drive Replacement: passo 19, imagem 1 %32
    • Pull the SATA data cable away from the hard drive.

    • Hard drive remains.

    Pergunte ao FixBot

    Comentar

  20. iMac G5 17" Model A1144 Hard Drive Replacement, Hard Drive: passo 20, imagem 1 %32
    • Remove the two T8 Torx screws securing the upper bracket to the hard drive.

    • Transfer the bracket and screws to your new hard drive.

    Pergunte ao FixBot

    Comentar

  21. iMac G5 17" Model A1144 Hard Drive Replacement: passo 21, imagem 1 %32
    • Remove the two T8 Torx pins on the connector side of the hard drive and transfer them to your new hard drive.

    Pergunte ao FixBot

    Comentar

  22. iMac G5 17" Model A1144 Hard Drive Replacement: passo 22, imagem 1 %32
    • Use the flat end of a spudger to pry the hard drive thermal sensor off the hard drive.

    • Don't forget to transfer this to your new drive.

    • If you are installing a new hard drive, we have an OS X install guide to get you up and running.

    Pergunte ao FixBot

    Comentar

Conclusão

To reassemble your device, follow these instructions in reverse order.

Cancelar: não concluí este guia.

112 outras pessoas executaram este guia.

4Comentários do guia

I disconnected the hard drive bracket and slid it to one side and removed it, then removed the hard drive (squeezing it out just wasn't working for me).

tina - Responder Compartilhar

Before I discovered IFIXIT I had purchased a hard drive from Western Digital and am hoping it is the correct one for my 17" iMac G5, 2 GHz Intel Core 2 Duo. The WD drive's description is TRESXLB2 7200 64M SATA3 6GB/S 1.0 TB 2HD STD . Can anyone tell me if I will have problems with this drive? Western Digital's recommendations fit this description for my iMac. Thank you. Ron

ronliz3 - Responder Compartilhar

Excellent presentation. My iMac G5 came apart easily just as described. The unit still worked perfectly but had been on the shelf for years as the screen was almost blacked out with lines. The G5 was replaced with an Intel model but I miss certain aspects of the old system. I'm hoping the HDD will boot up a G5 Power Mac so I can reminisce!

James Bonnefin - Responder Compartilhar

Excellent guideline. I took apart my old iMac to use the hard drive with the docking. Spend only few minutes with my daughter read the instructions, its quite fun. Thank you Walter. Keep safe and healthy

Tri Hadi Kurniawan - Responder Compartilhar

Comentar

Visualizações:

Últimas 24 horas: 4

Últimos 7 dias: 20

Últimos 30 dias: 105

Ao todo: 77,745