Introdução
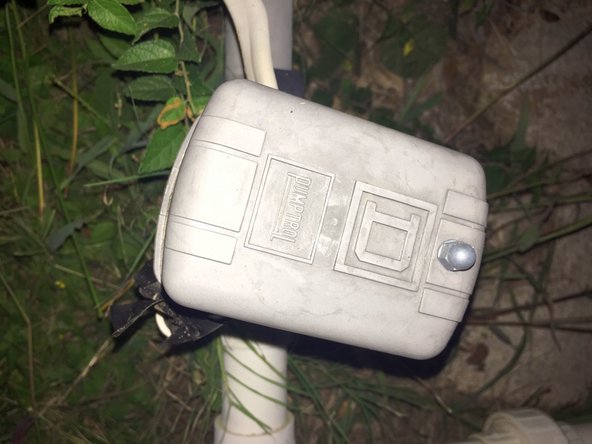
The pressure switch on this line would not shut off. This caused problems since the excessive pressure caused some faucets to start leaking. The pressure switch on this installation was a 30/50 PSI switch meaning it should cut in when the pressure reaches 30 PSI and should cut off when the pressure reaches 50 PSI. The pressure switch has some adjustment possibility but those did not show any result. Decision was made to replace the switch. It seems that any plumbing job has some additional challenges, just like this one did.
The power supply to the pump is 220240 Volt and 20A. This is potentially deadly. So, one does want to make sure that one checks and double checks that the power is off.
O que você precisa
-
-
Here is a time lapse of what the pressure gauge showed. The pressure switch did not cutoff and rising pressure caused some faucets to develop leaks.
-
-
-
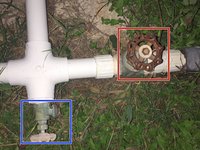
Close off the water supply to the dwelling by turning the gate valve to the right side.
-
Next drain the tank and the supply line by opening the valve. Each installation could be different, depending on ow and where it is installed. Any installation should have a shut-off valve and a drain valve somewhere before entering the dwelling.
-
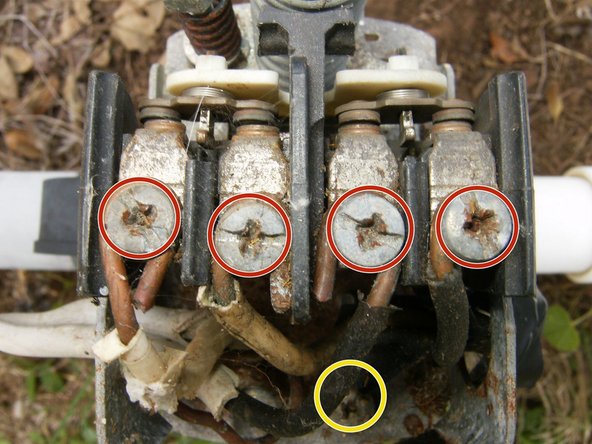
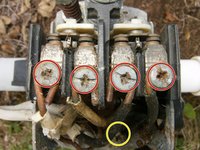
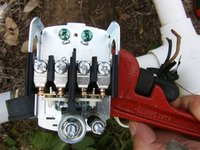
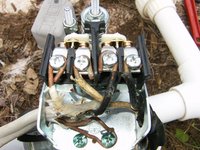
Loosen the 4 screws that hold the wires to the switch
-
The ground screw on the bottom of the switch shares the ground from the supply line and from the pump. Remove those as well.
-
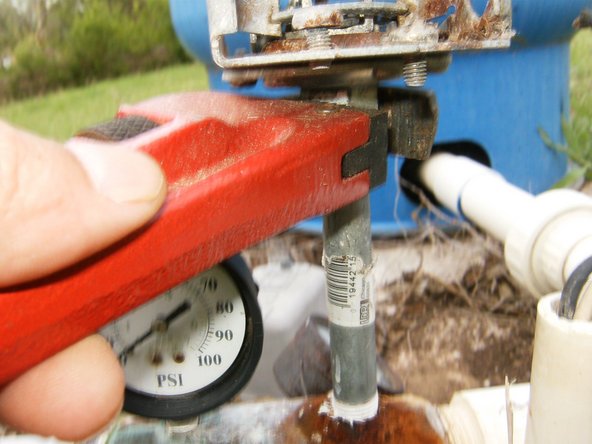
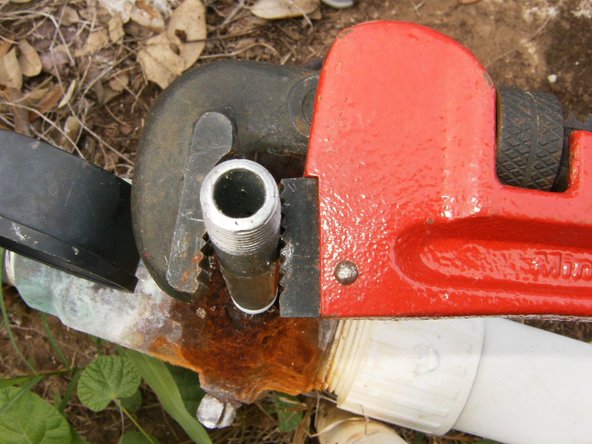
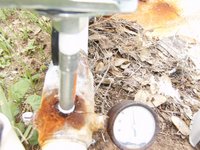
With the wires removed from the switch and the water line drained, remove the switch from the nipple attached to the check valve. Use a suitable wrench like an adjustable or in this case a pipe wrench
-
-
-
-
It became immediately obvious that the nipple was almost completely corroded of the check valve. It broke off while attempting to remove the pressure switch.
-
After the use of a couple of choice words and cleaning the damage on check valve, it turned out that the thread was not damaged.
-
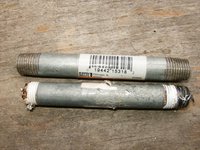
In this case the nipple needs to be replaced as well. The bottom one is the corroded one and the top is the new one.
-
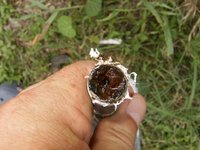
Corrosion and debris on the inside of the nipple show that it is almost entirely occluded.
-
-
-
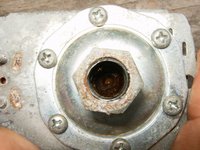
Here is the inlet to the pressure switch. Again visible is the large amount of corrosion and debris from the corroded nipple. this is what most likely caused the pressure switch to fail.
-
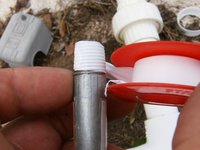
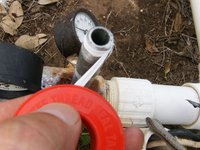
Apply some thread sealing tape before installing the new nipple. Apply the tape in a clockwise direction.
-
Install the nipple into the check valve. Use a small pipe wrench to fasten it.
-
-
-
Connect the power wires and the pump wires as directed. Most pressure switches have a small diagram on the inside of the cover. Some switches have the contacts labeled as L1&L2 for the power lines and T1&T2 for the pump wires.
-
All that is left now is to reapply the cover and to open the gate valve of the water line to the dwelling. Flip fuse(s) back on and the pressure switch should kick in.
-


Straight forward task accomplished with just a few basic tools.
Cancelar: não concluí este guia.
Uma outra pessoa concluiu este guia.
