Introdução
If the touchpad on your Wacom Intuos Pro stops functioning and no longer tracks input, you can replace it using this guide. The touchpad is responsible for tracking all of your drawings, so having it function less than perfectly can greatly hinder the functionality of your device. A replacement should alleviate any glitching or incorrect logging of input.
This guide instructs the user to remove the battery before removing the touchpad to negate the risk of an electrical discharge ruining any of the components while removing the touchpad. However, the battery requires soldering and desoldering to disconnect, which is not ideal for a temporary power disconnect. It should be possible to complete the replacement without disconnecting the battery if one wears an anti static wristband and takes care not to touch any metal tools to any of the cables or circuit boards during the repair.
O que você precisa
-
-
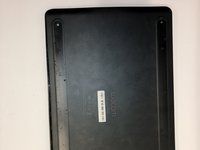
Orient the device so the bottom casing is facing upwards.
-
Use your fingers to gently pull on the rubber covers on the bottom of the device to remove them.
 Pergunte ao FixBot
-
-
-
Remove the four 4mm screws from underneath the rubber feet using a Phillips #00 screwdriver.
-
The screws are located 40mm in from the edge, so it not necessary to completely remove the rubber if you prefer not to.
-
-
-
-
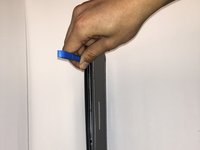
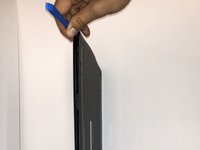
Insert the iFixit Opening Tool between the front and back cover of the device in order to snap and separate the type locks from around the edges.
-
Use the iFixit Opening Tool all the way around the edges until all the snaps have been released.
-
-
-
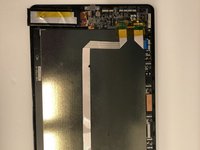
Remove the case backing from the rear of the device with your hands so the internal components are exposed.
-
-
-
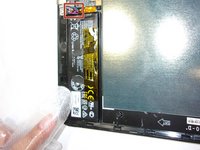
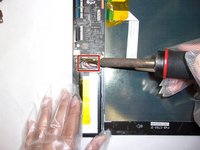
If not already done, desolder the three colored cables that connect the battery to the motherboard.
-
After desoldering the battery, carefully remove it.
-






To reassemble your device, follow these instructions in reverse order.

Equipe

Embry-Riddle Aeronautical University, Team S6-G3, Watkins Spring 2020 Membro de Embry-Riddle Aeronautical University, Team S6-G3, Watkins Spring 2020
ERAU-WATKINS-S20S6G3
4 Membros
Autoria de 5 guias
