Introdução
If your device is not turning on, it is possible that the wiring that connects the batteries to the motherboard is ruptured. This guide will give directions on replacing these wires.
O que você precisa
-
-
Remove the 9.9 mm screw covering the batteries with a PH1 driver head.
 Pergunte ao FixBot
-
-
-
Use a plastic opening tool to pry the batteries out of their holding.
-
-
-
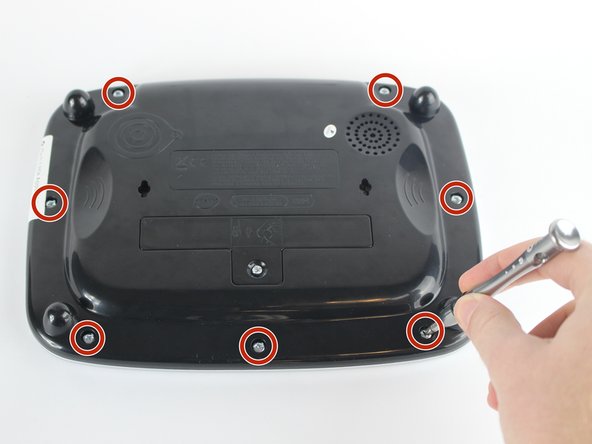
Position the VTech Little Apps Tablet face-down on a flat surface so that you can clearly see the back of the device.
-
Remove all seven 9.6 mm screws located around the perimeter of the back cover with a PH1 driver head.
-
-
-
-
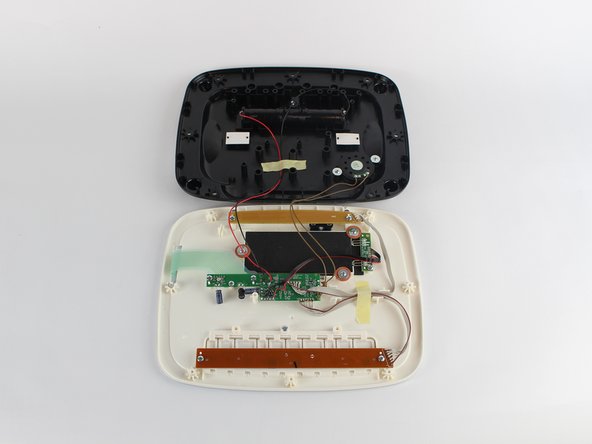
Gently remove the back cover then flip it 180 degrees so that the back cover of the device is now face-down.
-
-
-
Visually inspect the wires connecting the motherboard to the batteries, looking for damage.
-
-
-
Desolder the internal wire leads connected to the batteries, making sure to remove the positive (red) wire first, and the negative (black) wire second.
-
-
-
Next desolder the same black and red internal wire leads connected to the motherboard.
-


To reassemble your device, follow these instructions in reverse order.
Cancelar: não concluí este guia.
Uma outra pessoa concluiu este guia.
Equipe

USF Tampa, Team 2-6, Sullivan Spring 2016 Membro de USF Tampa, Team 2-6, Sullivan Spring 2016
USFT-SULLIVAN-S16S2G6
3 Membros
Autoria de 12 guias