Ir para o conteúdo principal

Toyota Key Shell Replacement

O que você precisa

  1. Toyota Key Shell Replacement, Introduction: passo 1, imagem 1 %32 Toyota Key Shell Replacement, Introduction: passo 1, imagem 2 %32 Toyota Key Shell Replacement, Introduction: passo 1, imagem 3 %32
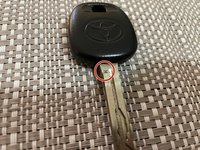
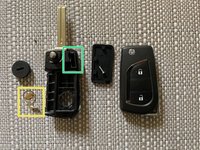
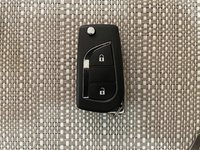
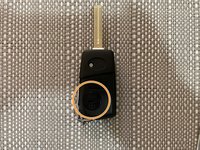
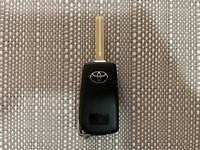
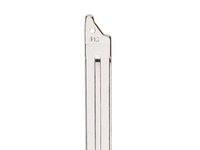
    • Here we have the original key set up from factory, next to the new aftermarket OEM style Flip Keys, found on pretty much every other Toyota.

    • No idea why Toyota decided to have seperate Key and Fob as many models have the exact same Flip Key set up

    • Note: Part is from Australia from a company called MAP. P/N KF428

  2. Toyota Key Shell Replacement, Remove Fob Battery: passo 2, imagem 1 %32 Toyota Key Shell Replacement, Remove Fob Battery: passo 2, imagem 2 %32 Toyota Key Shell Replacement, Remove Fob Battery: passo 2, imagem 3 %32
    • Let's begin shall we.

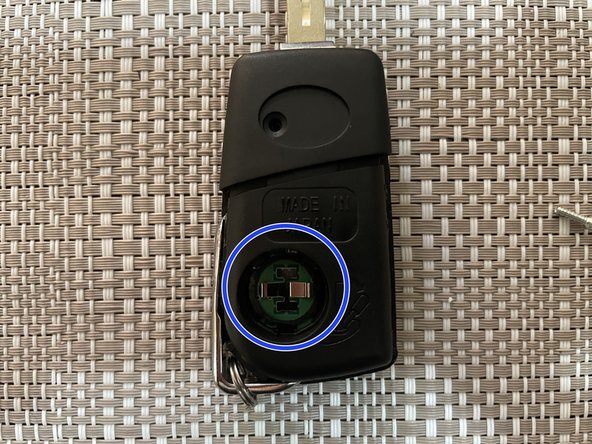
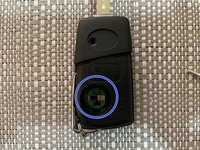
    • We start with the Central Locking Remote

    • Don't immediately start trying to seperate the Fob shell, there is a hidden screw behind the Toyota logo

    • Start by remove the first cover to access the battery. This is best removed from the key ring corner with a flat bladed screw driver to pry up and off.

    • There is a cover that hides the battery still (which isn't in the second photo, my bad), this is also removed with a flat bladed screw driver.

    • The internal battery cover is a water tight seal and isn't clipped in. It can be removed in a twist motion while levering up.

    • Remove battery from Fob (hey look, internal battery cover came back)
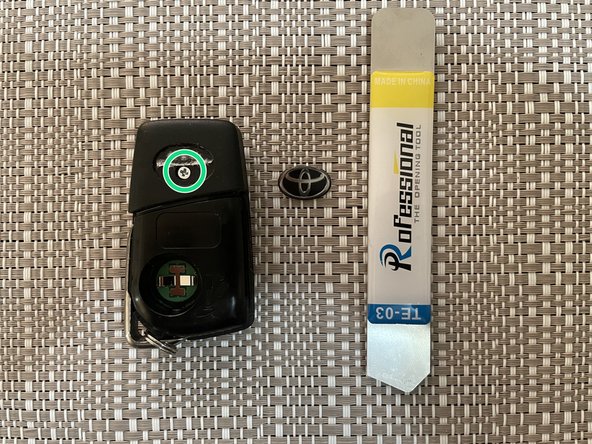
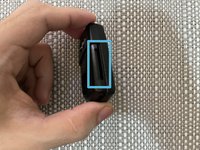
    • Remember to keep the battery, or even replace with a new one. The battery covers can be used in the replacement shell as well.

  3. Toyota Key Shell Replacement, Removing Fob Screw: passo 3, imagem 1 %32 Toyota Key Shell Replacement, Removing Fob Screw: passo 3, imagem 2 %32
    • Let's get this screw out.

    • Do not try and seperate or pull apart Fob just yet, there is a screw that requires removal first!

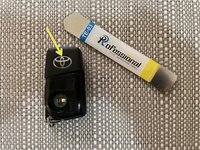
    • It's best to have one of these tools as pictured or something similar to pry up the Toyota logo to get to the screw.

    • Need something quite thin as there is very little gap between logo and case (must be that Toyota build quality)

    • You can also apply a bit of heat, I found this helped a little to soften the adhesive

    • Once logo is removed, the screw is visible and can be removed. Best to remove the old adhesive here as well.

    • No need to worry about springs or anything popping out, it's designed in a way for that NOT to happen! *cough Build Quality cough*

  4. Toyota Key Shell Replacement, Removing Fob PCB: passo 4, imagem 1 %32 Toyota Key Shell Replacement, Removing Fob PCB: passo 4, imagem 2 %32 Toyota Key Shell Replacement, Removing Fob PCB: passo 4, imagem 3 %32
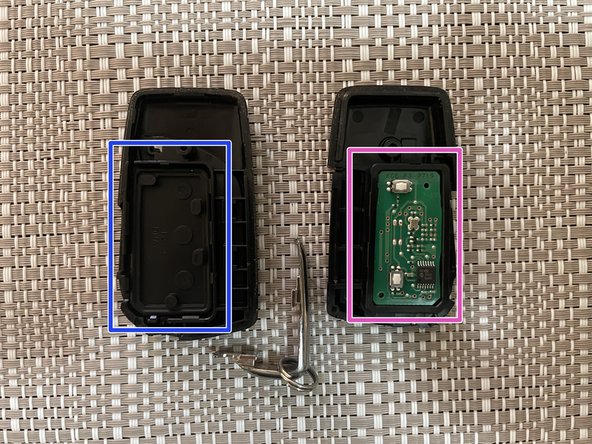
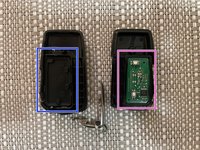
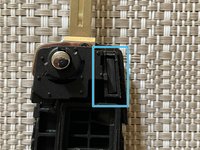
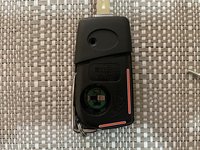
    • Tilting the Fob to the side, there is an opening.

    • And yup you guessed it, the mighty flat bladed screw driver pops this open!

    • Once open, we can see that there is heaps of room for a flip key. Toyota again, why did you bother designing a seperate Fob again?

    • Notice the rubber pad, this is for the buttons, I found the original pad to work better in the new key. Totally up to yourself if you mix and match parts.

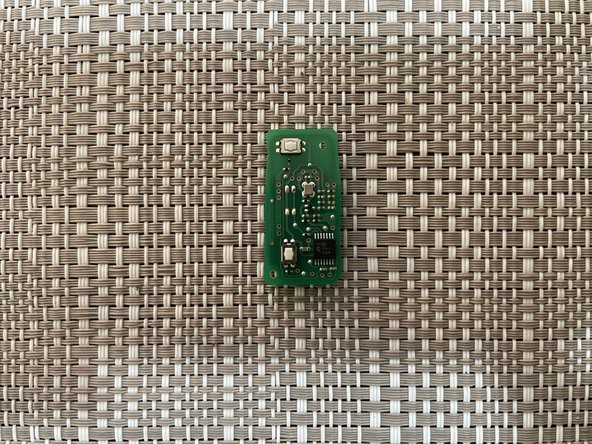
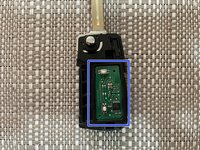
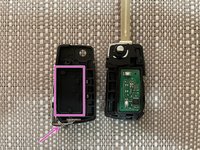
    • Carefully remove the PCB from the shell, save this as we will use this later for our new key.

    • Ensure Battery has been removed in previous step, as it can cause damage to the PCB. Also, avoid using a metal tool here incase.

  5. Toyota Key Shell Replacement, Removing Transponder Chip: passo 5, imagem 1 %32 Toyota Key Shell Replacement, Removing Transponder Chip: passo 5, imagem 2 %32 Toyota Key Shell Replacement, Removing Transponder Chip: passo 5, imagem 3 %32
    • Now let's gut the physical key to remove the all important Transponder Chip and physical key. This will be split into 2 steps, 5 & 6, due to limits with photos.

    • This Transponder Chip is highly important, without it the vehicle will NOT start. They are highly fragile and can easily chip (no pun intended here, this is serious) rendering TC useless.

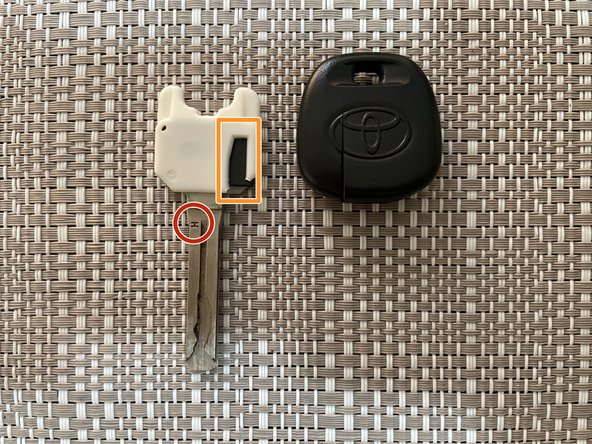
    • Notice this little 'H' on one side of the key, I've found that the Chip is sitting on the opposite side of this, there is no guarantee this is always the case but it was for this one and every other one I've done. This can also be a 'G' or little dot.

    • Easiest way to cut the Black/Gray Key mould is with a hobby knife. Slow and steady will win here.

    • You can see in the last photo, that the Chip is surrounded in a white housing, so when cutting open the rubber moulding there's very little chance of touching the Chip itself, just be careful.

    • The Chip can now be removed from the white housing. Minor cutting may be required.

  6. Toyota Key Shell Replacement, Removing Physical Key: passo 6, imagem 1 %32 Toyota Key Shell Replacement, Removing Physical Key: passo 6, imagem 2 %32
    • Here we see the Chip removed, keep it for the new Flip Key.

    • Continue cutting the white housing until you get to the bare brass key. Here you have a few options;

    • 1. Discard Key, melt down and make a ring or something, or throw in the bin.

    • 2. Keep as backup that's attached to the chassis on the vehicle incase you lock keys inside or something, or as a swimming key which let's you into the vehicle but is obviously waterproof.

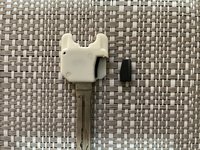
    • 3. Modify the key to fit the new Flip Key so you can save money on key cutting costs. This is a bit more complicated but if you're handy it's worth it, just remember the key is brass and quite soft.

  7. Toyota Key Shell Replacement, Let's have a look at the new Flip Key: passo 7, imagem 1 %32 Toyota Key Shell Replacement, Let's have a look at the new Flip Key: passo 7, imagem 2 %32 Toyota Key Shell Replacement, Let's have a look at the new Flip Key: passo 7, imagem 3 %32
    • The aftermarket Flip Key shell is pulled apart the same way as the original shell and comes with a few extra bits.

    • These extra bits are the little metal components, which can be discarded.

    • Notice where the Transponder Chip goes, it's a tight squeeze.

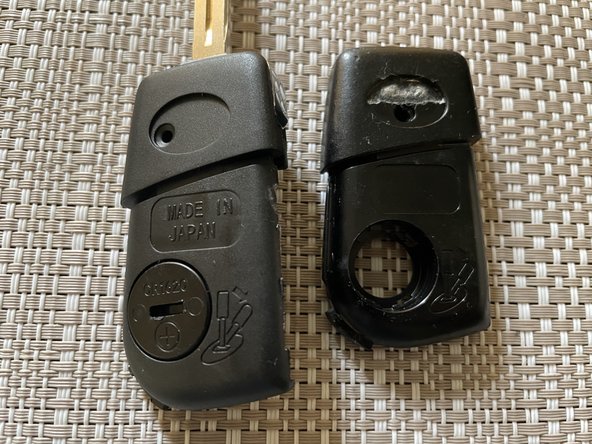
    • Here we also compare the 2 shells, screw location in different spots (must be how to bypass copyright/patent, who knows). But the more interesting part, for myself anyway, is the 'Made in Japan' on the aftermarket key but none on the genuine Fob, hmm...

  8. Toyota Key Shell Replacement, Assembling Flip Key Electronics: passo 8, imagem 1 %32 Toyota Key Shell Replacement, Assembling Flip Key Electronics: passo 8, imagem 2 %32 Toyota Key Shell Replacement, Assembling Flip Key Electronics: passo 8, imagem 3 %32
    • Time to put that Chip in, hope you didn't lose it in that short time.

    • Chip did sit snug in the housing, however may move a bit or rattle in other housings, I recommend blue tac or similar. Avoid super glue in case the chip has to be removed.

    • Let's place the PCB in position.

    • Take care in ensuring the metal contacts aren't damaged during this process.

    • Also found that the aftermarket housing had to be modified a tad, to fit the PCB correctly.

  9. Toyota Key Shell Replacement, Housing Assembly: passo 9, imagem 1 %32 Toyota Key Shell Replacement, Housing Assembly: passo 9, imagem 2 %32 Toyota Key Shell Replacement, Housing Assembly: passo 9, imagem 3 %32
    • Time to click everything back together!

    • Once all the electronics are in position the front cover (one with buttons) can be clipped into position to seal up the Key.

    • Remember to position the rubber pad so the buttons work.

    • Don't forgot the key ring on the metal holder, this is a pain to put on afterwards.

    • Now the fun part, it all snaps, clips, clicks onto place! The red Lines indicate where it clicks into place, and don't forget the screw!

    • Avoid over tighten the screw, it tends to strip the plastic pretty easily.

    • Have a feel for the buttons to see if it feels like the original, part swapping may be required to get the right feel.

  10. Toyota Key Shell Replacement, Final Assembly: passo 10, imagem 1 %32 Toyota Key Shell Replacement, Final Assembly: passo 10, imagem 2 %32
    • Once happy with the feel of the buttons, places the battery into the PCB and cover with the internal battery cover.

    • External Battery cover can be clicked back into place.

    • Toyota logo can be attached in multiple ways, I found thin double sided tape to work best (that's why the factory used it!)

    • Time to test!

    • Key won't go into Ignition or Door Locks as so don't be worried about that, once cut the key will fit, and hopefully turn.

  11. Toyota Key Shell Replacement, Using Original Physical Key (Optional): passo 11, imagem 1 %32 Toyota Key Shell Replacement, Using Original Physical Key (Optional): passo 11, imagem 2 %32 Toyota Key Shell Replacement, Using Original Physical Key (Optional): passo 11, imagem 3 %32
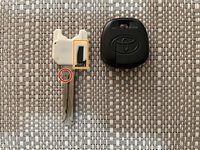
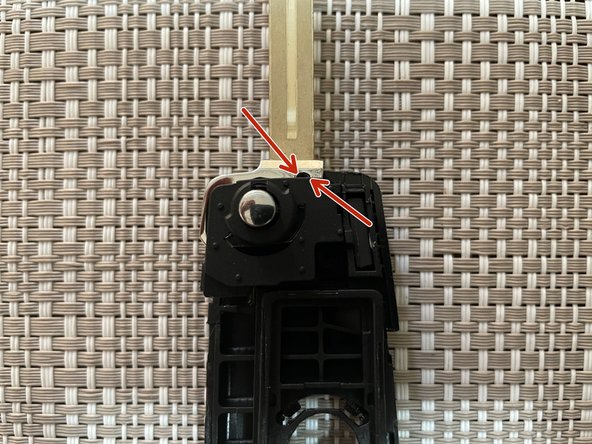
    • If wanting to use original key you will need to cut and file the key to the shape in second photo.

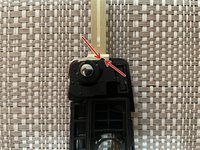
    • It is held on with a split pin that is accessed with the key in a half extended position. It can be partly seen when key is fully extended.

    • The split pin is quite difficult to remove, can use an old drill bit that is slightly smaller to remove split pin. There are correct tools out there that hold key and remove split pin with ease.

Conclusão

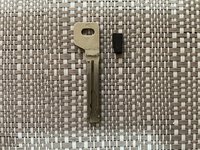
Once Key is cut, it will now start the vehicle and you can show off your new Key!

jamespribil

Membro desde: 03/22/12

235 Reputação

Autoria de 1 guia

Um comentário

No information on what to use to remove the screw that holds the fob together. Never seen anything like it , is it a tool exclusively to Toyota only?

Louis Loizou - Responder

Adicione um comentário

Exibir estatísticas:

Últimas 24 horas: 10

Últimos 7 dias: 56

Últimos 30 dias: 84

Duração total: 4,921