Ir para o conteúdo principal
Participe da comunidade de reparos - Criar conta

The Claw Circuit Board Replacement

O que você precisa

  1. The Claw Circuit Board Replacement, Bottom Cover: passo 1, imagem 1 %32
    • Place The Claw in upright position with controls facing you.

    Pergunte ao FixBot

    Comentar

  2. The Claw Circuit Board Replacement: passo 2, imagem 1 %32
    • Gently flip The Claw machine upside down with the controls facing you.

    Pergunte ao FixBot

    Comentar

  3. The Claw Circuit Board Replacement: passo 3, imagem 1 %32
    • Remove all ten screws from the bottom cover using a Phillips #1 screwdriver.

    • You will need a screwdriver with a long thin neck to fit in the screw holes.

    Pergunte ao FixBot

    Comentar

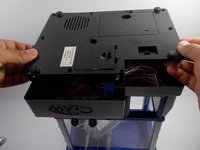
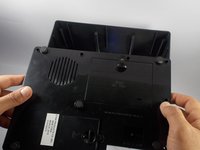
  4. The Claw Circuit Board Replacement: passo 4, imagem 1 %32 The Claw Circuit Board Replacement: passo 4, imagem 2 %32
    • Slide the bottom cover off to the side.

    • Do not completely remove bottom cover as it is still connected to wires.

    Pergunte ao FixBot

    Comentar

  5. The Claw Circuit Board Replacement: passo 5, imagem 1 %32
    • Complete removal of the bottom cover is not necessary, however if you feel you need to take the cover completely off the machine to complete your task it can be done by the following process.

    • You will need to cut the two green wires attached to the music player.

    • Then you will need to cut the white wire that leads to the battery compartment.

    • Finally you will need to cut the black wire leading to the battery compartment as well.

    • The complete removal of the bottom cover requires the cutting and soldering of wires. For help with soldering reference: Como soldar e dessoldar contatos.

    Pergunte ao FixBot

    Comentar

  6. The Claw Circuit Board Replacement, Circuit Board: passo 6, imagem 1 %32
    • Once you have removed the bottom cover you should have clear access to the circuit board.

    • Locate the circuit board in the bottom of The Claw machine.

    Pergunte ao FixBot

    Comentar

  7. The Claw Circuit Board Replacement: passo 7, imagem 1 %32
    • Locate the screws that hold the circuit board in place.

    Pergunte ao FixBot

    Comentar

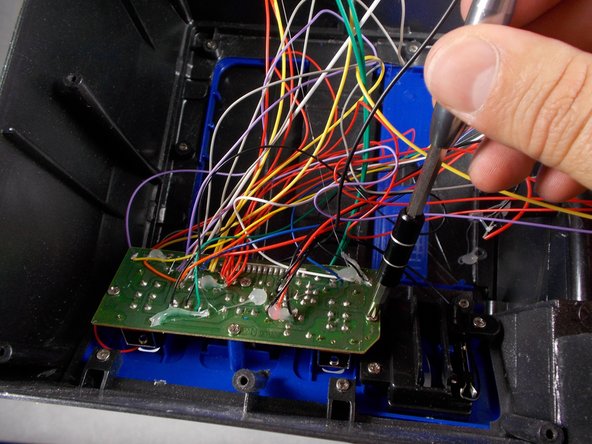
  8. The Claw Circuit Board Replacement: passo 8, imagem 1 %32
    • Be sure to turn off the device and remove the batteries before reaching into the device with your hands or any metal tools.

    • Using a Phillips #1 screwdriver, remove the four 6mm that hold the circuit board in place.

    • You will also need to cut all of the wires leading to the circuit board to completely remove it.

    Pergunte ao FixBot

    Comentar

  9. The Claw Circuit Board Replacement: passo 9, imagem 1 %32
    • Remove the circuit board.

    • The removal of the circuit board requires the cutting of existing wires and soldering new wires to the new board. For help with soldering reference: Como soldar e dessoldar contatos.

    Pergunte ao FixBot

    Comentar

Conclusão

To reassemble your device, follow these instructions in reverse order.

Cancelar: não concluí este guia.

2 outras pessoas executaram este guia.

Alain Pierre

Membro desde: 03/22/16

1.188 Reputação

Autoria de 9 guias

Equipe

9Comentários do guia

I accidentally cut the wires where the motors are and now can not figure out which go where, is there a diagram or drawling of where each wire goes?

Dyn4mic Universe - Responder Compartilhar

Did you ever find a diagram for this? I would like to have one also….

Nathan Riffel - Responder Compartilhar

Does anybody know where to get the replacement switches for these?

Bill B. - Responder Compartilhar

Same. I am in need of the replacements as well.

Allison Rousseau - Responder Compartilhar

Me too. L/R switch doesn't work need to replace it.

Johnny Annon - Responder Compartilhar

Comentar

Visualizações:

Últimas 24 horas: 3

Últimos 7 dias: 16

Últimos 30 dias: 94

Ao todo: 7,806