Introdução
This repair guide will provide steps to replace the motion sensor on a Swann Wi-Fi Indoor Security Camera. The motion sensor is what triggers the camera to begin recording. If your device matches the symptoms reported in the troubleshooting guide this repair guide will help remedy the issue further.
This guide requires the use of a soldering iron, proper safety and usage are advised to avoid injury. In addition, this repair guide requires the handling of electrical components that may be sensitive to ESD (Electrostatic Discharge), so proper ESD protection is also advised.
O que você precisa
-
-
Use the Phillips #0 to remove the screw located on the back of the camera above the mount.
-
Slide the mount out from the bottom of the device.
-
-
-
-
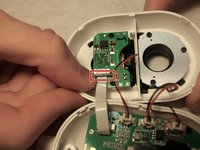
Facing the inside of the front of the case, release the white ribbon cable by pulling the black rectangular connector at the end of the connection
-
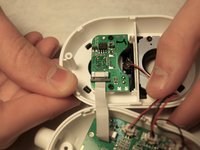
Once the black holder is opened, gently pull the cable out of the holder.
-


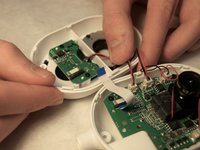


To reassemble your device, follow these instructions in reverse order.
Cancelar: não concluí este guia.
Uma outra pessoa concluiu este guia.
Equipe

Western Carolina University, Team S1-G4, Virtue Fall 2019 Membro de Western Carolina University, Team S1-G4, Virtue Fall 2019
WCU-VIRTUE-F19S1G4
4 Membros
Autoria de 12 guias