Ir para o conteúdo principal
Participe da comunidade de reparos - Criar conta

Sony Handycam FDR-AX33 Microphone Replacement

O que você precisa

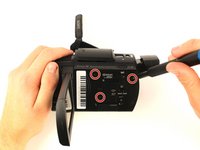
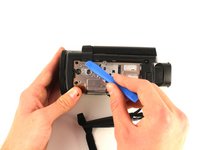
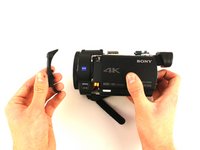
    1. Sony Handycam FDR-AX33 Microphone Replacement, Panel: passo 1, imagem 1 %32 Sony Handycam FDR-AX33 Microphone Replacement, Panel: passo 1, imagem 2 %32
      • Remove the battery by pushing the latch towards the body of the camera. Push the battery down and pull it out.

      • Remove the six black 4 mm Phillips #00 screws from the bottom panel of the camera.

      • Pull off the bottom panel. It may be difficult, but tugging on it shouldn't cause harm to yourself or the device.

      • Be sure to un-velcro the handle strap.

      Pergunte ao FixBot

      Comentar

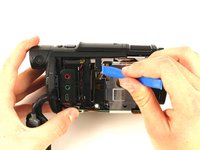
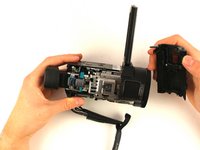
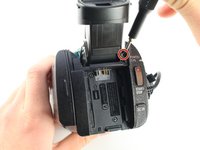
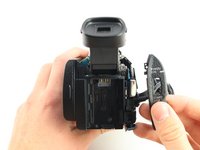
    2. Sony Handycam FDR-AX33 Microphone Replacement: passo 2, imagem 1 %32 Sony Handycam FDR-AX33 Microphone Replacement: passo 2, imagem 2 %32 Sony Handycam FDR-AX33 Microphone Replacement: passo 2, imagem 3 %32
      • Remove the 3 mm Phillips #00 screw from the bottom of the camera.

      • Remove the 4 mm Phillips #00 screw from the right panel.

      • Pull the right panel off. Again, it might be difficult, but pulling hard shouldn't harm you or the camera.

      • You may have to use the opening tool to remove this panel.

      Pergunte ao FixBot

      Comentar

    3. Sony Handycam FDR-AX33 Microphone Replacement: passo 3, imagem 1 %32 Sony Handycam FDR-AX33 Microphone Replacement: passo 3, imagem 2 %32
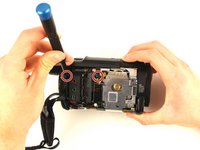
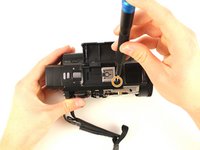
      • Remove the two 4 mm Phillips #00 screws from the top right corner of the camera.

      • Remove the 4 mm Phillips #00 screw from in front of the flash mount.

      Pergunte ao FixBot

      Comentar

    4. Sony Handycam FDR-AX33 Microphone Replacement: passo 4, imagem 1 %32 Sony Handycam FDR-AX33 Microphone Replacement: passo 4, imagem 2 %32
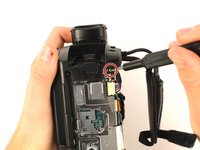
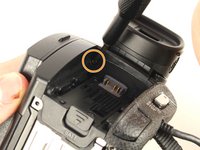
      • Remove the 3 mm Phillips #00 screw from below the right side of the battery slot.

      • Remove the black 5 mm Phillips #00 screw from the top of the battery slot.

      Pergunte ao FixBot

      Comentar

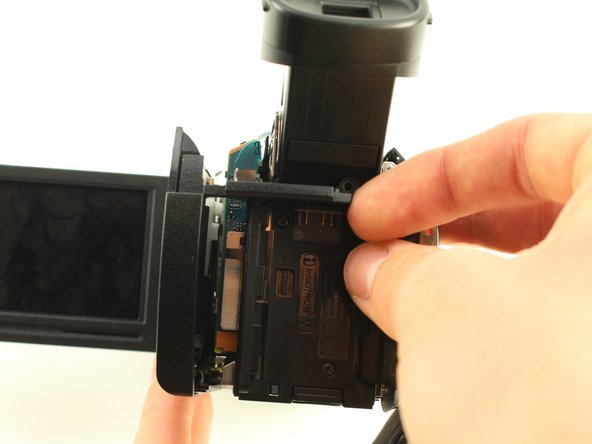
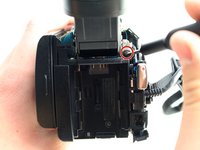
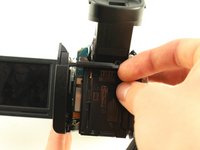
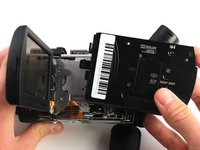
    5. Sony Handycam FDR-AX33 Microphone Replacement: passo 5, imagem 1 %32 Sony Handycam FDR-AX33 Microphone Replacement: passo 5, imagem 2 %32 Sony Handycam FDR-AX33 Microphone Replacement: passo 5, imagem 3 %32
      • Remove the three 4 mm Phillips #00 screws from the left panel underneath the display screen.

      • You’ll need to extend the eyepiece by pulling it out from the body of the camera.

      • Pull the top panel off of the device with the iFixit opening tool.

      Pergunte ao FixBot

      Comentar

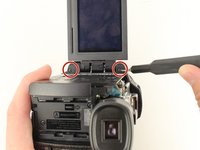
    6. Sony Handycam FDR-AX33 Microphone Replacement: passo 6, imagem 1 %32 Sony Handycam FDR-AX33 Microphone Replacement: passo 6, imagem 2 %32 Sony Handycam FDR-AX33 Microphone Replacement: passo 6, imagem 3 %32
      • Remove the top and bottom 4 mm Phillips #00 screws from the display screen hinge.

      • Use the iFixit opening tool to remove the screen hinge.

      Pergunte ao FixBot

      Comentar

    7. Sony Handycam FDR-AX33 Microphone Replacement: passo 7, imagem 1 %32 Sony Handycam FDR-AX33 Microphone Replacement: passo 7, imagem 2 %32
      • Remove the 3 mm Phillips #00 screw from between the eyepiece and the panel directly to the right of the battery slot.

      • Angle the eyepiece up to reach the screw with the screwdriver.

      • Take the panel directly to the right of the battery slot off of the camera.

      Pergunte ao FixBot

      Comentar

    8. Sony Handycam FDR-AX33 Microphone Replacement: passo 8, imagem 1 %32 Sony Handycam FDR-AX33 Microphone Replacement: passo 8, imagem 2 %32 Sony Handycam FDR-AX33 Microphone Replacement: passo 8, imagem 3 %32
      • Remove the 4 mm Phillips #00 screw above and to the right of the battery slot.

      • Pry the left panel out at an angle by pushing the plastic slat between the battery slot and the eyepiece.

      • Wiggle the left panel and pull it out gently.

      • The left panel can be hard to remove so make sure to apply a good amount of force, but be cautious to not harm yourself or the device.

      Pergunte ao FixBot

      Comentar

    1. Sony Handycam FDR-AX33 Microphone Replacement, Microphone: passo 9, imagem 1 %32
      • Pry up the plastic frame around the camera’s microphone.

      • Be careful with the thin plastic frame as it might break. If it does break, it shouldn't affect the camera's performance.

      Pergunte ao FixBot

      Comentar

    2. Sony Handycam FDR-AX33 Microphone Replacement: passo 10, imagem 1 %32
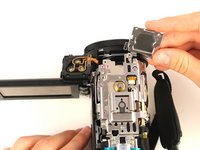
      • Pull back clips to release microphone.

      Pergunte ao FixBot

      Comentar

    3. Sony Handycam FDR-AX33 Microphone Replacement: passo 11, imagem 1 %32 Sony Handycam FDR-AX33 Microphone Replacement: passo 11, imagem 2 %32 Sony Handycam FDR-AX33 Microphone Replacement: passo 11, imagem 3 %32
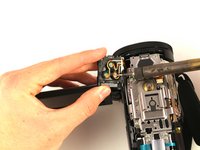
      • Desolder the three connections on the bottom of the microphone. Refer to the soldering guide linked here.

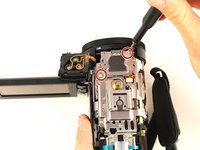
      • Remove the two 3 mm Phillips #00 screws to release the microphone mount.

      • Removing the microphone mount is not required to replace the microphone.

      Pergunte ao FixBot

      Comentar

Conclusão

To reassemble your device, follow these instructions in reverse order.

Cancelar: não concluí este guia.

Uma outra pessoa concluiu este guia.

Cameron Casey

Membro desde: 01/24/19

187 Reputação

Autoria de 1 guia

Equipe

Cal Poly, Team S18-G2, White Winter 2019 Membro de Cal Poly, Team S18-G2, White Winter 2019

CPSU-WHITE-W19S18G2

4 Membros

Autoria de 12 guias

0Comentários do guia

Comentar

Visualizações:

Últimas 24 horas: 0

Últimos 7 dias: 6

Últimos 30 dias: 29

Ao todo: 1,049