Ir para o conteúdo principal
Participe da comunidade de reparos - Criar conta

Razer BlackShark V2 Cable Replacement

O que você precisa

  1. Razer BlackShark V2 Cable Replacement, Ear Cushion: passo 1, imagem 1 %32
    • Place the headset so that the left side is facing you.

    • The left side of the headset has the cable attachment and the volume control knob.

    Pergunte ao FixBot
  2. Razer BlackShark V2 Cable Replacement: passo 2, imagem 1 %32
    • Scoop your middle and ring finger underneath the top or bottom inner portion of the ear cushion.

    • You should feel a hard plastic ridge.

    • Pull from the hard plastic ridge, being sure not to pull from the soft cushion.

    • Slowly apply pressure to prevent damage.

    Pergunte ao FixBot
  3. Razer BlackShark V2 Cable Replacement: passo 3, imagem 1 %32
    • Pull from the hard plastic ridge, being sure not to pull from the soft cushion.

    • Slowly apply pressure to prevent damage.

    Pergunte ao FixBot
  4. Razer BlackShark V2 Cable Replacement: passo 4, imagem 1 %32 Razer BlackShark V2 Cable Replacement: passo 4, imagem 2 %32
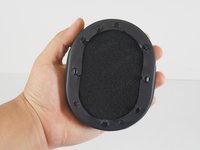
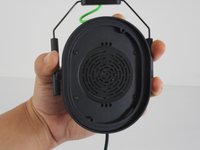
    • Once the cushion is removed, make sure the hard plastic base with the clips is attached to it.

    • If you are replacing both ear cushions, repeat Steps 1-4 for the other side. Then, insert the new ear cushions by lining up the clips in their respective holes and applying even pressure until they audibly click.

    Pergunte ao FixBot
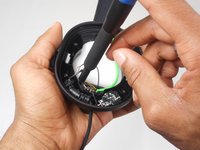
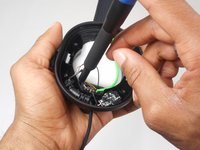
  5. Razer BlackShark V2 Cable Replacement, Speaker: passo 5, imagem 1 %32 Razer BlackShark V2 Cable Replacement, Speaker: passo 5, imagem 2 %32
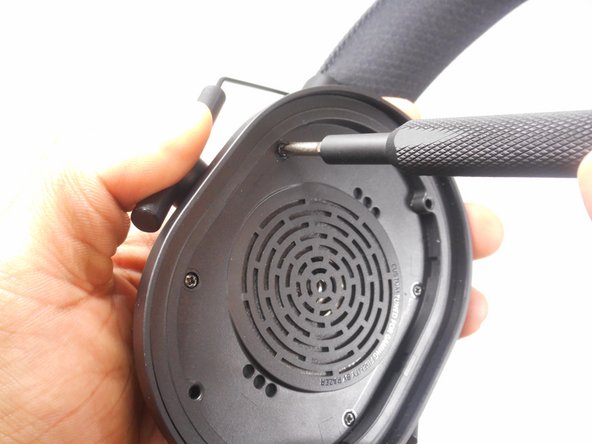
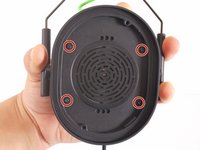
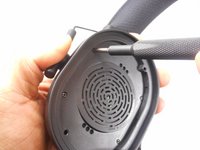
    • Remove the four screws holding the speaker in the headset using a Phillips #1 screwdriver.

    Pergunte ao FixBot
  6. Razer BlackShark V2 Cable Replacement: passo 6, imagem 1 %32 Razer BlackShark V2 Cable Replacement: passo 6, imagem 2 %32
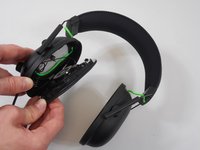
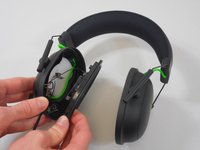
    • Gently grab the headset and slowly apply pressure to the speaker cover; it will come off.

    • Be careful of the wires that are attached to the back of the speaker to ensure they won't be damaged when removing the speaker and its cover.

    Pergunte ao FixBot
  7. Razer BlackShark V2 Cable Replacement: passo 7, imagem 1 %32 Razer BlackShark V2 Cable Replacement: passo 7, imagem 2 %32 Razer BlackShark V2 Cable Replacement: passo 7, imagem 3 %32
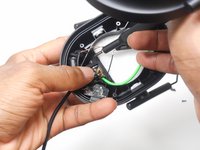
    • After disconnecting the speaker from the headset, it is still connected by the wires that power the speaker itself.

    • With heat or with a sharp tool, remove the glue around the wires that connect the speaker to the headset.

    • Using the new speaker, you can reattach the wires soldering them in with existing glue.

    • If replacing internal components and NOT the speaker, you can do so without severing any wire connections; operate carefully to not sever them unnecessarily!

    Pergunte ao FixBot
  8. Razer BlackShark V2 Cable Replacement, Cable: passo 8, imagem 1 %32 Razer BlackShark V2 Cable Replacement, Cable: passo 8, imagem 2 %32
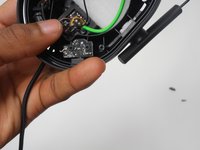
    • Locate the main cable after it protrudes through the opening in the headset and where the cable is attached to the motherboard.

    Pergunte ao FixBot
  9. Razer BlackShark V2 Cable Replacement: passo 9, imagem 1 %32
    • Remove the connecting glue attaching the wires to the motherboard with a sharp object or heat.

    • Be careful around the motherboard when removing the connected wires.

    Pergunte ao FixBot
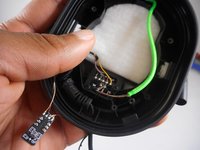
  10. Razer BlackShark V2 Cable Replacement: passo 10, imagem 1 %32 Razer BlackShark V2 Cable Replacement: passo 10, imagem 2 %32
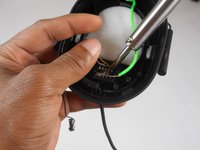
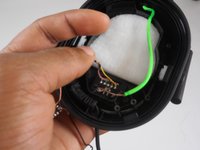
    • Reattach the new cable with the soldering iron.

    • Be sure not to damage the motherboard when resoldering the new cable.

    Pergunte ao FixBot
Conclusão

To reassemble your device, follow these instructions in reverse order.

5 outras pessoas executaram este guia.

3Comentários do guia

any chance you have a guide to replacing the battery?

Bradix Thresher - Responder Compartilhar

Never mind figured it out, battery is on the right earpiece... Love all your guides though!!

Bradix Thresher - Responder Compartilhar

Cuál es el orden del cableado en el plug 3.5 porfavoor! No lo encuentro por ningún lado :(

Panerukk M. - Responder Compartilhar

Comentar

Visualizações:

Últimas 24 horas: 10

Últimos 7 dias: 51

Últimos 30 dias: 241

Ao todo: 10,622