Ir para o conteúdo principal
Participe da comunidade de reparos - Criar conta

OnePlus 9 Pro Screen Replacement

O que você precisa

  1. OnePlus 9 Pro Screen Replacement, Rear Glass: passo 1, imagem 1 %32
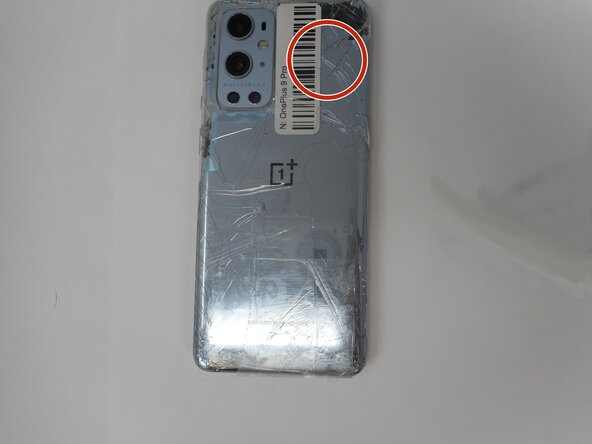
    • For your safety, discharge your battery below 25% before disassembling your phone. This reduces the risk of a dangerous thermal event if the battery is accidentally damaged during the repair. If your battery is swollen, take appropriate precautions.

    • Unplug any chargers/peripheries and power off your phone.

    Pergunte ao FixBot

    Comentar

  2. OnePlus 9 Pro Screen Replacement: passo 2, imagem 1 %32
    Pergunte ao FixBot

    Comentar

  3. OnePlus 9 Pro Screen Replacement: passo 3, imagem 1 %32 OnePlus 9 Pro Screen Replacement: passo 3, imagem 2 %32
    • Use a hair dryer to lightly heat the perimeter of the rear glass.

    • Additionally, heat the top-right corner, as there is adhesive further inside of phone in that one spot.

    • Do not hold the hair dryer in one spot on the phone for too long to prevent damage to internal parts of the phone.

    Pergunte ao FixBot

    Comentar

  4. OnePlus 9 Pro Screen Replacement: passo 4, imagem 1 %32
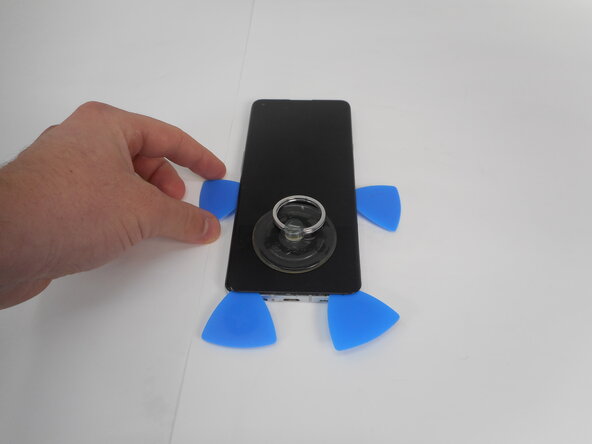
    • Apply a suction handle as close to the bottom edge as possible.

    • Pull up on the suction handle with strong, steady force to create a gap between the glass and the frame.

    • If you have trouble creating a gap, apply more heat to further soften the adhesive.

    • Insert an opening pick into the gap.

    Pergunte ao FixBot

    Comentar

  5. OnePlus 9 Pro Screen Replacement: passo 5, imagem 1 %32
    • Slide the opening pick around the perimeter of the rear glass to slice the adhesive.

    • Insert additional opening picks as you slice the adhesive to prevent the adhesive from resealing.

    • If the adhesive becomes hard to cut, it has most likely cooled down. Use your hair dryer to reheat it.

    Pergunte ao FixBot

    Comentar

  6. OnePlus 9 Pro Screen Replacement: passo 6, imagem 1 %32 OnePlus 9 Pro Screen Replacement: passo 6, imagem 2 %32
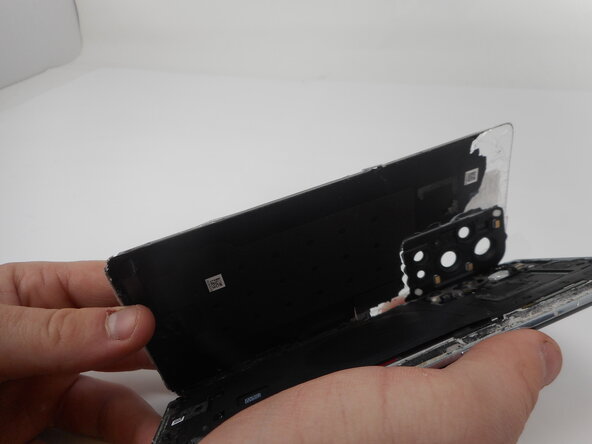
    • Carefully lift the rear glass up and off of the phone.

    • During reassembly secure the rear glass with pre-cut adhesive or double-sided adhesive tape. After installing the rear glass, apply strong, steady pressure to your phone for several minutes to help the adhesive form a good bond—a stack of heavy books works well.

    Pergunte ao FixBot

    Comentar

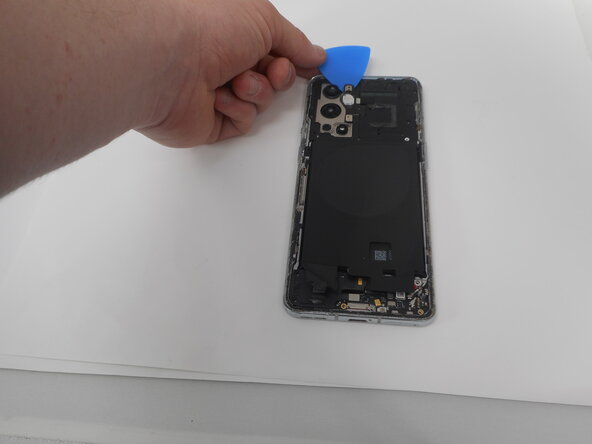
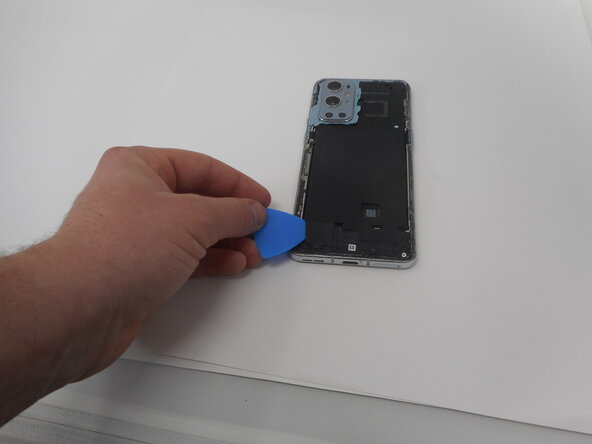
  7. OnePlus 9 Pro Screen Replacement, Bottom Loudspeaker: passo 7, imagem 1 %32 OnePlus 9 Pro Screen Replacement, Bottom Loudspeaker: passo 7, imagem 2 %32
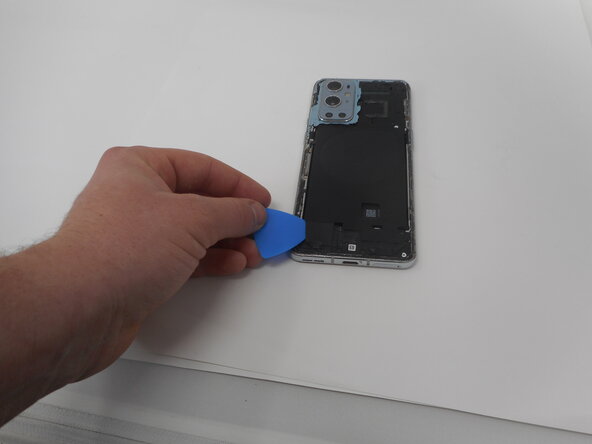
    • Use one of the opening picks to remove the adhesive on the lower part of the wireless charging cable

    Pergunte ao FixBot

    Comentar

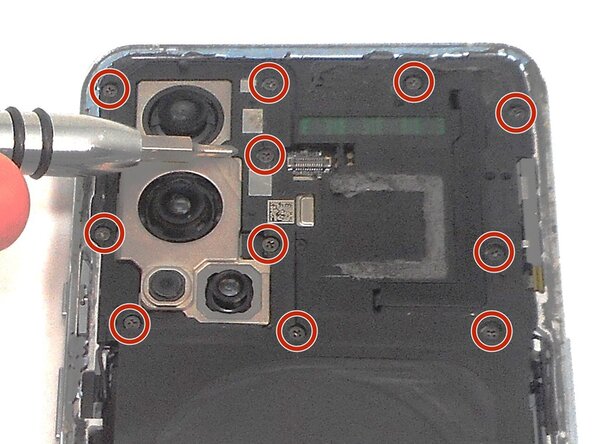
  8. OnePlus 9 Pro Screen Replacement: passo 8, imagem 1 %32 OnePlus 9 Pro Screen Replacement: passo 8, imagem 2 %32 OnePlus 9 Pro Screen Replacement: passo 8, imagem 3 %32
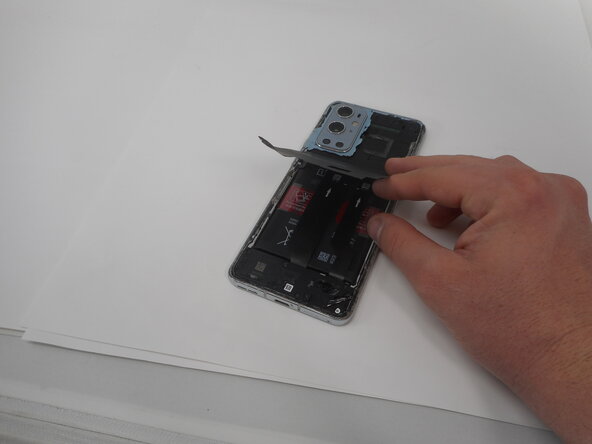
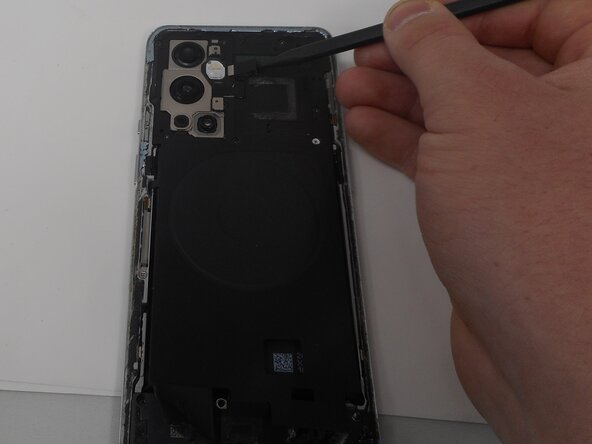
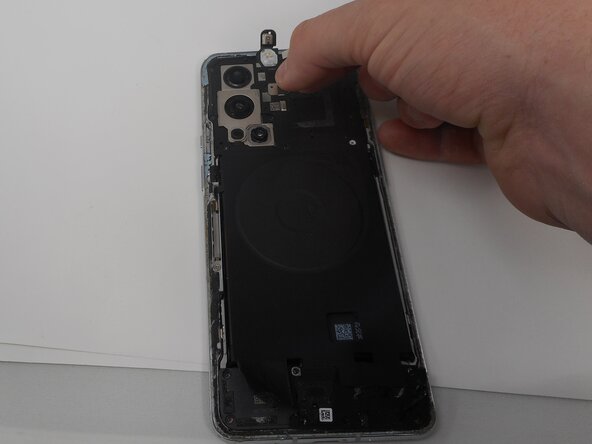
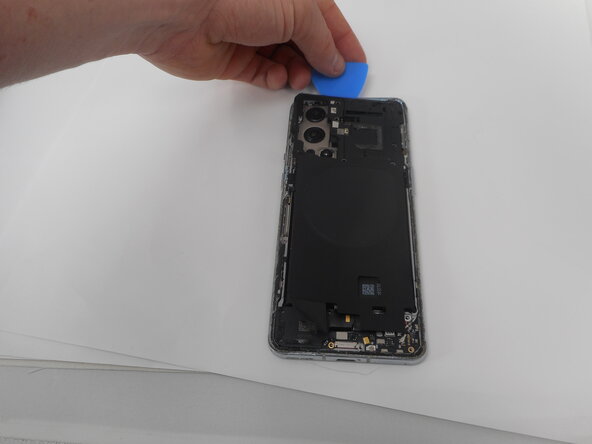
    • Unplug the press connector ribbon cable attached to the flash module by inserting a spudger under the bottom edge and prying straight up.

    • Use an opening pick to remove the flash module by the camera.

    • Use a Phillips #000 screwdriver to remove the eleven 4.9 mm-long screws holding the motherboard cover to the phone.

    • Use an opening pick to pry off the motherboard cover.

    Pergunte ao FixBot

    Comentar

  9. OnePlus 9 Pro Screen Replacement: passo 9, imagem 1 %32
    • Use a Phillips #000 screwdriver to remove five screws that secure the lower daughterboard cover.

    • Two of the screws have a white head and are 4.8 mm-long. They go in the bottom right corner of the daughter and mother board.

    • The other three screws are black and are also 4.8 mm-long.

    Pergunte ao FixBot

    Comentar

  10. OnePlus 9 Pro Screen Replacement: passo 10, imagem 1 %32 OnePlus 9 Pro Screen Replacement: passo 10, imagem 2 %32
    • Disconnect the two interconnect cables by inserting a spudger under each lip and prying straight up.

    Pergunte ao FixBot

    Comentar

  11. OnePlus 9 Pro Screen Replacement: passo 11, imagem 1 %32
    • Remove the three screws from the loudspeaker using a Phillips #000 screwdriver.

    Pergunte ao FixBot

    Comentar

  12. OnePlus 9 Pro Screen Replacement: passo 12, imagem 1 %32
    • Use the spudger to pry up and remove the loudspeaker.

    Pergunte ao FixBot

    Comentar

  13. OnePlus 9 Pro Screen Replacement, Battery: passo 13, imagem 1 %32 OnePlus 9 Pro Screen Replacement, Battery: passo 13, imagem 2 %32 OnePlus 9 Pro Screen Replacement, Battery: passo 13, imagem 3 %32
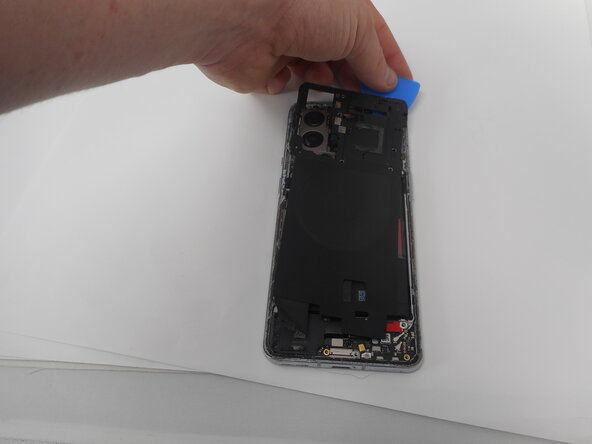
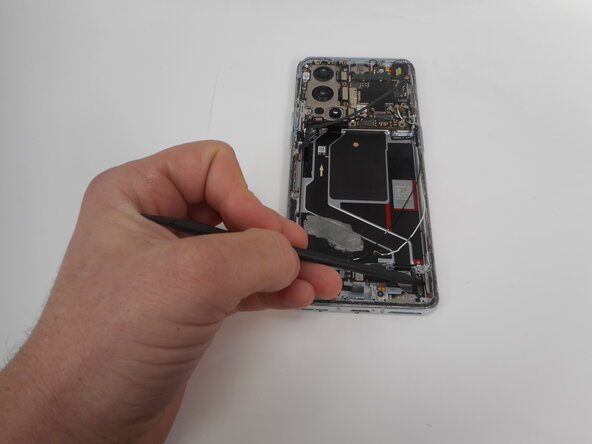
    • Use an opening pick or tweezers to carefully peel back the adhesive on the bottom of the wireless charging module.

    Pergunte ao FixBot

    Comentar

  14. OnePlus 9 Pro Screen Replacement: passo 14, imagem 1 %32 OnePlus 9 Pro Screen Replacement: passo 14, imagem 2 %32 OnePlus 9 Pro Screen Replacement: passo 14, imagem 3 %32
    • Pry on the bottom of the flash module off using a pick and use tweezers to get under the module without ripping it.

    • Be careful unplugging the module as the cable is very delicate.

    Pergunte ao FixBot

    Comentar

  15. OnePlus 9 Pro Screen Replacement: passo 15, imagem 1 %32
    • Use a Phillips #000 screwdriver to remove the eleven 4.8 mm-long screws securing the motherboard cover.

    Pergunte ao FixBot

    Comentar

  16. OnePlus 9 Pro Screen Replacement: passo 16, imagem 1 %32 OnePlus 9 Pro Screen Replacement: passo 16, imagem 2 %32 OnePlus 9 Pro Screen Replacement: passo 16, imagem 3 %32
    • Pry around the phone with picks to remove the motherboard cover.

    Pergunte ao FixBot

    Comentar

  17. OnePlus 9 Pro Screen Replacement: passo 17, imagem 1 %32
    • Lift off the motherboard cover.

    Pergunte ao FixBot

    Comentar

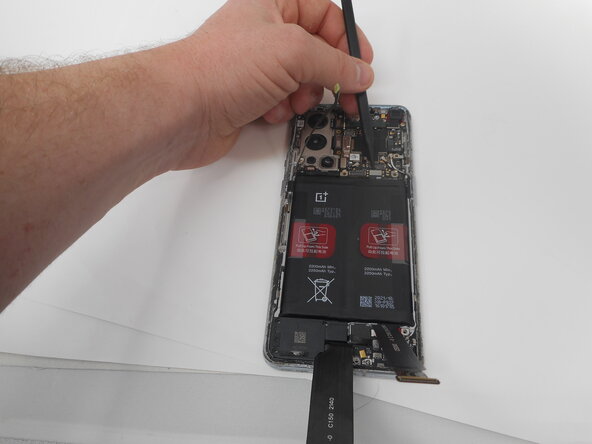
  18. OnePlus 9 Pro Screen Replacement: passo 18, imagem 1 %32 OnePlus 9 Pro Screen Replacement: passo 18, imagem 2 %32
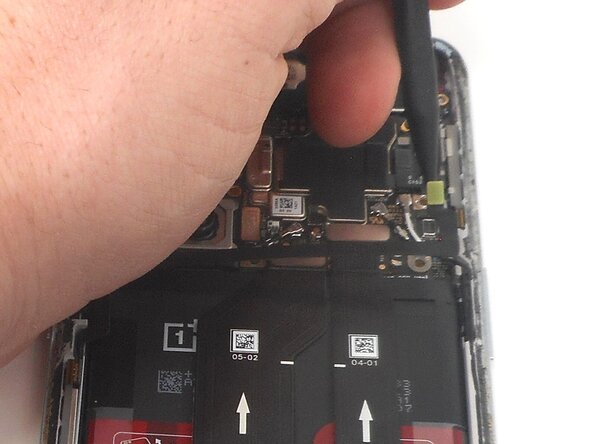
    • Pry up and disconnect the press connector ribbon cable in the top right with a spudger.

    • Make sure not to damage them in the process.

    Pergunte ao FixBot

    Comentar

  19. OnePlus 9 Pro Screen Replacement: passo 19, imagem 1 %32 OnePlus 9 Pro Screen Replacement: passo 19, imagem 2 %32 OnePlus 9 Pro Screen Replacement: passo 19, imagem 3 %32
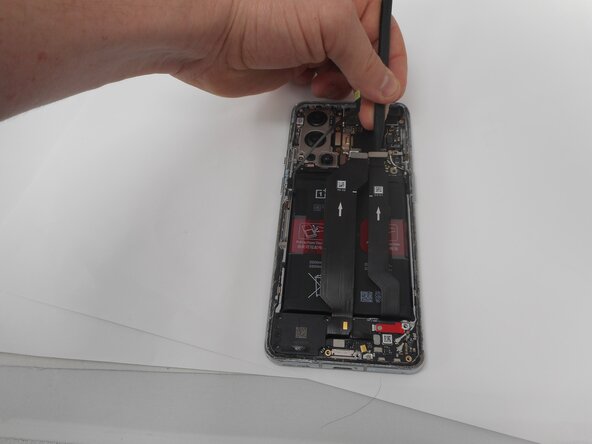
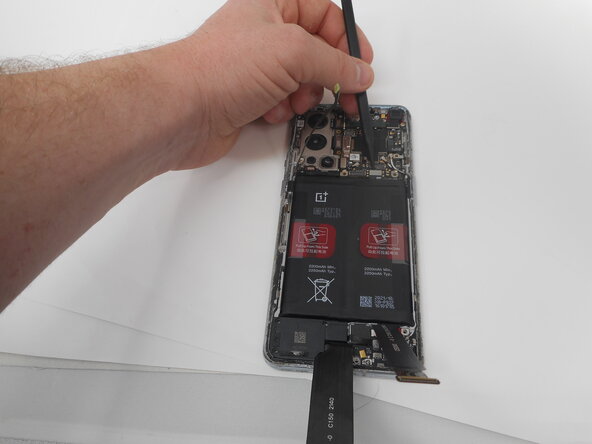
    • Use a spudger to disconnect the two interconnect cables from the motherboard by prying the connector straight up from its socket.

    Pergunte ao FixBot

    Comentar

  20. OnePlus 9 Pro Screen Replacement: passo 20, imagem 1 %32 OnePlus 9 Pro Screen Replacement: passo 20, imagem 2 %32
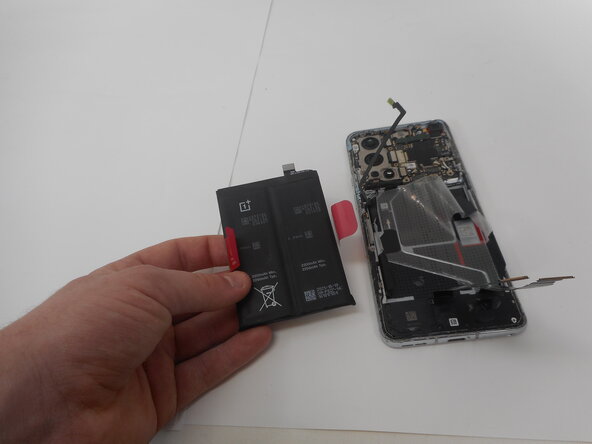
    • Take care not to bend or puncture battery during the removal procedure—a bent battery may leak dangerous chemicals or cause a fire.

    • Remove the battery from the phone by slowly pulling up on the red tabs.

    • If you're having trouble lifting the battery out of its recess, apply a heated iOpener to the screen side for two minutes to loosen the battery adhesive.

    • A hair dryer, heat gun, or hot plate may also be used, but be careful not to overheat the device.

    Pergunte ao FixBot

    Comentar

  21. OnePlus 9 Pro Screen Replacement, Screen: passo 21, imagem 1 %32 OnePlus 9 Pro Screen Replacement, Screen: passo 21, imagem 2 %32
    • Use the spudger to unplug the ribbon cable that connects the screen to the rest of the phone.

    Pergunte ao FixBot

    Comentar

  22. OnePlus 9 Pro Screen Replacement: passo 22, imagem 1 %32
    • Place the suction cup on the glass towards the bottom of the screen.

    Pergunte ao FixBot

    Comentar

  23. OnePlus 9 Pro Screen Replacement: passo 23, imagem 1 %32
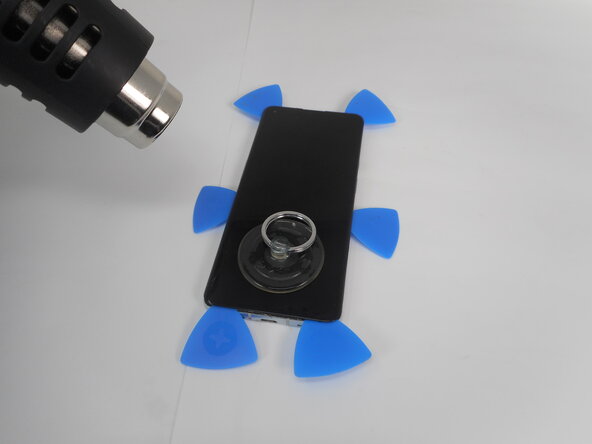
    • Heat the adhesive holding the screen onto the phone by using the heat gun on the edges of the screen.

    • Be sure to use caution when using the heat gun.

    Pergunte ao FixBot

    Comentar

  24. OnePlus 9 Pro Screen Replacement: passo 24, imagem 1 %32 OnePlus 9 Pro Screen Replacement: passo 24, imagem 2 %32 OnePlus 9 Pro Screen Replacement: passo 24, imagem 3 %32
    • Put the jimmy into the bottom edge of the screen.

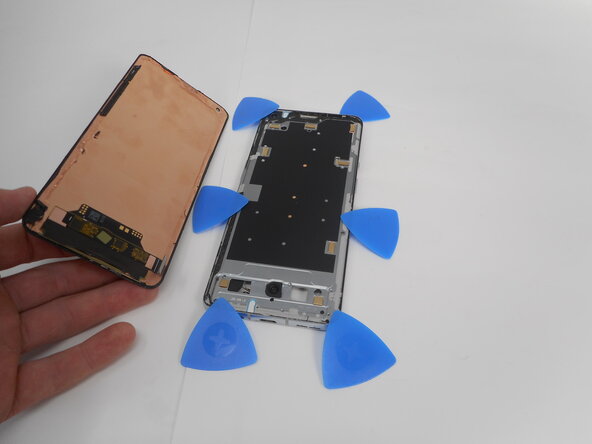
    • Use an opening pick to slice the adhesive, and place opening picks around the perimeter as you slice to avoid the adhesive from resealing.

    • Reheat the screen as needed.

    Pergunte ao FixBot

    Comentar

  25. OnePlus 9 Pro Screen Replacement: passo 25, imagem 1 %32 OnePlus 9 Pro Screen Replacement: passo 25, imagem 2 %32
    • Carefully pull up on the suction cup to pull the screen away from the phone.

    Pergunte ao FixBot

    Comentar

Conclusão

To reassemble your device, follow the above steps in reverse order.
Take your e-waste to an R2 or e-Stewards certified recycler.
Repair didn’t go as planned? Try some basic troubleshooting or ask our Answers community for help.

Cancelar: não concluí este guia.

Averie

Membro desde: 02/17/25

291 Reputação

Autoria de 2 guias

0Comentários do guia

Comentar

Visualizações:

Últimas 24 horas: 17

Últimos 7 dias: 62

Últimos 30 dias: 237

Ao todo: 2,730