Introdução
This is a prerequisite-only guide! This guide is part of another procedure and is not meant to be used alone.
O que você precisa
-
Ferramenta utilizada neste passo:Magnetic Project Mat$19.95
-
Use a Y00 screwdriver to remove the four 6.3 mm-long screws securing the back panel.
-
-
-
Use a JIS 000 driver or an official iFixit PH 000 driver to remove the following screws securing the back panel:
-
Two 3.6 mm-long screws on the top of the device
-
Two 3.6 mm-long screws on the bottom of the device
-
-
-
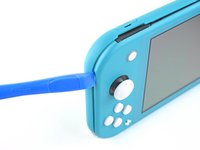
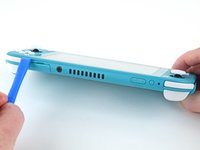
Insert an opening tool into the left speaker grille on the bottom of the device.
-
Twist the opening tool to release the clips securing the back panel.
-
-
-
Slide the opening tool around the bottom-left corner to release the clips on the left side of the device.
-
-
-
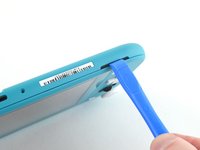
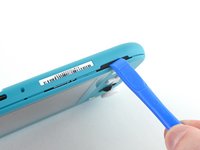
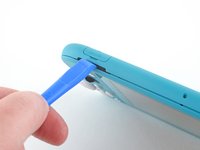
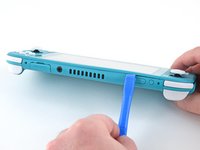
Insert an opening tool into the right speaker grille on the bottom of the device.
-
Twist the opening tool to release the clips.
-
-
-
-
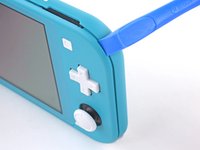
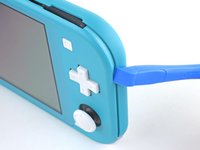
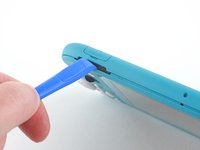
Slide and pry the opening tool around the bottom-right corner to release the clips on the right side of the device.
-
-
-
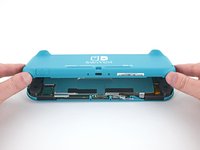
Lift the bottom edge of the back panel, opening it like a book.
-
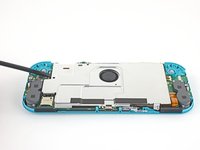
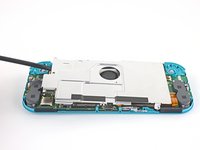
Remove the back panel.
-
-
-
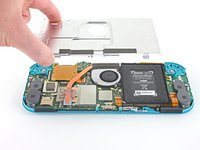
Use a JIS 000 driver or an official iFixit PH 000 driver to remove the following four screws:
-
Three 3.1 mm screws
-
One 4.5 mm screw
-
-
-
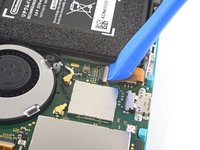
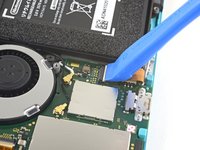
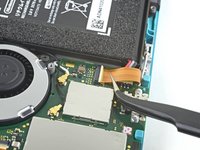
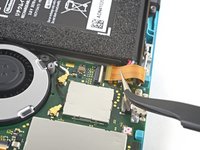
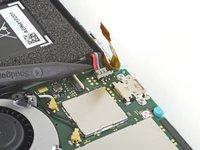
Use an opening tool or your fingernail to flip up the small, hinged locking flap on the motherboard interconnect cable's ZIF connector.
-


To reassemble your device, follow these instructions in reverse order.
Cancelar: não concluí este guia.
Uma outra pessoa concluiu este guia.
