Introdução
This guide details the steps required to replace buttons on the back face of the camera. Please use this guide only when a specific button is not working. When the problem involves other parts of the camera or all of the buttons, you may need to replace a component of the circuit board.
O que você precisa
-
-
-
Unscrew all eight black, 4mm screws with a Philips 000. (The top-most screw shown in the third image can be accessed by lifting the cover flap off.)
 Pergunte ao FixBot
-
-
-
Pry case open with a metal spludger by slipping the spludger between the back and front case of the camera and wiggling the spludger forwards and backwards.
-
-
-
Ferramenta utilizada neste passo:Tweezers$4.99
-
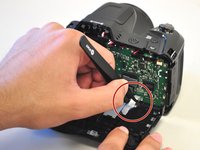
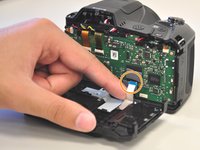
Carefully unhook the silver strip with tweezers. Get a grasp of the sides of the silver strip with the tweezers, and pull upwards and out.
-
The strip may also be identified by its blue tip, which becomes more visible once pulled out.
-
-
-
-
-
Unscrew the two, right-most, 2 mm screws with a Philips 000.
-
Unscrew the left-most, 4 mm screw with a Philips 000.
-
-
-
Flip to the front side of the button panel to access the button sensors.
-
-




To reassemble your device, follow these instructions in reverse order.
Cancelar: não concluí este guia.
Uma outra pessoa concluiu este guia.

Equipe

Cal Poly, Team 1-11, Maness Spring 2016 Membro de Cal Poly, Team 1-11, Maness Spring 2016
CPSU-MANESS-S16S1G11
4 Membros
Autoria de 10 guias
1Comentário do guia
Where can I get a replacement board for the buttons?
