Introdução
This guide will enable you to replace the power and/or volume button of your Microsoft Surface Book. Follow the Microsoft Surface Book Screen Replacement guide to remove the screen from the device.
Tip:
This is a very difficult repair and cost me nearly $450 to complete. This was due to the fact that I had to purchase several parts-only motherboards while I perfected the button harvesting process and a new screen. The repair did bring the Surface Book back to operational state, but not to its original state. You may want to consider going the refurbished option through MS support. Otherwise, I hope my experience benefits you if decide to attempt this repair.
O que você precisa
-
Passo 1 Screen
Cuidado: as etapas de 1 a 8 são provenientes de um guia marcado como em andamento.
-
Heat an iOpener and lay it on the bottom edge of the screen to soften the glue securing it.
-
-
-
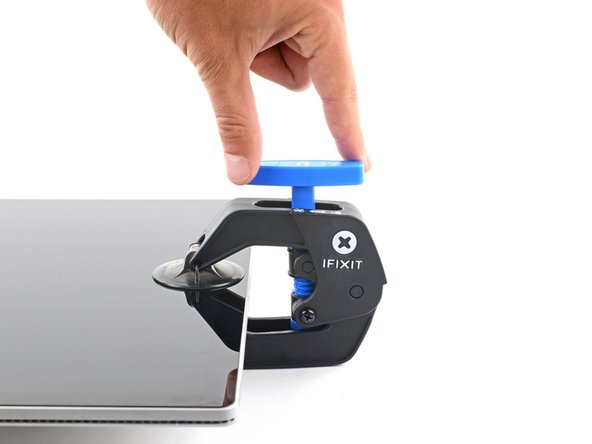
Pull the blue handle backwards to unlock the Anti-Clamp's arms.
-
Place an object under your Surface Book so it rests level between the suction cups.
-
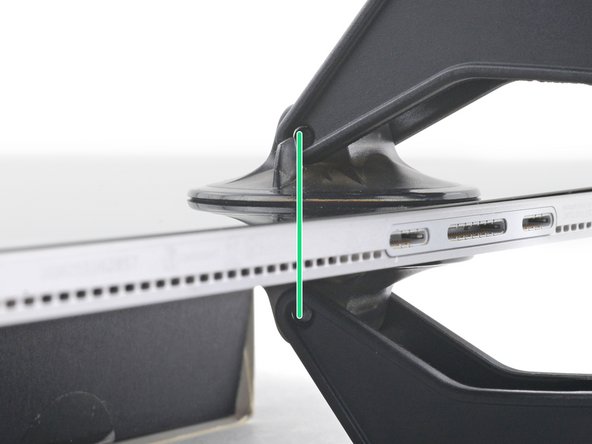
Position the suction cups near the middle of the bottom edge—one on the front, and one on the back.
-
Hold the bottom of the Anti-Clamp steady and firmly press down on the top cup to apply suction.
-
-
-
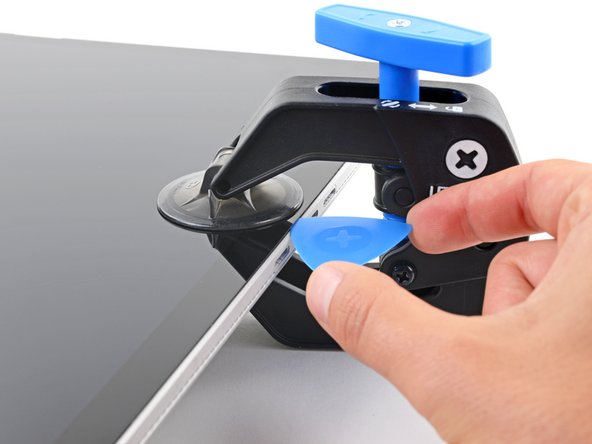
Wait one minute to give the adhesive a chance to release and present an opening gap.
-
If your screen isn't getting hot enough, you can use a hair dryer to heat along the bottom edge.
-
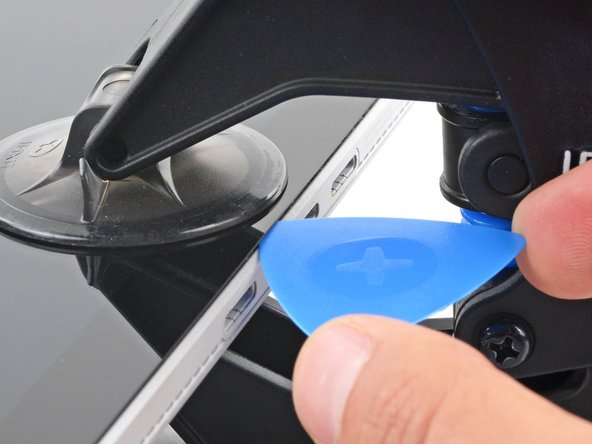
Insert an opening pick under the screen when the Anti-Clamp creates a large enough gap.
-
Skip the next step.
Didn't worked for me. And the top suction cup is now broken where the anti-clamp and the suction cup unites. Even though, it was extermely difficult to keep the anti-clamp in place. The top suction cup will begin to move around and the anti-clamp will not stay vertical, going sideways or tilted. I ended up using a standard suction cup and finally could move forward. Also the anti-clamp gets very hot when used with a hair dryer, and touching it is almost impossible.
-
-
-
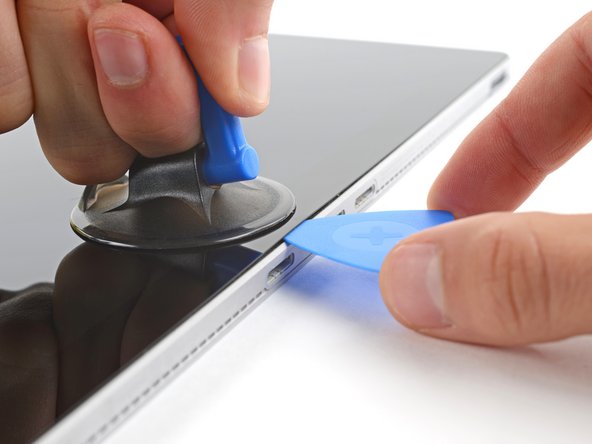
Apply a suction handle to the screen, as close to the center of the bottom edge as possible.
-
Pull up on the suction cup with strong, steady force to create a gap between the screen and the frame.
-
Insert an opening pick into the gap.
The glass is extremely brittle, so do not keep applying too much upward force while clearing the adhesive, or it will shatter and make you yell at your dog!
-
-
-
Use the pick to slice all the way around the perimeter of the screen to separate the glue.
-
Gently raise the screen but don't fully detach it until the cables underneath are disconnected.
Be carful around the power switch and volume buttons when separating as the WiFi Arial is attached to the casing under the adhesive strip, second Arial is located further along the case about the same distance away from edge of cases as the power and volume button .
This^^^
Use heat, be patience don’t rush, go slow to prevent breaking screen like I did. I also damage the antenna to the wireless onboard adapter. The antenna is glued between the screen and the plastic strip protecting camera and is easy to damage. I didn’t realize this until after the repair was complete and my surface book no longer recognized its WiFi device. I have to use a usb/Bluetooth adapter. Good luck.
how to remove WiFi antenna im stucked at this step.
Not just only around the power switch and volume button, but the whole top. There are three antennas in the left, middle and right top of the display
Not just only around the power switch and volume button, but the whole top. There are three antennas in the left, middle and right top of the display
Don't just be careful around the power switch and volume button, but the whole top. There are three antennas in the left, middle and right top of the display
There are three antennas in the left, middle and right top of the display.
You can use the replacement adhesive strips as a guide to how deep to go with your pick (you did get replacement adhesive strips, right? - iFixit store IF412-035-1).
Be careful when removing the old glue from the back side of the screen. The black color is on that surface, and if you scrape it, you'll scrape through the paint leaving unsightly scratches that will show through the bezel when you're done.
-
-
-
-
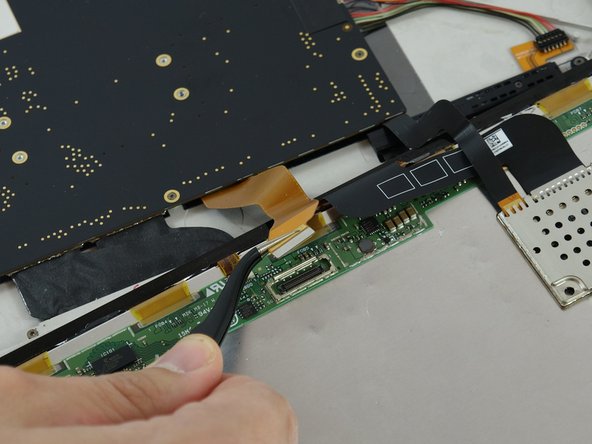
Begin by removing the ribbon on the right. With the curved tweezers, carefully remove the metal bracket to expose the end of the ribbon. Remove ribbon.
I used a blue tool with small scoop on the side opposite the tines to leverage the bracket off. Easily popped off that way, after a few attempts with the curved tweezers filed.
This blue tool seemed to work best for me, as well as knowing the pry point is opposite of the tines.
mavzerb -
-
-
-
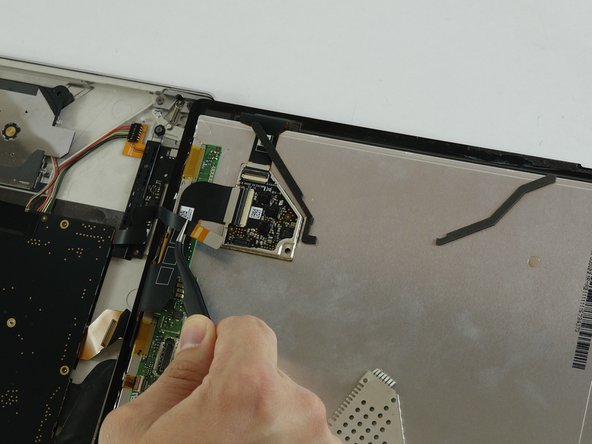
Next, remove the metal shield covering the other ribbon. Then remove the ribbon.
-
Remove the screen.
Remove only the plug to the far right leave the ribbon cables and the clips alone What was confusing in this photo it looked like he removed the large ribbon clip, he did not. I did and busted the clip that secured the cable. I had to buy a new touch sensor board.
Don’t make this mistake, look carefully before you do. Stop before going to far.
I managed to bust my connector as well, despite trying like !&&* not to - awful design on microsoft's part, but the instructions really need to call out just how exactly one needs to remove these without destroying other components
Manuka -
James Foley, I've just done the same: busted the clip on the wide connector (had to detach the ribbon cables to replace a broken screen with a new one). Where and how did you find a replacement board?
I assume your talking about step 8. I removed all 3 ribbons easily. 2 had latches that need to be opened. I had the whole sensor out and seperated.
I think I could have done this in less than 30 minutes since the computer back was bulging with the batteries swelling. To my surprise, the batteries were stuck to the back with black adhesive so the connector popped loose. Fearing that I had screwed up the connector, I plugged the computer into the new battery pack and found everything was working and the battery showed a full charge. TaDa. With my wife’s help holding the back, I used a hair dryer and wooden spatula to remove the old battery pack. Rather than trying to apply more adhesive to the edges of the back I used black electrical tape to keep it in place.
I did the screen and battery. Battery swelled and cracked the screen. Scariest part was heating the battery. Reading all the labels about possibility of fire. I heated the back and the old battery slipped right out. adhesive was still good so I put the new battery right in on top of it.
-
-
-
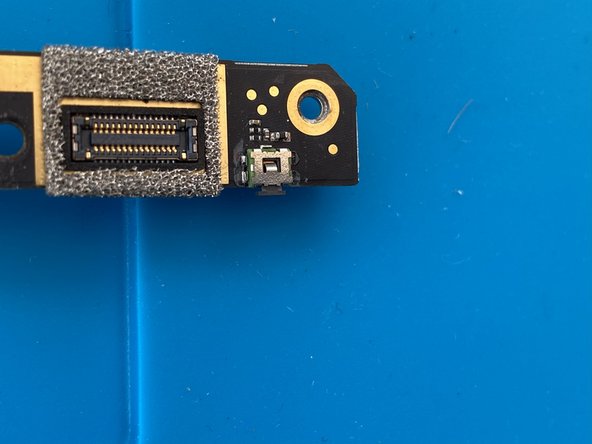
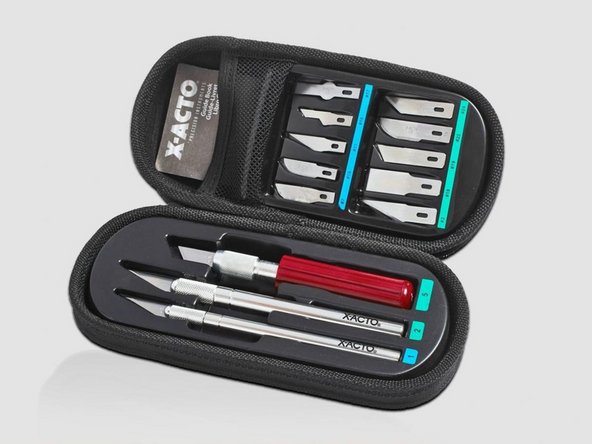
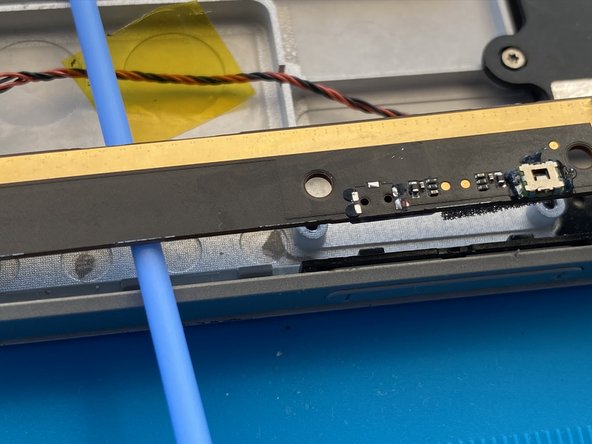
Gently remove the black epoxy resin covering surface contacts on the button from your parts only Microsoft Surface Book 1703 Motherboard using an X-ACTO knife.
-
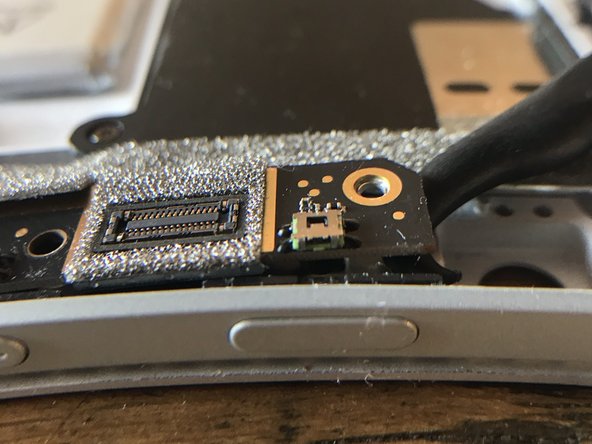
Place the X-ACTO knife blade flat against the board and apply gentle pressure to the epoxy moving the knife with control towards the button. The epoxy should pop off the mount and the side of the button.
-
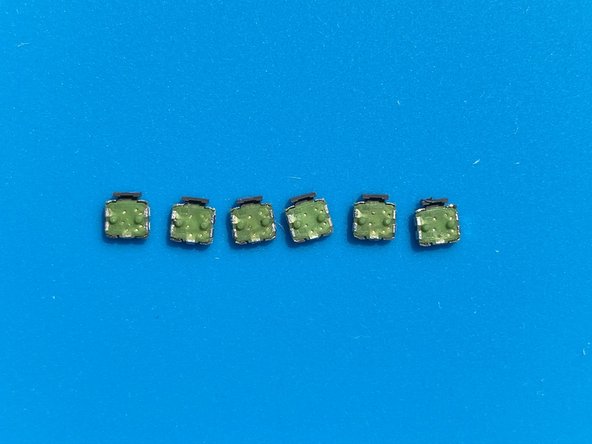
Once you removed the epoxy with the X-ACTO knife the button appear similar to the second image.
-
Warning: the buttons are delicate and be damaged if you apply too much pressure as you attempt to remove the epoxy.
-
Warning: if you dig in to much you can snap the button clear of the board breaking the surface mount contacts on the board. If you do the motherboard in the computer you'll be unable to repair the issue and will need to install a new motherboard. Trust me, just don't.
-
Warning: there are tiny surface mount components next to the buttons on the board. Be very careful not to hit them or disturb them with the X-ACTO knife as you remove the epoxy.
-
Tip: Work steps 1 - 3 on your parts only Motherboard first to get the feel of each step before attempting the procedure on the Motherboard in your computer. I would recommend you remove all three buttons from your parts only board for practice. I damaged several buttons and circuit boards before achieving success.
-
-
-
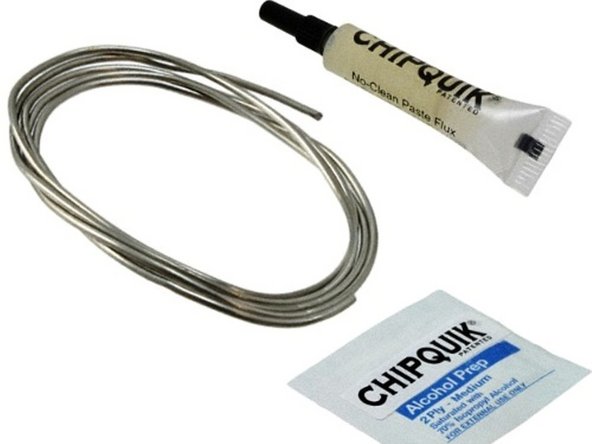
Apply a little flux to the five leads that mount to the circuit board. There are two on either side of the button and one on the back of the button. See the reference image.
-
Apply the Lead-Free Chip Quik Alloy to the button contacts using a soldering iron.
-
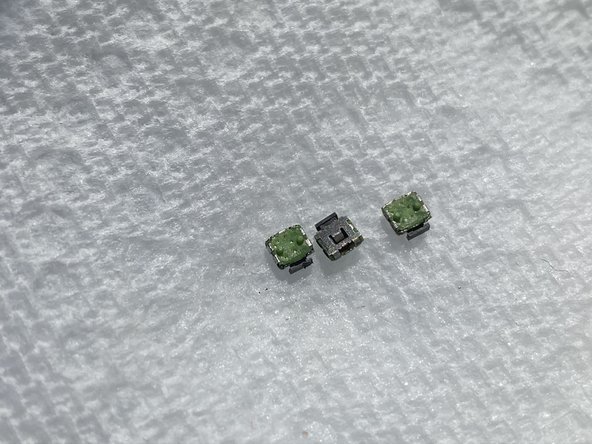
While the Chip Quik alloy is still in a liquid and malleable state and with carefully applied heat from the soldering iron gently slide with minimal pressure the X-ACTO knife between button and the circuit board right beneath the push button head and carefully attempt to rotate the knife blade so that it lifts the button from circuit board.
-
Warning: If the button doesn't slip off the board apply more heat and try to remove the button.
-
Warning: there are two tiny anchors the help seat the button on the circuit. You can damage these if you are not careful so don't slide your knife in the middle of the button. Slide it between the board on either side of the button. See the reference image.
-
Warning: there are very tiny surface mount components right next to the button. DO NOT disturb them with soldering iron. Make sure you apply heat only to the surface mount contacts on the button. DO NOT all the Chip Quik Alloy to come in contact with the other surface mount components on the board.
-
-
-
Using Solder Wick gently clean the five surface mount contacts so they are free of solder.
-
Remove any remaining flux using an alcohol pad or flux remover.
-
Warning: there are tiny surface mount components next to the button. Be extremely careful when cleaning the board to avoid damaging them.
-
-
-
You need clean any residual solder and flux from buttons you harvested from your parts only board. Use solder wick to clean all the J leads on the button.
-
Warning: you can damage the casing and leads on the button if you remove it incorrectly or apply to much heat.
-
Tip: tip check the operation of the button to be sure it wasn't damaged in the removal process.
-
Tip: make sure you clean any excess flux from the button.
-
-
-
Once you've got the hang of the procedure on your parts only motherboard you are ready to attempt the procedure on your computer.
-
You do not need to and you SHOULD NOT remove the motherboard to repair the button. Simply remove the screws on the motherboard that hold the upper portion of the board to the chassis.
-
Gently slide a Q-tip between the motherboard and chassis.
-
-
-
Repeat steps 5 - 7 on the motherboard in your computer. Make sure you clean the Surface mounts.
-
-
-
I found the best technique to for mounting the button back to the board was to apply solder to each of the J Leads on the button before soldering.
-
Using a fine tweezers hold the button and apply a small amount of solder to each lead.
-
-
-
Apply a small amount of flux to the surface mount pads on the board.
-
Recommended: for additional strength you may want to consider gluing the button in place. I did this on my fix.
-
Secure the button in place on the motherboard making sure it is flush with the circuit board and touching the surface mount contacts. One-by-one heat each of the J Leads on button using your soldering iron. If you've done this right the flux should draw the solder to the SMT pads on the board.
-
Testing: to test your soldering job you can carefully screw the motherboard back in place so that the battery contacts are touching the motherboard. Gently press the button being careful not to break it. If your soldering was done correctly you should hear the fan turn on when you power it up.
-
Using a toothpick apply a drop of epoxy for each of the J leads on the button to circuit board so that the drop covers the lead. Allow the epoxy to cure based on the product instructions. The epoxy helps keep the button in place so that when you press down it doesn't break free from the board.
-
Note: The button harvesting process may cause some flux to get into the button and it may not click when you press it. This happened to me. I was unable to find a way to clean the button without damaging it. Unfortunately you may find the button requires additional pressure in order to power on and off your device.
-


To reattach the screen to your device, follow the instructions in the Microsoft Surface Book Screen Replacement guide.
To reattach the screen to your device, follow the instructions in the Microsoft Surface Book Screen Replacement guide.
Cancelar: não concluí este guia.
3 outras pessoas executaram este guia.

7 comentários
Hy can you recommand a button from here ? https://uk.farnell.com/c/switches-relays...
I was unable to identify a compatible button on the market. I had to harvest my from used boards.
Was able to find the same button used on the surface book
Mitsumi R-667270 - This one is the 204gf operation force and can be seen with the green color plastic under the metal top
https://www.digikey.sg/en/products/detai...
If the plastic color is gray then use the (R-667799) 245gf operation force or black then use the (R-666939) 163gf operation force
I just removed the small plastic plunger from one to put on another. I bought my pieces new, not off of another board. Also, there is no epoxy on mine, even the ones that are mounted to the board already… could be that the parts were not available like they are now, so he had to get an old board.
hi Ghengis, could you please tell me where you buy the new pieces? I meet the same question and I cannot find that button in my city, can you send me(ryan136688@gmail.com) the link of that product selling?
That was not a small plastic plunger you removed, you actually broke the button. I’ll see if I can find a picture from one of the buttons I pulled apart. Trying to break of the button mechanism is not a good strategy. You need to go on eBay and harvest buttons from old boards. They don’t sell replacements and I’ve found no equivalent button on the market after weeks of searching.
anyone have problems with the tough screen not working after a screen replacement?
Once you insert an opening pick, you can use a few drops of Acetone around the edge to loosen the glue. I found this much easier than keep reheating the iOpener and possibly cracked the display.
dan89fernando - Responder
Bad idea to use acetone with these types of devices because of the plastic parts that can become either damaged or outright melted by the solvent. (Especially the ribbon cables and connections) You are better off using isopropyl alcohol or nothing. Easy enough just to avoid this idea completely. Not to mention that it is possible to cause the display to shatter due to thermal shock when you apply the solvent to a heated surface. Good luck to those that try anyway.
Rick Sanchez - Responder
The iOpener did nothing to loosen up the glue. Had to use a hair dryer for almost 40 minutes to get it softened up enough to open.
david alexis - Responder
Took at least 30 mins with a hair dryer to get the screen off. That 20 min completion time is total BS.
Tommy - Responder
my screen is 25% off
Daniel R Patton - Responder
Be EXTRA careful when running the opening pick around the bottom right portion of the screen. This is where the touch controller attaches to the display, and the ribbon cable is only about a quarter inch away from the edge and is easy to rip out.
Alexander V Trofimuk - Responder
Very important hint!
Andreas -
Having recently been inside a Surface Book I purchased via Facebook marketplace, consider the screen a “cost” of replacing the battery and the pressure is off of you. I tried VERY hard not to break the glass, but…still happened. With that out of the way, I successfully replaced the screen, battery, and also battery in the base. Microsoft should be ashamed of this device. All that engineering effort built into their crappy hinge, only to have the batteries fail prematurely. Also, the mechanism to release the screen from the base sucks real bad. Mine doesn’t work, I carry a paper clip with me to unleash the tablet mode. Pathetic. Thank GOD I picked this up second hand for a few hundred bucks. Pity the folks that paid two grand or more for this turd.
Ken Okpych - Responder
after I did reassemble back the screen, before applying the new tapes I did test it for one day and I did find out the right release mechanism was not working anymore. Accidentally I did disconnect the control wire coming from the main board. Easy to put it back in position. No need to dismantle all again. So, you can give a try and check the connectors. Both the connectors did disconnect while removing the mainboard. Just be careful and check them before gluing all back! Hope it helps.
Gian Paolo -
I just tried for over an hour and a half with heat packs and a dyson hair dryer, and got absolutely nowhere… I even bought the iSclack and had ifixit openers at the ready. I guess I’ll try a heat gun next (after I buy one). If anyone has any other suggestions, it would really be appreciated… I’m so disappointed in Microsoft right now.
Trevor Brown - Responder
If you use a heat gun make sure to keep it moving along the edge and use your hand to shield the rest of the screen from getting hit with heat. You only want it to be hot to the touch and no further. You take a big risk of discoloring the screen if you overheat a part. Heat gun did make life much easier but you have to be very very careful and concentrated while using it.
andrew.j.nieto -
I got my computer open after completely abandoning the “step 1” instructions here. The hot pack (iOPener) and suction cups (iSclack) were completely worthless for me, and did absolutely nothing. Instead, simply get yourself a tool with a very thin metal knife, such as the “Jimmy” sold here on iFixit.
Use a heat gun to get a section of the screen nice and hot (I went with ~160 degrees Fahrenheit) then insert the Jimmy vertically in between the screen and the metal frame (a tiny gap.) Then, carefully flip it horizontally to get between the tape and the screen. After this, carefully slide the knife along the edge while using a heat gun to hover right over the place the knife will next be (I used gloves to prevent burning my hands.) Do NOT insert the knife more than a half an inch into the gap, or you might damage your screen (stay within the black bezel range.)
This will QUICKLY, EASILY, and SAFELY get the screen off.
Trevor Brown - Responder
Attempted to do this without enough heat and the glass shattered; recommend using a heat gun and potentially using repair tape to keep the glass intact. The screen removal is the hardest part of everything.
J.K. - Responder
I broke my screen too, but I blame myself for being impatient. Once I took my time heating with a hair dryer and getting the opening pick in there, with enough heat I could just slide the pick down the edges. Next time I’ll know better!
Kirk Feindel - Responder
I tried the heated iOpener. I had some success but then used too much force and cracked the screen. My advice is to take you time and use the iOpener often on the very edge of the screen. Use the suction cups or iSclack as your primary tools to separate the glass form the frame. And a second set of hands is very helpful to hold the metal part of the screen onto your table. The glass will come off with patience and perseverance.
standurlacher - Responder
Use heat, be patience don’t rush, go slow to prevent breaking screen like I did. I also damage the antenna to the wireless onboard adapter. The antenna is glued between the screen and the enclosure and is easy to damage. I didn’t realize this until after the repair was complete and my surface book no longer recognized its WiFi device. I have to use a usb/Bluetooth adapter. Good luck.
Nyaniso Rahotep - Responder
This is vital information - I also destroyed the antenna in the process, because the pick does not discriminate between layers of adhesive. . Microsoft did a horrible design job on this.
Manuka -
The WiFi antenna is not physically connected to anything. It has a capacitive interaction with a small brick below the plastic so you can build it by yourself with a 0.2mm foil of copper or aluminum, cut the same geometry and tape it . It works. iFixit guide is pretty incomplete about that point, without mentioning all the screws forgotten to mark.
Gian Paolo -
Best place of entry for the pick is by the speaker on the right and left side. Heat up that area and then get the pick through there. I found that pretty easy and sliding the pick around the bottom (where the tablet attaches to keyboard). Unfortunately, I broke the screen up top where the webcam is. Not sure if that area is more brittle than the others due to webcam, but word of advice is to be careful there. Using a hair dryer worked best and getting this very toasty; the iOpener was useless.
Quan Thai - Responder
Both sides of the central block “camera-Mic” there are three FSP antennas. They are easy to cut off while using an opener tool because a part can stick to the LCD and a part on the shell. So pay attention! I did cut one! You can clearly see the three antennas position in the first picture of the step 11.
Gian Paolo - Responder