Introdução
Use this guide to replace a worn out or dead battery in the screen (tablet section) of a Microsoft Surface Book.
To minimize risk of damage, turn off your Surface Book before starting this procedure. If your battery looks puffy or swollen, take extra precautions.
The lower/keyboard portion has its own separate battery, and replacing it requires additional instructions.
O que você precisa
-
-
Press and hold the Detach button on the keyboard.
-
Alternatively, click the Detach icon on the right-hand side of the Windows 10 taskbar.
-
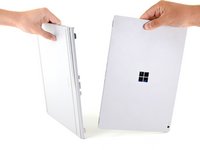
Remove the display.
-
-
-
Flip open the display as far as it will go.
-
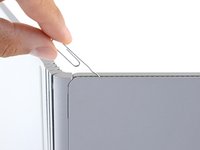
Lift the device up and place it on its side, with the display facing away from you and the SurfaceConnect port facing up.
-
-
-
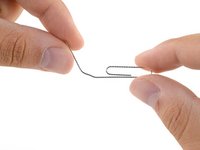
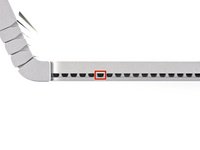
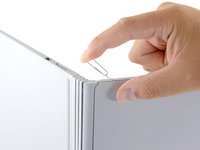
Insert the straight end of the paper clip at a 45 degree angle into the sixth hole from the left.
-
-
-
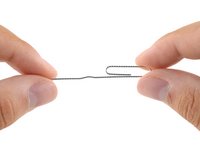
Firmly push the paper clip into the hole.
-
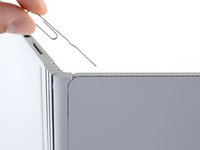
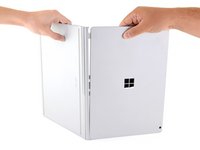
Pull the base away from the display to detach it.
-
-
-
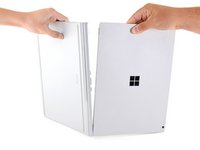
With one side detached, pull firmly to pivot the display out to disconnect the second side.
-
-
-
-
Heat an iOpener and lay it on the bottom edge of the screen to soften the glue securing it.
-
-
Ferramenta utilizada neste passo:Clampy - Anti-Clamp$24.95
-
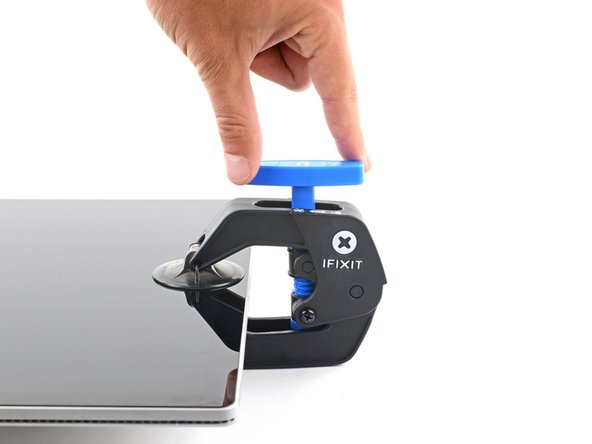
Pull the blue handle backwards to unlock the Anti-Clamp's arms.
-
Place an object under your Surface Book so it rests level between the suction cups.
-
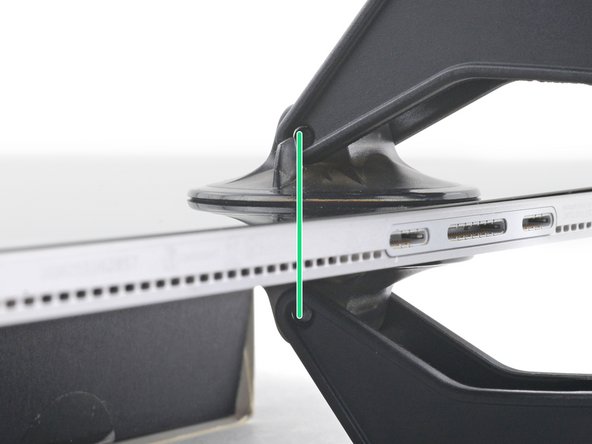
Position the suction cups near the middle of the bottom edge—one on the front, and one on the back.
-
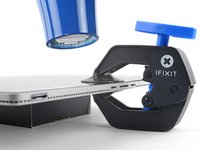
Hold the bottom of the Anti-Clamp steady and firmly press down on the top cup to apply suction.
-
-
-
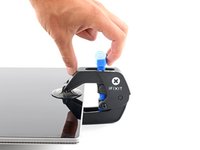
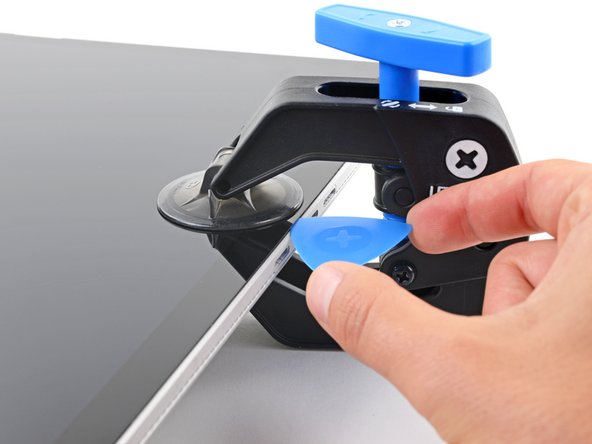
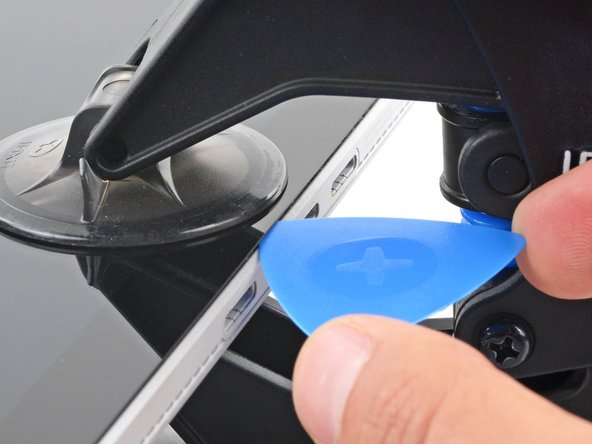
Wait one minute to give the adhesive a chance to release and present an opening gap.
-
If your screen isn't getting hot enough, you can use a hair dryer to heat along the bottom edge.
-
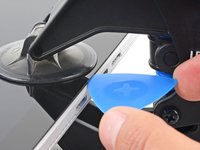
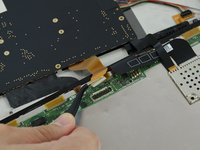
Insert an opening pick under the screen when the Anti-Clamp creates a large enough gap.
-
Skip the next step.
-
-
-
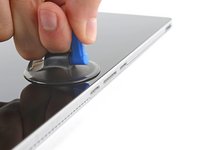
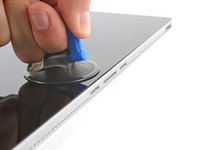
Apply a suction handle to the screen, as close to the center of the bottom edge as possible.
-
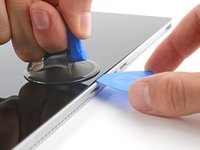
Pull up on the suction cup with strong, steady force to create a gap between the screen and the frame.
-
Insert an opening pick into the gap.
-
-
-
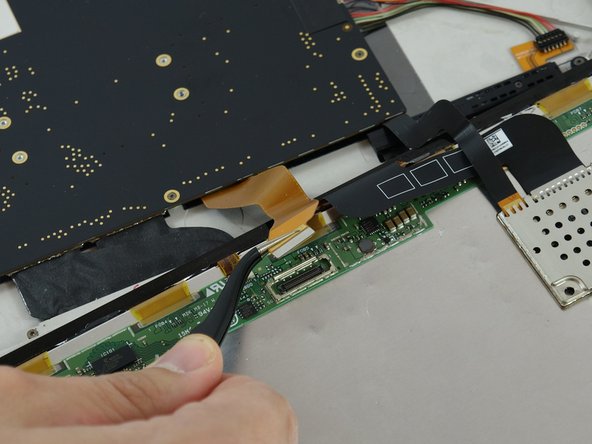
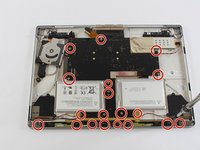
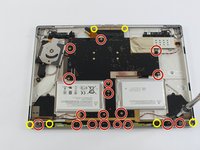
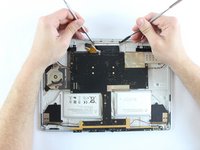
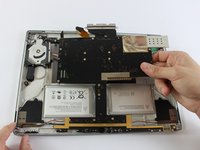
Use a T4 Torx driver to remove the 24 screws. The two tiny screws on the ends of the WiFi board/Camera bracket are T3 Torx.
-


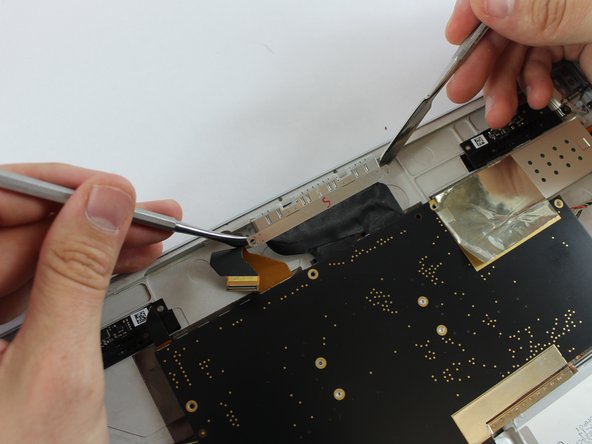


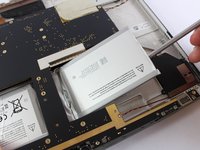

Compare your new replacement part to the original part—you may need to transfer remaining components or remove adhesive backings from the new part before installing.
To reassemble your device, follow the above steps in reverse order.
Take your e-waste to an R2 or e-Stewards certified recycler.
Repair didn’t go as planned? Check out our Answers community for troubleshooting help.
Cancelar: não concluí este guia.
74 outras pessoas executaram este guia.
Equipe

USF Tampa, Team 1-6, Sullivan Spring 2017 Membro de USF Tampa, Team 1-6, Sullivan Spring 2017
USFT-SULLIVAN-S17S1G6
Membros da 3
Autoria de 14 guias
85 comentários
Good day, Where would you purchase the batteries. Both are swollen and need changing.
I got mine off ebay, just do a search, it was like 20 bucks.
First thing’s first, MS will send you a new SurfaceBook Pro if your battery is swollen. They just replaced my 3yo SBP; I did not have an extended warranty and was definitely out of warranty support. Contact them before you attempt the repair on your own.
They only replace machine under 3yo. They want 600USD after that
Hello I am overseas how do I contact MS