Introdução
Use this guide to replace the heat sink or to reapply thermal paste to the processors.
O que você precisa
-
-
Remove the following ten screws securing the lower case to the upper case:
-
Seven 3 mm Phillips screws.
-
Three 13.5 mm Phillips screws.
-
-
ComprarFerramenta utilizada nesse passo:P6 Pentalobe Screwdriver 2009 15" MacBook Pro Battery$5.49
-
Three Pentalobe screws secure the battery to the upper case. They can be removed with this special driver.
-
-
-
Use the flat end of a spudger to pry the fan cable connector up off its socket on the logic board.
-
-
-
-
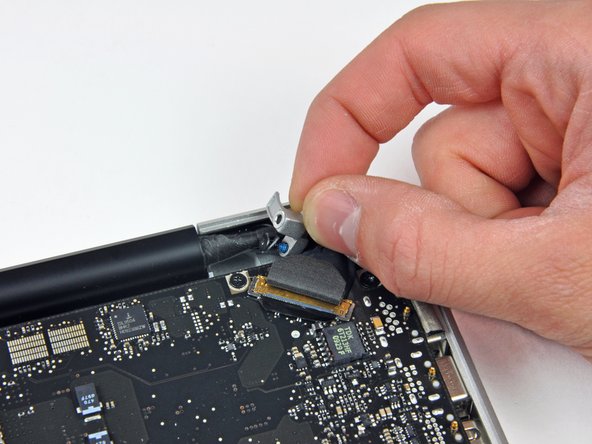
Hold the end of the cable retainer down with one finger while you use the tip of a spudger to slightly lift the other end and rotate it away from the camera cable connector.
-
To reassemble your device, follow these instructions in reverse order.
To reassemble your device, follow these instructions in reverse order.
Cancelar: não concluí este guia.
15 outras pessoas executaram este guia.
2 comentários
Hey ifixit, I really appreciate the level of description to your various guides. I was following this guide to a tee except that I couldn't find my spudger, but managed with using creditcard like. I was following this guide as I want to change the thermal paste. I completed step 23, but from there on it was a bust, it felt way too tight when I was trying too lift the logic board, I could only get i a few centimeters up on the left side. It felt stuck at the bottom/uppercase. i checked that all screws and connections were free and I couldn't find any obstacles, but didn't want to use force lifting it. should it be easy/hard to lift??
To answer Mike’s question (although 4 years late, I hope this helps others), when I disassembled my 2009 15” MacBook Pro I had to use more force than I would have liked when removing the Logic Board, it turns out that one of the heatsinks has some adhesive on it that sticks to the keyboard, and you have to break it apart. So more force than you’ll probably be comfortable with is required.


