Introdução
Use this guide to replace the microphone assembly in a 2019 MacBook Air.
To minimize risk of damage, turn on your MacBook and allow the battery to fully discharge before starting this procedure. A charged lithium-ion battery can be very dangerous if accidentally punctured. If your battery looks puffy or swollen, take extra precautions.
Do not reuse the battery if it is swollen or was deformed in any way during the procedure. The battery is likely damaged and can be very dangerous to reuse—it should be replaced.
This guide involves removing the speakers and battery. You will need new adhesive to reinstall the speakers and battery.
O que você precisa
-
-
If your MacBook is running Big Sur v11.1 or later, disabling Auto Boot may not work. You can proceed normally, but make sure to disconnect the battery as soon as you're inside.
-
Use a P5 driver to remove the following screws:
-
Two 7.9 mm screws
-
Two 7.1 mm screws
-
Six 2.6 mm screws
-
-
-
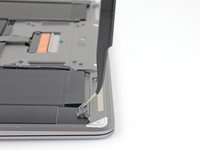
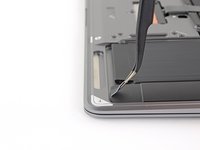
Wedge your fingers between the display and the lower case and pull upward to pop the lower case off the Air.
-
Remove the lower case.
-
-
-
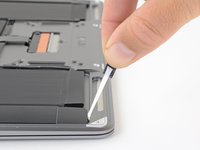
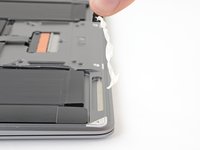
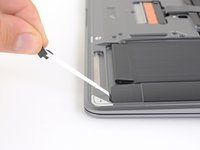
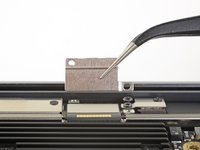
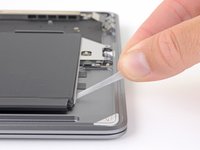
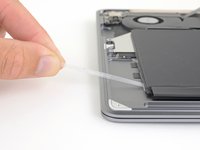
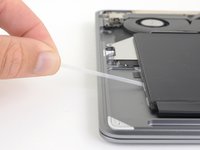
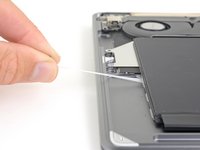
Peel back the tape covering the battery connector enough to reveal the connector underneath.
-
-
Ferramenta utilizada neste passo:Tweezers$4.99
-
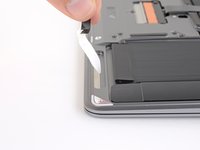
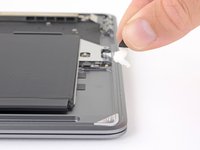
Use a pair of tweezers to lift up the black adhesive pull tab at the bottom of the right speaker, enough so you can grab it with your fingers.
-
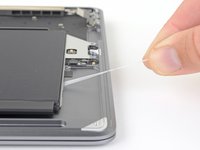
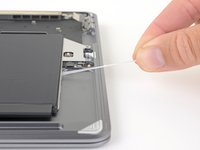
Grab the adhesive strip pull tab and slowly and carefully pull the adhesive strip out from under the speaker.
-
If the adhesive strip breaks, leave it in and proceed to the next step.
-
-
-
Use tweezers to lift the adhesive pull tab at the top of the right speaker enough that you can grab it with your fingers.
-
Grab the adhesive strip pull tab and slowly and carefully pull the adhesive strip out from under the speaker.
-
Apply heat to the speaker to soften the adhesive underneath.
-
Carefully slide a spudger or opening pick underneath the speaker to separate the adhesive.
-
-
-
Lift the right speaker straight up from the bottom and remove it.
-
-
Ferramenta utilizada neste passo:Tweezers$4.99
-
Use a pair of tweezers to lift up the black adhesive pull tab at the bottom of the left speaker, enough so you can grab it with your fingers.
-
Grab the adhesive strip pull tab and slowly and carefully pull the adhesive strip out from under the speaker.
-
If the adhesive strip breaks, leave it in and proceed to the next step.
-
-
-
Use tweezers to lift the adhesive pull tab at the top of the left speaker enough that you can grab it with your fingers.
-
Grab the adhesive strip pull tab and slowly and carefully pull the adhesive strip out from under the speaker.
-
Apply heat to the speaker to soften the adhesive underneath.
-
Carefully slide a spudger or opening pick underneath the speaker to separate the adhesive.
-
-
-
Lift the left speaker straight up from the bottom and remove it.
-
-
-
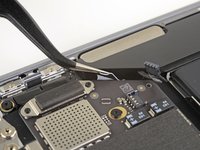
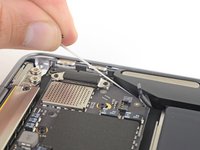
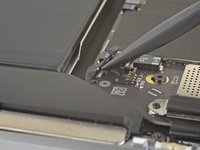
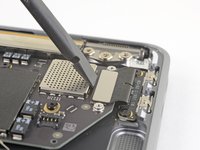
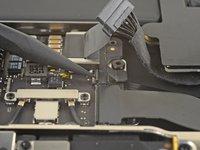
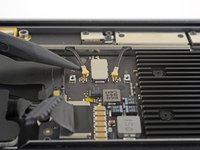
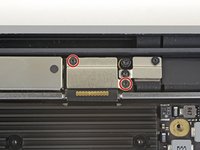
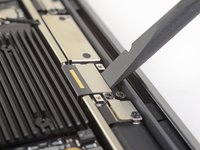
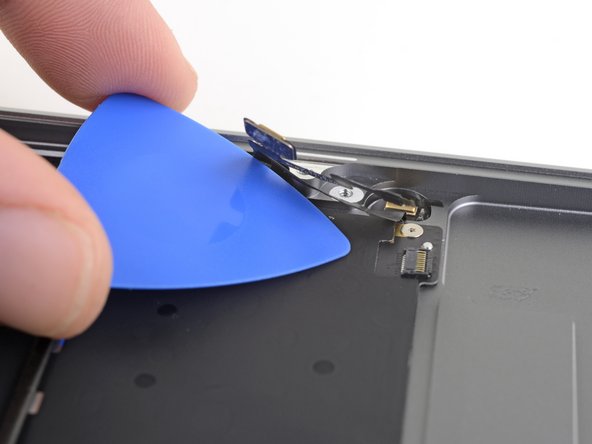
Use a T3 Torx driver to remove the two 1.4 mm screws securing the trackpad connector bracket.
-
Remove the trackpad connector bracket.
-
-
-
-
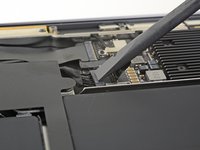
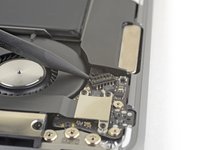
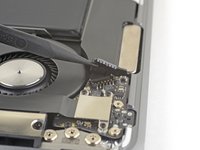
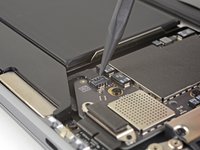
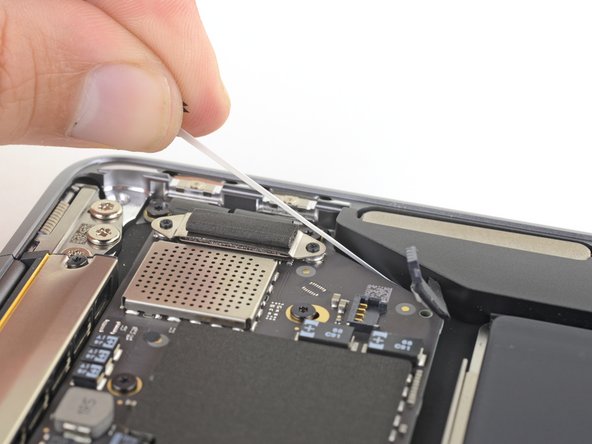
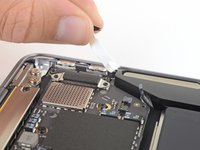
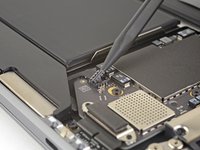
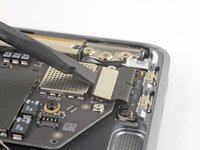
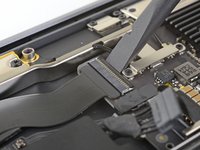
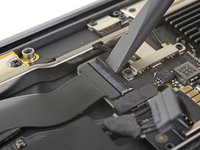
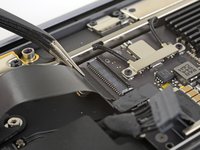
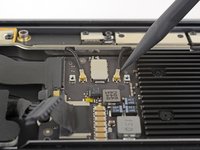
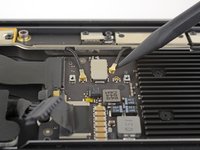
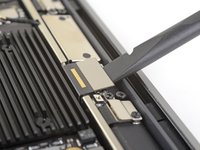
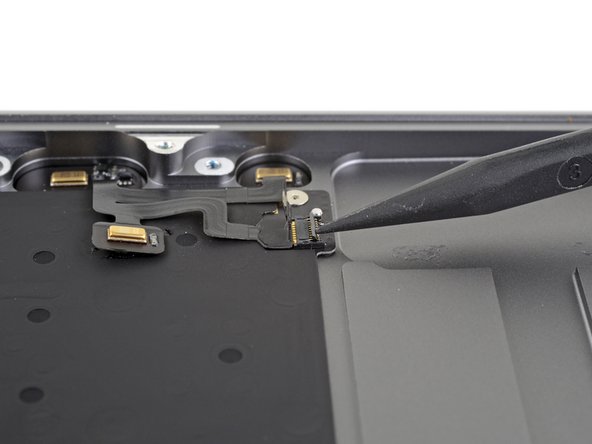
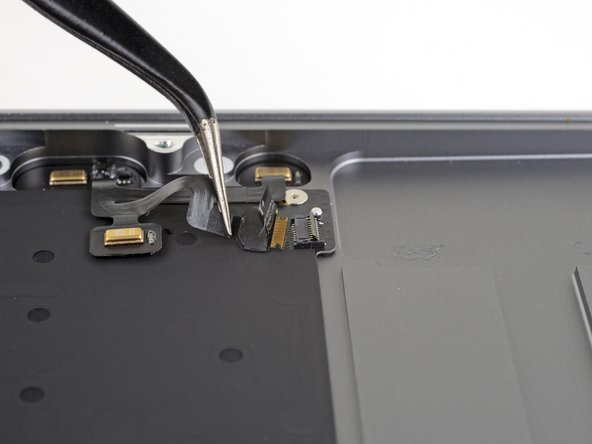
Use a spudger to lift up the small locking flap on the sound board cable's ZIF connector.
-
Slide the sound board cable out of the ZIF connector.
-
-
-
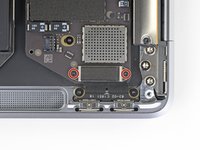
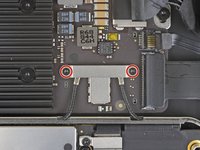
Use a T5 Torx driver to remove the following screws:
-
One 5.5 mm screw
-
Three 2.6 mm screws
-
Two 1.9 mm screws
-
-
-
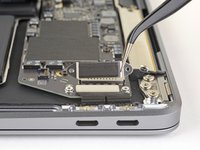
Use a T3 Torx driver to remove four 2.5 mm screws securing the battery.
-
-
Ferramenta utilizada neste passo:Tweezers$4.99
-
Use a pair of tweezers to lift up the black adhesive pull tab on the side of the battery, enough so you can grab it with your fingers.
-
Grab the adhesive strip pull tab and slowly and carefully pull the adhesive strip out from under the battery.
-
If the adhesive strip breaks, leave it in and proceed to the next step.
-
-
-
Repeat the previous two steps to remove the three adhesive strips on the other side of the battery.
-
Carefully drip isopropyl alcohol along either edge of the battery, in the recessed part of the upper case, where the adhesive pull tabs were.
-
Let the alcohol soak into the adhesive for a minute or two.
-
Use opening picks to gently pry the battery away from the upper case.
-
-
-
Remove the battery.
-
Calibrate your newly installed battery: charge it to 100%, and keep charging it for at least 2 more hours. Unplug and use it normally to drain the battery. When you see the low battery warning, save your work, and keep your laptop on until it goes to sleep due to low battery. Wait at least 5 hours, then charge your laptop uninterrupted to 100%.
-
-
-
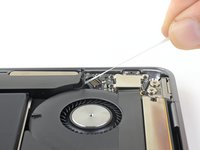
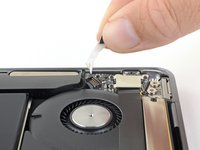
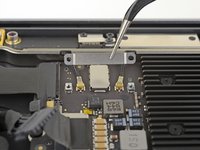
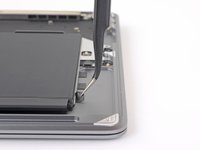
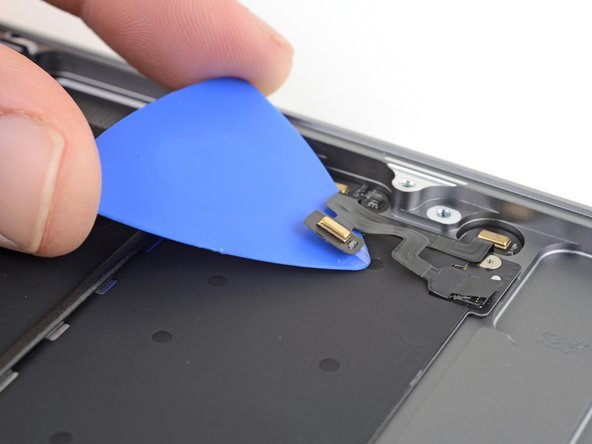
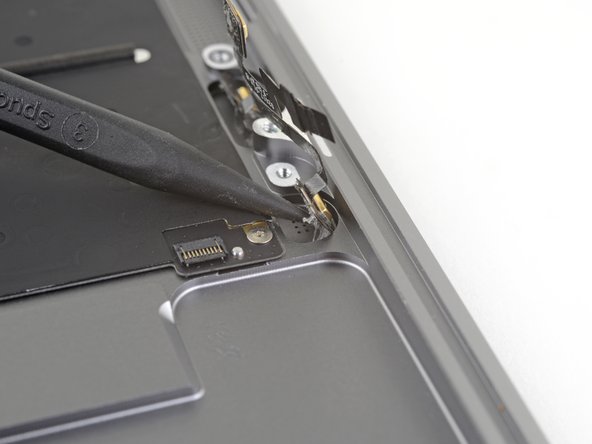
Slide an opening pick under the microphone farthest away from the edge of the case to slice through the adhesive securing it to the upper case.
-


Compare your new replacement part to the original part—you may need to transfer remaining components or remove adhesive backings from the new part before installing.
To reassemble your device, follow the above steps in reverse order.
Take your e-waste to an R2 or e-Stewards certified recycler.
Repair didn’t go as planned? Check out our Answers community for troubleshooting help.
Cancelar: não concluí este guia.
2 outras pessoas executaram este guia.
