Ir para o conteúdo principal
Participe da comunidade de reparos - Criar conta

Kindle Paperwhite 2nd Generation Charging Port Replacement

O que você precisa

  1. Kindle Paperwhite 2nd Generation Charging Port Replacement, Battery: passo 1, imagem 1 %32 Kindle Paperwhite 2nd Generation Charging Port Replacement, Battery: passo 1, imagem 2 %32
    • Insert plastic opening tool into the corners of the Paperwhite and slide around the edge perimeter to remove bezel.

    • Be sure to begin prying along the outer edges , these are the optimal points for removing the bezel.

    • Be careful and do not slide prying tool deeper than 3-4 mm under the side bezel or you could peel off screen protector film.

    Pergunte ao FixBot
  2. Kindle Paperwhite 2nd Generation Charging Port Replacement: passo 2, imagem 1 %32 Kindle Paperwhite 2nd Generation Charging Port Replacement: passo 2, imagem 2 %32
    • Using a Screw Driver, Remove the eleven 3.2 mm Phillips 000 screws from corners of the mid-frame and from behind the black strip as shown.

    • Do not forget the screw in the middle of the black adhesive strip.

    Pergunte ao FixBot
  3. Kindle Paperwhite 2nd Generation Charging Port Replacement: passo 3, imagem 1 %32
    • Carefully remove the mid-frame from the back cover.

    Pergunte ao FixBot
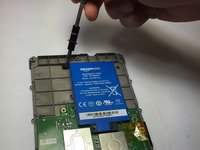
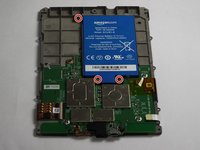
  4. Kindle Paperwhite 2nd Generation Charging Port Replacement: passo 4, imagem 1 %32 Kindle Paperwhite 2nd Generation Charging Port Replacement: passo 4, imagem 2 %32
    • Use a screwdriver to remove the three 3.0 mm Phillips 000 screws that are holding the battery in place as shown.

    Pergunte ao FixBot
  5. Kindle Paperwhite 2nd Generation Charging Port Replacement: passo 5, imagem 1 %32
    • Carefully lift the battery and remove it from the device.

    Pergunte ao FixBot
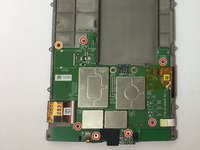
  6. Kindle Paperwhite 2nd Generation Charging Port Replacement, Motherboard: passo 6, imagem 1 %32 Kindle Paperwhite 2nd Generation Charging Port Replacement, Motherboard: passo 6, imagem 2 %32
    • Use a screwdriver to remove the seven 3.0 mm Phillips 000 screws that are holding the motherboard in place as shown.

    • Don't lose the washer that is highlighted with an orange marker as shown. It is a necessary component to protect the screw.

    Pergunte ao FixBot
  7. Kindle Paperwhite 2nd Generation Charging Port Replacement: passo 7, imagem 1 %32 Kindle Paperwhite 2nd Generation Charging Port Replacement: passo 7, imagem 2 %32
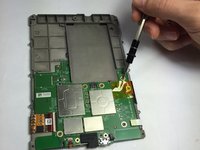
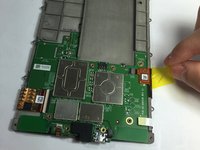
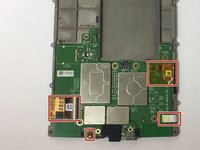
    • Gently disconnect the zif connectors.

    • Some of these connectors are very thin and fragile, handle with care!

    Pergunte ao FixBot
  8. Kindle Paperwhite 2nd Generation Charging Port Replacement: passo 8, imagem 1 %32 Kindle Paperwhite 2nd Generation Charging Port Replacement: passo 8, imagem 2 %32 Kindle Paperwhite 2nd Generation Charging Port Replacement: passo 8, imagem 3 %32
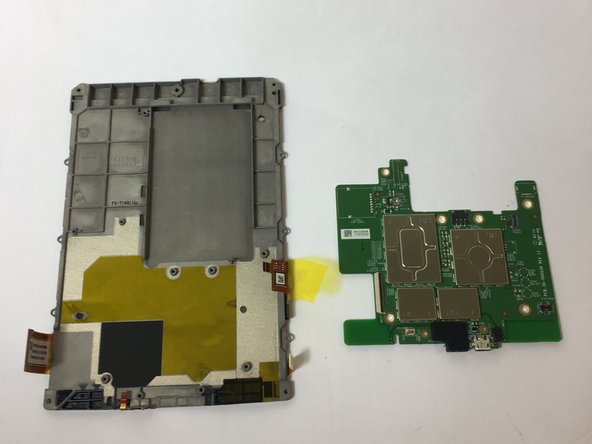
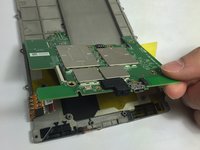
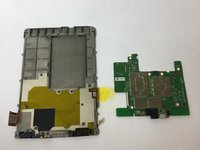
    • Gently remove the motherboard.

    Pergunte ao FixBot
  9. Kindle Paperwhite 2nd Generation Charging Port Replacement, Charging Port: passo 9, imagem 1 %32
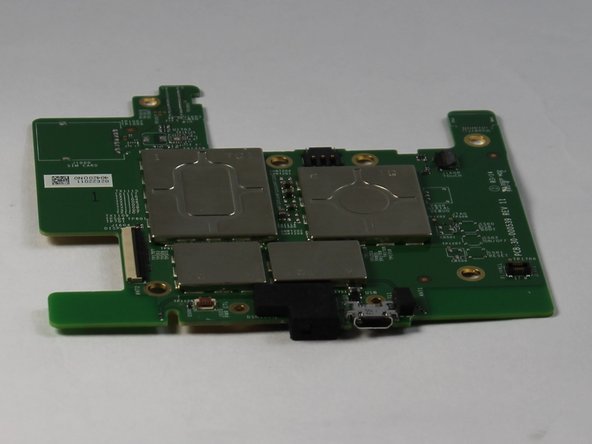
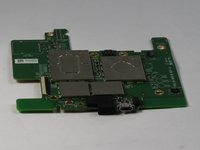
    • The charging port is integrated in to the device motherboard.

    • From here, to fix a faulty port, either replace the entire motherboard, or carefully desolder the old port and solder a new one on in its place.

    • Check out the soldering guide for help.

    Pergunte ao FixBot
Conclusão

To reassemble your device, follow these instructions in reverse order.

12 outras pessoas executaram este guia.

Tyler Davis

Membro desde: 09/15/16

1.959 Reputação

Autoria de 5 guias

Equipe

USF Tampa, Team 11-2, Blackwell Fall 2016 Membro de USF Tampa, Team 11-2, Blackwell Fall 2016

USFT-BLACKWELL-F16S11G2

4 Membros

Autoria de 20 guias

10Comentários do guia

How to replace the USB port; replace the motherboard. Kind of a lame fix if you ask me. Whatever happened to soldering a new port on?

Sam Hardeman - Responder Compartilhar

I have not done the fix yet but plan to replace the USB which appears to be a USB - micro B USB 2.0 Receptacle Connector 5 Position Surface Mount available at DigiKey. Is there any reason not to attempt this? I have microscope and soldering station. If not, where do you get the motherboard and how much is it?

Bill Smith - Responder Compartilhar

Any updates? Did you run into any issues?

theend12212012 - Responder Compartilhar

Démontage facile effectivement, mais les cinq microsoudures sur la carte mère sont impossibles à faire avec un simple fer à souder ! Il faut utiliser du matériel pour CMS (composant à montage en surface)…

Ceci dit mon problème vient effectivement de ces microsoudures. En appuyant simplement sur ces contacts mon Kindle s’est remis en marche ! Vive le travail mal fait à la construction…

telerando - Responder Compartilhar

Getting the Kindle open and getting to the charging port was quite ‘easy’. In step 1 the top is stuck on with something like sticky back tape and the top can be gently pulled away from the tape.

Having got to the port I can not figure out how to replace it. This part does not seem to be easy, unless Step 9 is explained in much more detail. The contacts for the port seem to be incredibly small and I can’t figure out how they’re connected, or what part I need to order to replace the port.

Richard Garside - Responder Compartilhar

Comentar

Visualizações:

Últimas 24 horas: 18

Últimos 7 dias: 87

Últimos 30 dias: 305

Ao todo: 31,592