Introdução
Use this guide to replace a worn-out or dead battery in your JBL Xtreme 2.
The model you see in this guide is the Q version. There are different models of the JBL Xtreme 2 that differ in their build and internal connectors.
This guide can be used as a reference when repairing other versions, but some disassembly steps may vary.
Check the first digit of the serial number to find the model of your device. You can find the serial number printed on the packaging or underneath the speaker's connector cover.
For your safety, discharge the battery before disassembling your device. This reduces the risk of fire if the battery is accidentally damaged during the repair. If your battery is swollen, take appropriate precautions.
O que você precisa
-
-
Insert the flat end of a metal spudger into the seam between the two halves of the fabric cover.
-
Push the spudger underneath the edge of the fabric cover and pry upwards to release its plastic clips.
-
-
-
Insert the flat end of a metal spudger underneath the edge of the fabric cover's center section.
-
Push the spudger underneath the edge of the fabric cover and pry upwards to release its plastic clips.
-
-
-
Insert the flat end of a metal spudger underneath the second short edge of the fabric cover.
-
Push the spudger underneath the edge of the fabric cover and pry upwards to release its plastic clips.
-
-
-
Use a Phillips screwdriver to remove the two 8.6 mm-long screws securing the fabric cover.
-
-
-
Repeat the previous prying procedure, starting with the opposing short edge of the fabric cover.
-
Insert the flat end of a metal spudger and pry upwards to release the plastic clips.
-
-
-
-
Insert the flat end of a metal spudger underneath the long edge of the fabric cover and pry upwards to release the plastic clips.
-
-
-
Insert the flat end of a metal spudger underneath the short edge of the fabric cover and pry upwards to release the remaining plastic clip.
-
-
-
Place your speaker on your working surface with the Xtreme 2 branding facing upwards.
-
Open the hinge of the fabric cover by folding it upwards.
-
-
-
Lift the speaker assembly up and away from the fabric cover.
-
Remove the fabric cover.
-
-
-
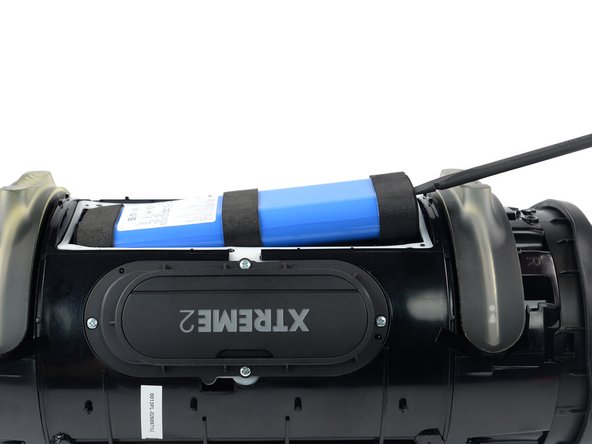
Use a Phillips screwdriver to remove the six 8.6 mm-long screws securing the battery cover.
-
-
-
Insert a spuder into the gap between the bottom end of the battery and its recess.
-
Pry upwards to lift the battery until you can grip it with your fingers.
-
-
-
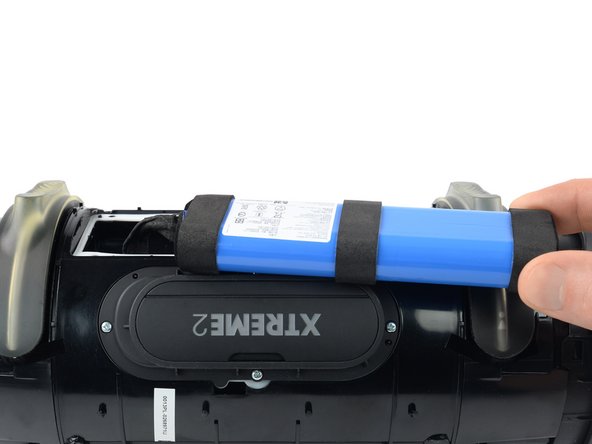
Lift the battery out of its recess and carefully pull it to the side to get free access to the battery connector.
-
-
-
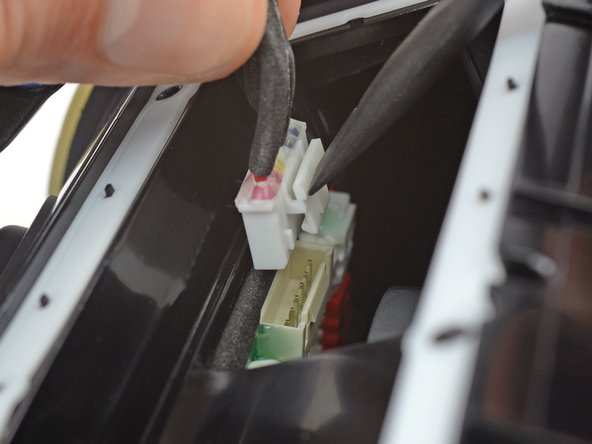
Insert a spudger into the cut-out in the battery recess where the battery connector is located.
-
Use your spudger to squeeze the tab against the connector to release it.
-
Use your free hand to grab the battery cable just above the connector. Pull the connector straight up from its socket, wiggling it back and forth to loosen the clips securing it.
-


If possible, power on your device and test your repair before reassembly. For optimal performance, calibrate your newly installed battery after completing this guide.
To reassemble your device, follow these instructions in reverse order.
Take your e-waste to an R2 or e-Stewards certified recycler.
Repair didn’t go as planned? Try some basic troubleshooting, or ask our Answers community for help.
Cancelar: não concluí este guia.
4 outras pessoas executaram este guia.

