Essa tradução foi gerada por um programa e ainda não foi revisada por uma pessoa. Falas essa língua? Dá uma olhada.

Substituição da porta micro USB / AUX do JBL Charge

Alexander Castanares e 9 outros colaboradores
Última atualização em 21 de jul de 2026
Visualizações: 116 mil
Visualizar Estatísticas:
- Últimas 24 horas:
- 4
- Últimos 7 dias:
- 35
- Últimos 30 dias:
- 157
- Ao todo:
- 115.543
Comentários: 37
16 comments on steps, 21 guide comments.
Go to guide commentsConcluído: 14 15
14 pessoas marcaram este guia como "concluído". Será você o próximo?
15· pessoas marcaram este guia como "concluído". Incluindo você — ótimo trabalho!
Favorites: 4 5
4 pessoas favoritaram (e se inscreveram) neste guia. Você será o próximo?
5 pessoas marcaram como favorito (e assinaram) este guia - incluindo você!
Ferramentas incorretas
Ajude a fazer melhor este guia usando as ferramentas corretas em imagens e/ou texto.
Introdução
Ir para o passo 1 ↓Como os conectores da porta micro USB / AUX são colados com supercola na estrutura branca, é quase impossível substituí-los sem trocar toda a peça da estrutura. Siga este guia para isolar e substituir a estrutura branca que contém a porta micro USB / AUX.
O que você precisa
Ferramentas


-
-
-
Certifique-se de que o dispositivo esteja desligado antes de começar a desmontar o alto-falante.
-
Remova o acabamento do alto-falante usando uma ferramenta de abertura (jimmy) ou uma espátula de metal.
 Pergunte ao FixBot
-
-
-
Use a chave (de fenda) PH1 para remover todos os cinco parafusos de 6 mm da tampa da bateria.
-
Remova a tampa da bateria e coloque-a de lado.
-
-
-
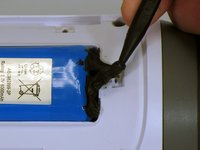
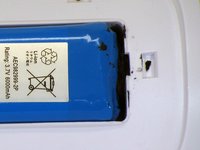
Use uma espátula para remover cuidadosamente a fita isolante líquida que prende a bateria dentro do compartimento da bateria.
-
-
-
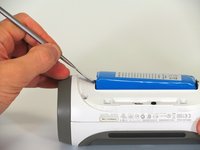
Use uma espátula para levantar a bateria para fora do dispositivo.
-
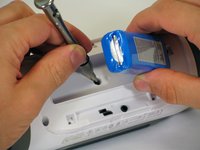
Levante a extremidade da bateria que não possui a conexão da fiação e remova o parafuso PH2 de 16 mm que se encontra abaixo da bateria.
-
-
-
Remova os quatro parafusos de 16 mm da carcaça de plástico branca usando a chave (de fenda) PH2.
-
-
-
Começando em um canto do dispositivo onde a carcaça e a lateral se encontram, use uma espátula de metal pontiaguda para soltar a carcaça traseira do alto-falante e a cola que mantém a junção unida.
-
Deslize a espátula de metal ao longo da junção para separar a carcaça traseira do restante do alto-falante.
-
-
-
Com a carcaça traseira aberta, desconecte os três conectores brancos da placa-mãe.
-
Remova a carcaça superior.
-
-
-
-
-
Volte sua atenção para a carcaça traseira removida no Passo 7.
-
-
-
-
Com uma lâmina, remova a cola que prende o cabo da bateria.
-
Use vários cortes verticais para remover pedaços da cola.
-
-
-
Remova a espuma que envolve o cabo da bateria.
-
-
-
Para remover a bateria, puxe o cabo da bateria através do through-hole.
-
-
-
-
-
Coloque a bateria na nova carcaça branca.
-
Para a remontagem, siga estes passos na ordem inversa.
-
-






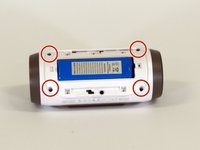
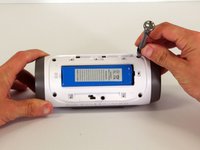


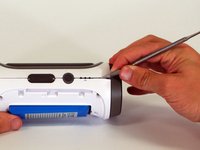
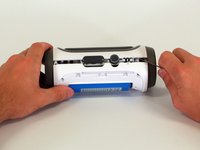


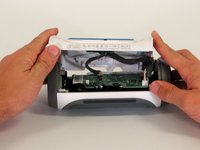
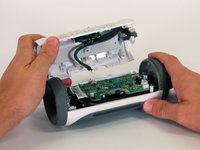


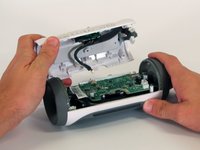
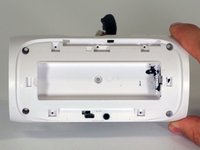
Para a remontagem de seu dispositivo, siga estas instruções na ordem inversa.
Cancelar: não concluí este guia.
14 outras pessoas executaram este guia.

Equipe

Cal Poly, Team 12-4, Lancaster Spring 2015 Membro de Cal Poly, Team 12-4, Lancaster Spring 2015
CPSU-LANCASTER-S15S12G4
2 Membros
Autoria de 48 guias
21Comentários do guia
Hi. This is the problem my speaker is having, but all I need to know is where to buy the replacement back. That's certainly something you should have included in your guide.
The purpose of a guide is to show how to fix the device, not obtain parts. I suggest eBay.
Joe Durand. Thank you for taking time out of your busy day to share such an enlightening comment.
Yeah what was the point of this if people can't actually do it. BS
The point is to guide people on the replacement of parts, not obtaining parts. I suggest eBay.
