Introdução
Use this guide to replace or remove the in display finger print sensor in your Huawei Mate 20 Pro.
Opening the Huawei Mate 20 Pro will damage the waterproof sealing on the device. If you do not replace the adhesive seals, your phone will function normally but will lose its water-protection.
If your battery is swollen, take appropriate precautions. For your safety, discharge your battery below 25% before disassembling your phone. This reduces the risk of a dangerous thermal event if the battery is accidentally damaged during the repair.
Due to the phone’s design, you need to remove the lithium-ion battery in order to remove the screen and the fingerprint sensor afterwards. Reusing a deformed battery after it been removed is a potential safety hazard. Replace it with a new battery.
You’ll need replacement adhesive to reattach components when reassembling the device.
O que você precisa
-
-
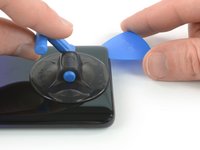
Before you begin, switch off your phone.
-
Apply a heated iOpener to the back of the phone to loosen the adhesive beneath the back cover. Apply the iOpener for at least two minutes.
-
-
-
If the adhesive becomes hard to cut, it has most likely cooled down. Use your iOpener to reheat it.
-
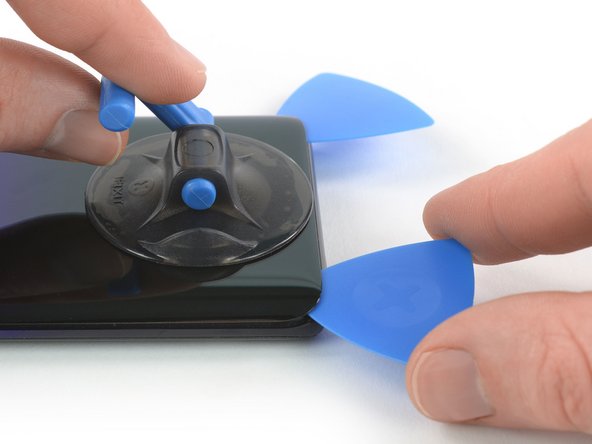
Insert a fourth opening pick under the top left corner of the back cover.
-
Slide the opening pick along the top edge of the phone to cut the adhesive.
-
Leave the opening pick in the top right corner to prevent the adhesive from resealing.
-
-
-
Remove the eight Phillips #00 screws (4.3 mm length).
-
-
-
Remove the three Phillips #00 screws (4.3 mm length).
-
If you want to remove or replace the loudspeaker, daughterboard, battery, or the OLED screen, remove the four Phillips #00 screws (4.3 mm length) which hold down the loudspeaker assembly.
-
-
-
-
Use a Spudger to pry up and disconnect the interconnect flex cable from the daughterboard.
-
-
-
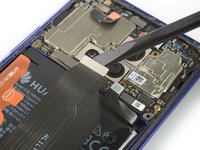
Use a spudger to pry up and disconnect the main flex cable from the motherboard.
-
-
-
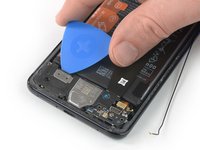
Peel the orange adhesive strip labeled with a 1 off the battery. The orange adhesive tape will rip along a small perforated line.
-
-
Ferramenta utilizada neste passo:Tweezers$4.99
-
Use a spudger to pry up and disconnect the display flex cable from the motherboard.
-
The display flex cable holds onto the midframe because of mild adhesive underneath. Use a pair of tweezers to peel the flex cable off the midframe.
-
-
-
Apply a heated iOpener to the screen and all edges of the phone for at least two minutes, to loosen the adhesive.
-
-
-
Once the screen is warm to the touch, apply a suction cup to the bottom edge of the phone.
-
Pull the suction cup upwards and insert an opening pick in the gap between the display glass and the midframe. Start to cut the adhesive by sliding the opening pick to the bottom right corner.
-
-
-
Thread the display flex cable through the gap in the midframe and remove the display.
-
Not all replacement screens come with a new preinstalled fingerprint sensor. In case you need to transfer your old fingerprint sensor to your replacement screen you can follow this guide, to remove it.
-
-
-
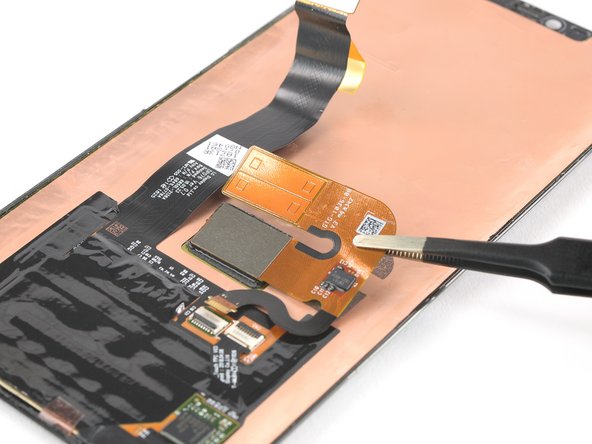
Use the pointed end of a spudger to open the ZIF connector of the fingerprint sensor.
-


If possible, turn on your device and test your repair before installing new adhesive and resealing.
To reassemble your device, follow these instructions in reverse order. Apply new adhesive where necessary after cleaning the relevant areas with isopropyl alcohol (>90%).
Take your e-waste to an R2 or e-Stewards certified recycler.
Repair didn’t go as planned? Check out our Answers community for troubleshooting help.
Cancelar: não concluí este guia.
4 outras pessoas executaram este guia.

