Esta versão pode conter edições incorretas. Mude para o último instantâneo verificado.
O que você precisa
-
Este passo não foi traduzido. Ajude a traduzi-lo
-
Flip your device over so the bottom panel is facing up.
-
-
Este passo não foi traduzido. Ajude a traduzi-lo
-
The battery is held in by a latch in the front and tabs in the back.
-
Slide the lock switch left, towards the center of the computer.
-
Lift up the battery, rotating it up and away from you, then pull it out.
-
-
Este passo não foi traduzido. Ajude a traduzi-lo
-
Using the black tab on the connect and/or a prying tool, lift up to disconnect the black hard drive cable from the green circuit board.
-
Pull the black cable up and out of the back panel. This will make taking the hard drive out much easier.
-
-
Este passo não foi traduzido. Ajude a traduzi-lo
-
Gently pull up on the plastic tab attached to the hard drive.
-
Pull the hard drive up and to the right to remove it completely from the laptop.
-
-
Este passo não foi traduzido. Ajude a traduzi-lo
-
Use your fingers, plastic opening tools, or pliers to pull the silver brackets away from the RAM.
-
-
Este passo não foi traduzido. Ajude a traduzi-lo
-
Gently pull the RAM straight out in the direction it currently is orientated.
-
-
Este passo não foi traduzido. Ajude a traduzi-lo
-
Use a Phillips #1 screw driver to unscrew the black 4 mm Phillips #1 screw on the wireless card.
-
-
Este passo não foi traduzido. Ajude a traduzi-lo
-
Use a plastic opening tool to lift the wireless card out of its slot.
-
-
Este passo não foi traduzido. Ajude a traduzi-lo
-
Pull the black and white wires up and off of the wireless card.
-
Remove the wireless card.
-
-
-
Este passo não foi traduzido. Ajude a traduzi-lo
-
Unscrew the 7 mm Phillips #1 screw next to the keyboard icon.
-
-
Este passo não foi traduzido. Ajude a traduzi-lo
-
Carefully pry up one of the top corners of the keyboard with a prying tool. Slide the tool along the top of the keyboard to release it from the housing. Pull the top of the keyboard towards you an inch or two.
-
Pull the keyboard up and away from you, as it is held in by clips in the front. It is not yet disconnected.
-
-
Este passo não foi traduzido. Ajude a traduzi-lo
-
Gently turn keyboard over, towards you, to reveal the silver cable ribbon.
-
-
Este passo não foi traduzido. Ajude a traduzi-lo
-
Using a prying tool, flip the black clip up and to the right. Pull the silver cable out and to the left, the keyboard is now detached from the laptop.
-
-
Este passo não foi traduzido. Ajude a traduzi-lo
-
Unscrew the four 7 mm Phillips #1 screws on the board.
-
-
Este passo não foi traduzido. Ajude a traduzi-lo
-
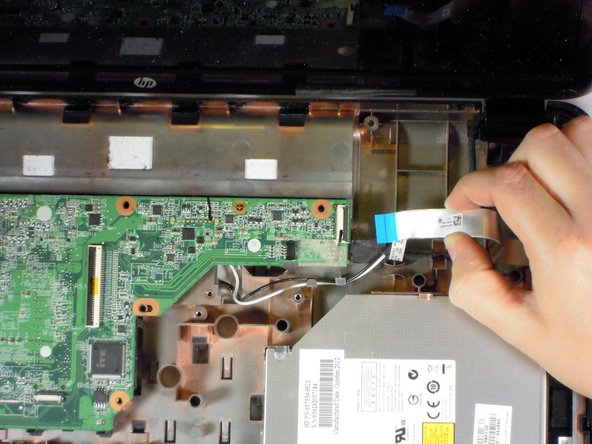
Use a plastic opening tool to lift the white clip up, towards the screen.
-
Pull the white cable with blue head, away from the clip.
-
-
Este passo não foi traduzido. Ajude a traduzi-lo
-
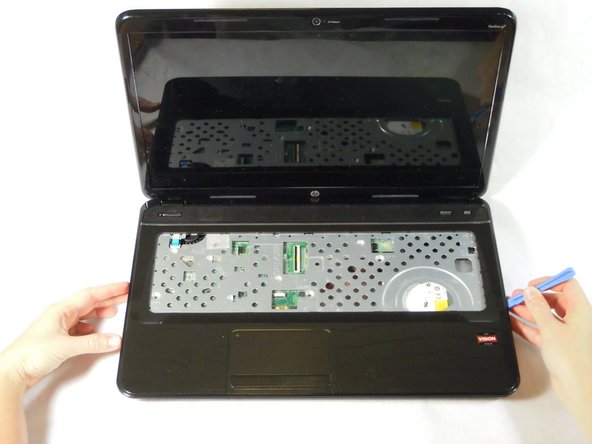
With a plastic opening tool, pry open a side or corner of the top panel. Slide the tool around the rest of the panel to release it from the clips.
-
-
Este passo não foi traduzido. Ajude a traduzi-lo
-
Rotate the top panel away from you, keeping the back near the hinge of the laptop to avoid damaging the speaker cable.
-
-
Este passo não foi traduzido. Ajude a traduzi-lo
-
Using a plastic opening tool, disconnect the black speaker connector from the top right of the motherboard.
-
Set aside the top panel until your are ready to reassemble your laptop.
-
-
Este passo não foi traduzido. Ajude a traduzi-lo
-
Unscrew one 7 mm Phillips #1 screw from the bottom left corner of the motherboard.
-
-
Este passo não foi traduzido. Ajude a traduzi-lo
-
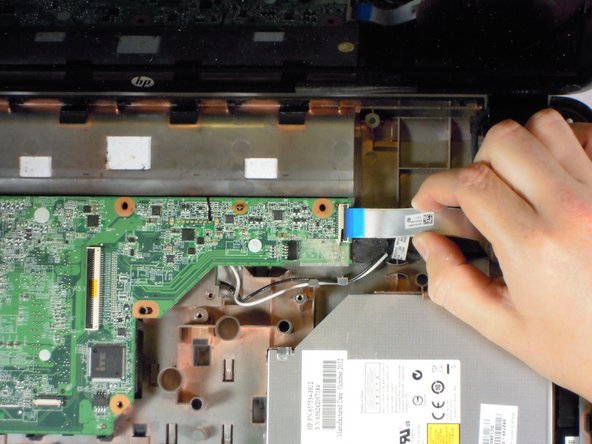
Lift black tab for the CD drive cable in the bottom left of the motherboard.
-
Disconnect it from the motherboard with your fingers or a plastic opening tool.
-
-
Este passo não foi traduzido. Ajude a traduzi-lo
-
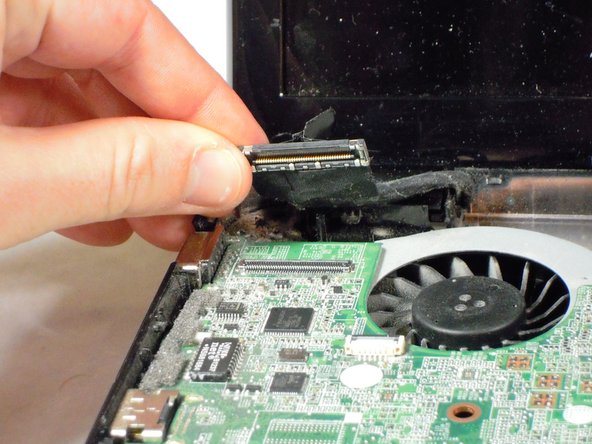
Lift, with your fingers or a plastic opening tool, the large black monitor cable at the top of the left hand corner of the motherboard.
-
-
Este passo não foi traduzido. Ajude a traduzi-lo
-
Use a plastic opening tool to lift the black clip up from the silver cable that's in the upper right hand corner of the computer.
-
Pull the silver cable away from the motherboard.
-
-
Este passo não foi traduzido. Ajude a traduzi-lo
-
Using a small amount of force pull the black cable, below the silver cable we just removed, to the right and out of the way.
-
-
Este passo não foi traduzido. Ajude a traduzi-lo
-
Lift the right side of the motherboard up at roughly a 45 degree angle and pull to the right to remove it.
-
-
Este passo não foi traduzido. Ajude a traduzi-lo
-
Now that the motherboard is out, flip it over and begin working on the back side.
-
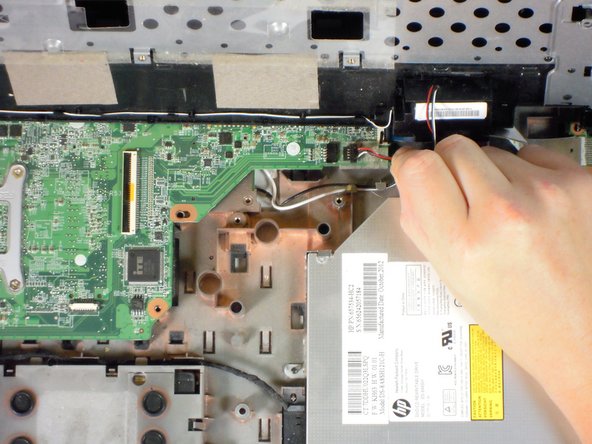
Remove the red, blue, and yellow set of wires from the motherboard.
-
-
Este passo não foi traduzido. Ajude a traduzi-lo
-
Using a Phillips #1 screw driver unscrew the four screws on the heat sink.
-
Lift the bracket up from the motherboard.
-
-
Este passo não foi traduzido. Ajude a traduzi-lo
-
Since the fan is held on with adhesives, you will likely need a prying tool and a small amount of force to lift the fan up and off of the motherboard.
-


Cancelar: não concluí este guia.
45 outras pessoas executaram este guia.

Equipe

Cal Poly, Team 11-51, Amido Spring 2014 Membro de Cal Poly, Team 11-51, Amido Spring 2014
CPSU-AMIDO-S14S11G51
Membros da 4
Autoria de 21 guias
16 comentários
I had to stop at stap 14 because i couldnt open my laptop, lifting the screen took the plastic piece around the keyboard loose. I tried to return my staps ( to still have a computer) but that plastic piece wont fit back. And i,still cant open my screen.
This worked well for accessing and cleaning the fan. Thanks.
I just wanted to say THANK YOU for posting this instructional page. I know this took a lot of time on your part plus you done this for free to boot. It is because of people like you that make the lives of others PC life much MUCH easier!
Thank you so much! It helped me a lot although I had a different g7 model.
Thanks!!! I was able to fix my laptop.